![]()
![]()
Bookmarks allows you to tag records and while viewing filter the view based on the bookmark. You can bookmark records from the listing page. Bookmarks are specific to a project and help you to prioritize records.
You can bookmark only those records for which you are the submitter or the owner. To use bookmarks as a first step they need to be created. You can only create bookmarks if the Service Desk project administrator has enabled this feature. Refer to Enable/Disable Bookmark Creation.
Click on the  icon to create a new bookmark. The configuration screen is displayed.
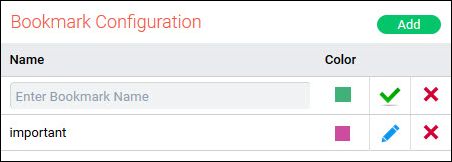
Enter the bookmark
name, select the color and click on the  icon
. The bookmark gets added and appears in the list. Click 'Add' to add another bookmark.
icon
. The bookmark gets added and appears in the list. Click 'Add' to add another bookmark.
You can delete the
bookmark by clicking on  icon. If the bookmark
is deleted, the tickets which are book marked are unmarked.
icon. If the bookmark
is deleted, the tickets which are book marked are unmarked.
In the record listing page, click the bookmark symbol appearing on top of the record ID. If you are viewing the Grid view, select the records and click on 'Bookmark' option or click on the bookmark symbol appearing against the record. The bookmark selector pops-up as shown below.
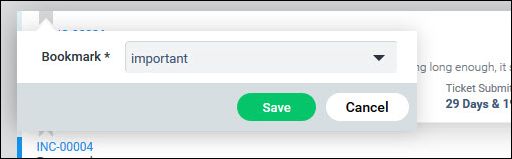
Select the bookmark and click on 'Save'.
The bookmark tag appears in the color for the bookmark.
If you want to unmark the bookmark, click on the bookmark symbol, select 'unmark' and click on 'Save'.
 Note: This section is for
Service Desk Project Administrators.
Note: This section is for
Service Desk Project Administrators.
To enable or disable bookmark creation for a project, go to Service Desk Settings tab and select a project.
Click on 'Settings > General Settings > Project Settings'.
Select the setting key 'Enable or Disable Bookmark creation'. The setting screen is displayed.
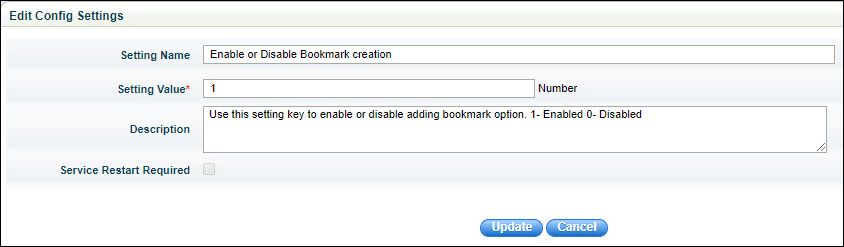
Set the value as "1" or "0" to enable or disable the setting and click on 'Update'.