![]()
![]()
Identity Providers are systems that manage identity information and provide authentication services to relying applications within a federation or distributed network. Relying party applications such as web applications outsource the user authentication step to a trusted identity provider. Single sign-on to all applications using the same identity provider is possible.
SapphireIMS supports Microsoft Active Directory Federation Service (ADFS) as an identity provider.
In this topic, the specific steps to setup the IdP and configure SapphireIMS as a Relying Party Trust in ADFS is detailed.
Domain controller (Active Directory)
ADFS 3.0 server - It is recommended to use ADFS in a system other than the AD server
Login to the ADFS
In the left hand pane, right click on 'Services' and choose 'Edit Federation Services Properties'.
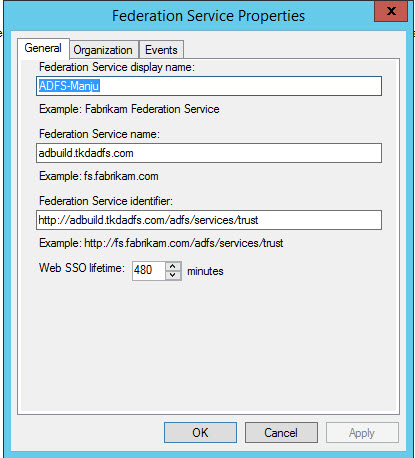
Confirm that the General settings match your DNS entries.
Upon verifying the entries click on 'OK'.
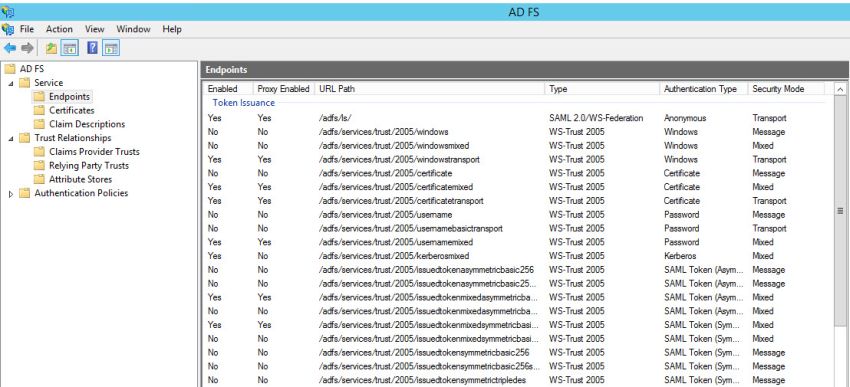
Click on 'Endpoints'. Verify that '/adfs/ls' URL path under Token Issuance and '/FederationMetadata/2007-06/FederationMetadata.xml' URL path under 'Metadata' are enabled as shown in the figures below.
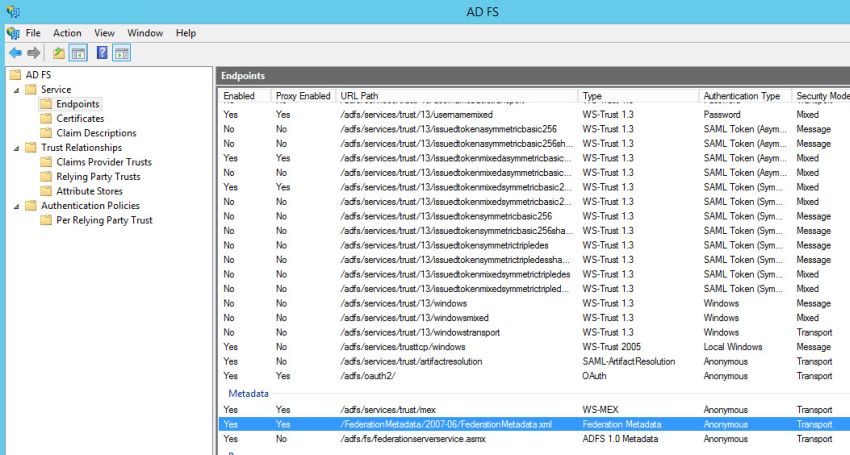
Download the 'FederationMetadata.xml' file from the path displayed in ADFS and given below.
'https://<ADFS Server>/FederationMetadata/2007-06/FederationMetadata.xml'
This file is required for configuring the IdP in SapphireIMS.
Select 'Relying Party Trust' on the left hand menu and right click. This opens up the wizard to add a new RPT, in this case SapphireIMS.
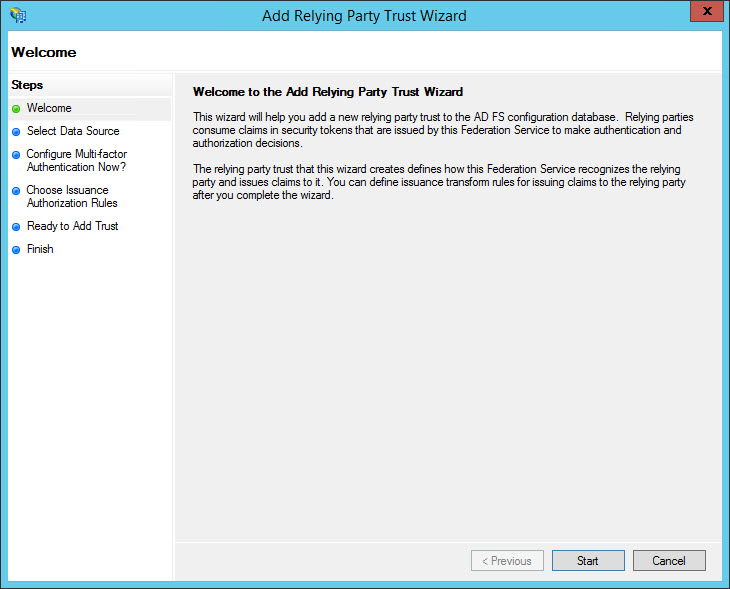
Click on 'Start'.
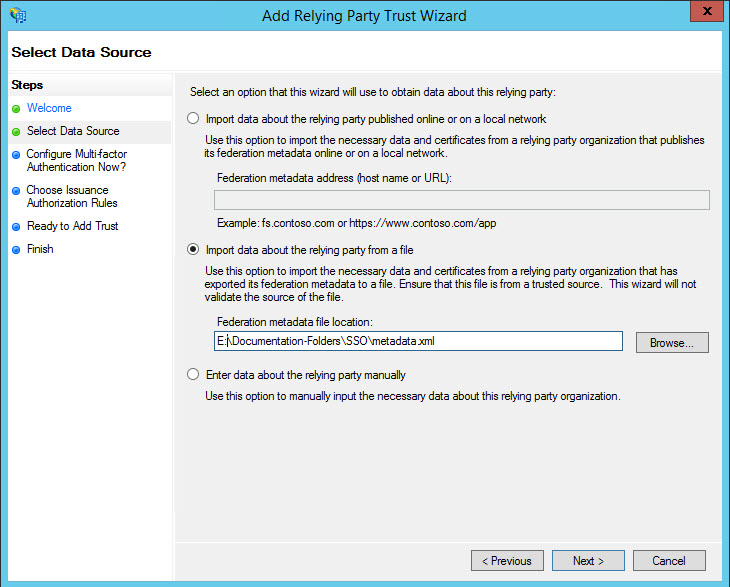
Select the option 'Import data about the relying party from a file'. Enter the path of the 'metadata.xml' file which has been downloaded from SapphireIMS. Click 'Next'. The metadata file contains the details of the Relying Party Identifiers, the Encryption certificate which is used to encrypt all communications to the Relying Party, the Signature and Endpoints of the Relying Party. Alternatively these fields need to be updated manually.
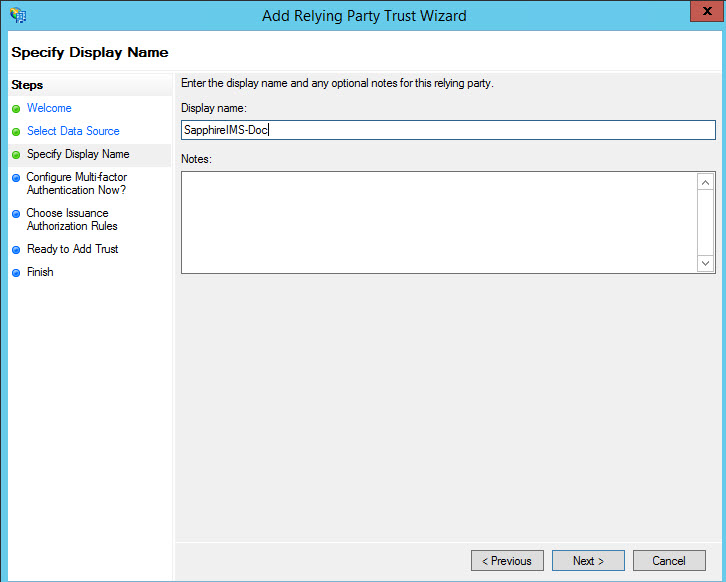
Specify the 'Display Name' which is used to identify the RPT. Click on 'Next'.

Select 'Permit all users to access this relying party' and clock on 'Next'.
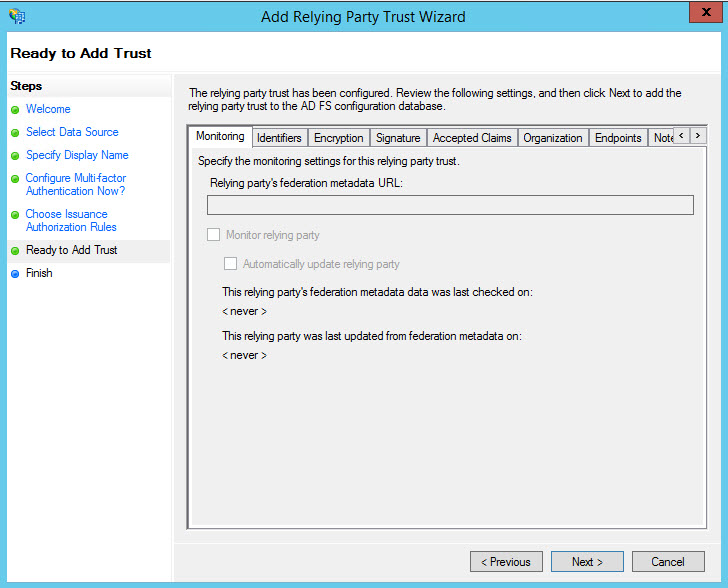
Click on 'Next'.
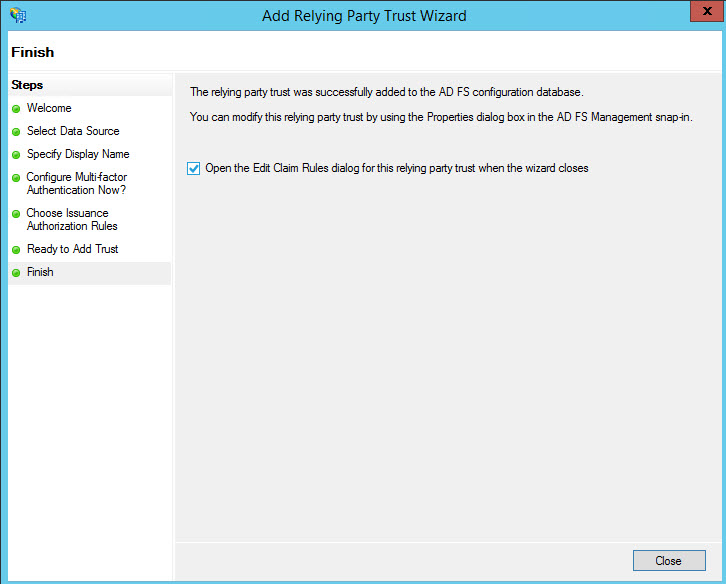
Click on 'Close'. The RPT entry gets added and can be seen in the list.
Select the RPT entry and right-click on it. The 'Properties' window is opened
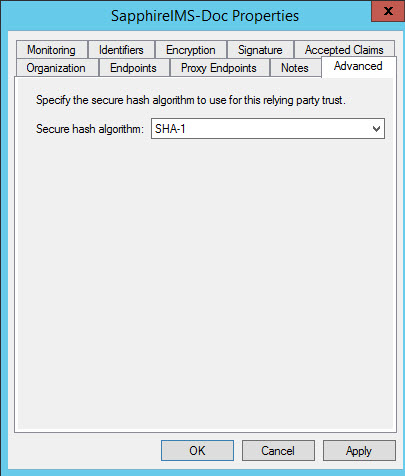
Select on 'Advanced' and set the secure hash algorithm as 'SHA-1'. Click on 'OK'.
After the RPT is configured, the Claim Rules need to be added. The steps to edit the claim rules are given below.
Right-click on the RPT entry. Select 'Edit Claim Rules...' option in the menu.
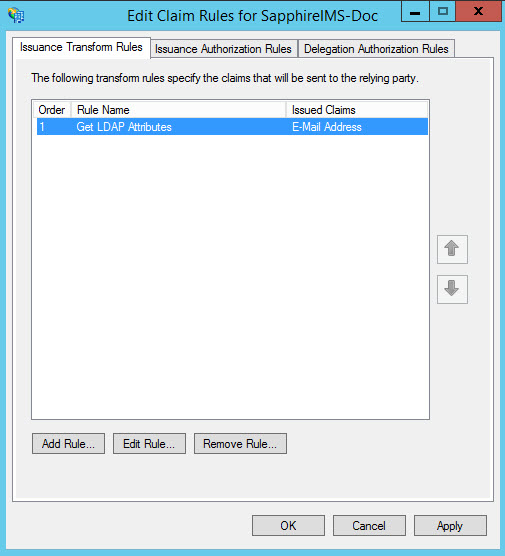
Select 'Issuance Transform Rules' and click on 'Add Rule...'. The Add Transform Claim Rule Wizard is displayed. Select the Rule Type as 'Send LDAP Attributes as Claims'.
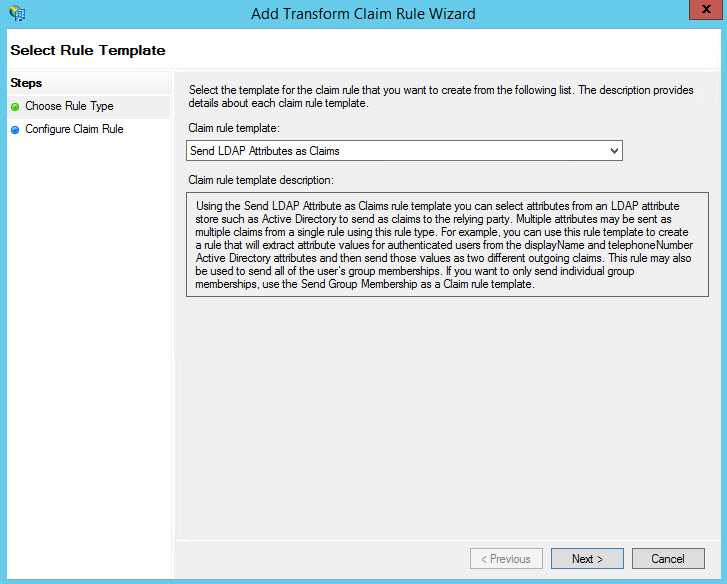
Click on 'Next'. The Claim Rule template is displayed.
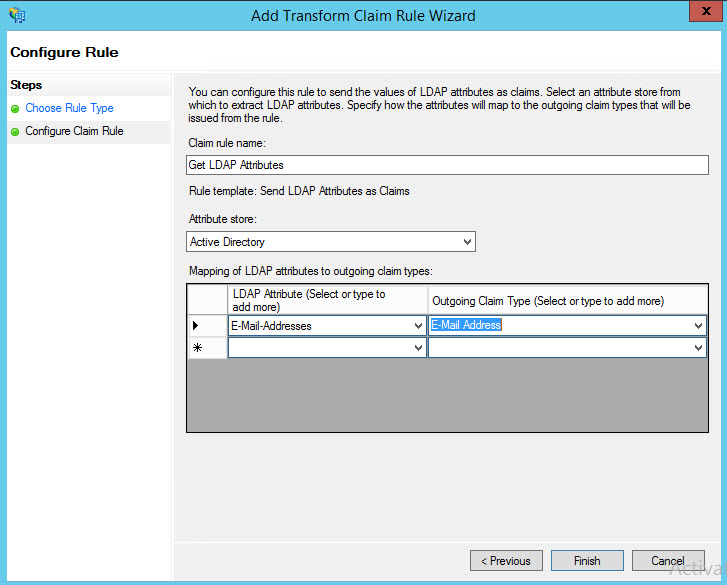
Select the LDAP Attribute as 'E-Mail-Addresses' and the Outgoing Claim Type as 'E-Mail Address'. Click on 'Finish'. You will be returned to the 'Edit Claim Rules' screen.
Add a second rule by selecting the Rule Template as 'Transforming an Incoming Claim'. The following screen will be displayed.
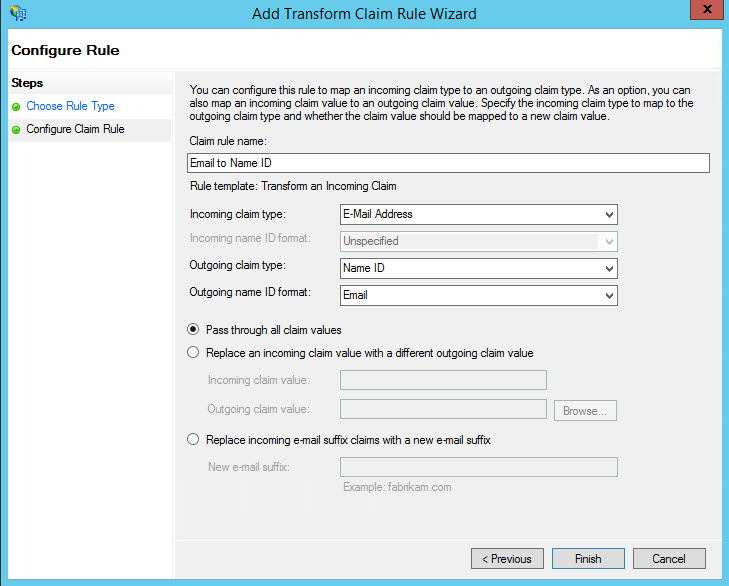
Enter the rule name as 'Email to Name ID'. Select the 'Incoming claim type' as 'E-Mail Address' and the 'Outgoing claim type' as 'Name ID'. Select the 'Outgoing name ID format' as 'Email'. Select the option 'Pass through all claim values' and click on 'Finish'.
ADFS can be configured to initiate application login from the IdP. This is useful when there are multiple applications for which a centralized portal is used to select a specific application and login. In order to configure IdP initiated login, follow the steps below.
Open the browser and type in the following address https://<ADFS Server>/adfs/ls/idpinitiatedsignon.aspx where <ADFS Server> is the address of the ADFS server. This displays the ADFS login screen which has options to sign in to the ADFS server itself or to select an application and sign in. Select the SapphireIMS application (RPT) and click on 'Sign-in'.

The user is directly logged into SapphireIMS and the home page is displayed.