![]()
![]()
OAuth2 is an authorization framework that enables users to access applications using accounts in Https based services such as Google, Facebook, Office 365 etc. It basically works by delegating user authentication to the service that host user accounts and authorizing third-party applications to access the user account information.
SapphireIMS supports user authentication using OAuth2 based services provided by Google, GSuite and Office 365.
This section provides details on configuring OAuth2 based services provided by Google.
SapphireIMS should be enabled for SSL communication using https.
SapphireIMS should be registered with the service and the Client ID and Client Secret needs to be obtained. Refer to the section Setting up OAuth2 Google Service for details.
Users logging in to Sapphire using OAuth2 should have Google accounts created. The users should be imported into SapphireIMS (using Excel user import). Note that the e-mail id for the users should be the Google mail id.
SapphireIMS needs to be registered with the Google service. Upon registering Google will issue client credentials in the form of a client identifier (Client ID) and a client secret. The Client ID is a publicly exposed string that is used by the service to identify the application and is also used to build authorization URLs that are presented to users. The Client Secret is used to authenticate the identity of the application to the service when the application make a request to access a user's account and must be kept private between the application and the service.
Access the following URL 'https://console.developers.google.com'. Use your Google credentials and login to the Google developers console.
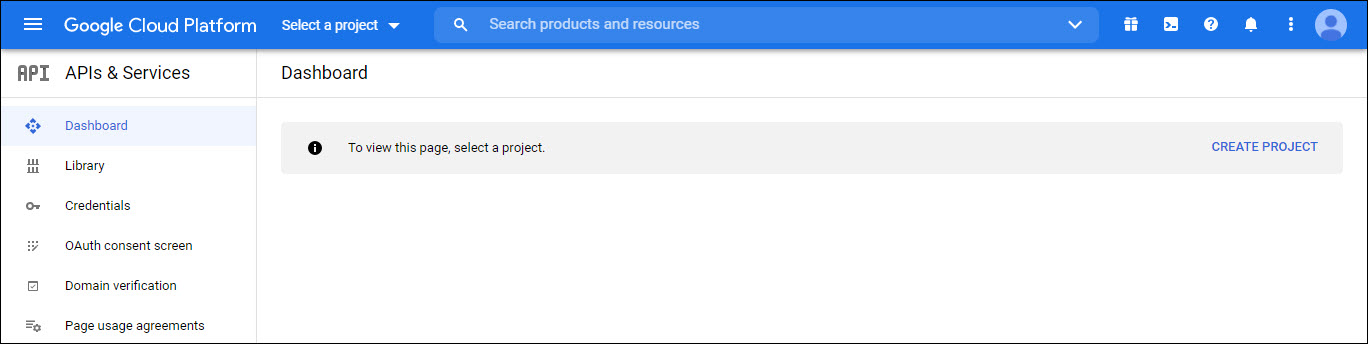
The dashboard is displayed. Select 'Library' and search for 'Google+'. Click on 'Google+ API'.

The following screen is displayed. Click on 'ENABLE' which will enable the Google+ API.
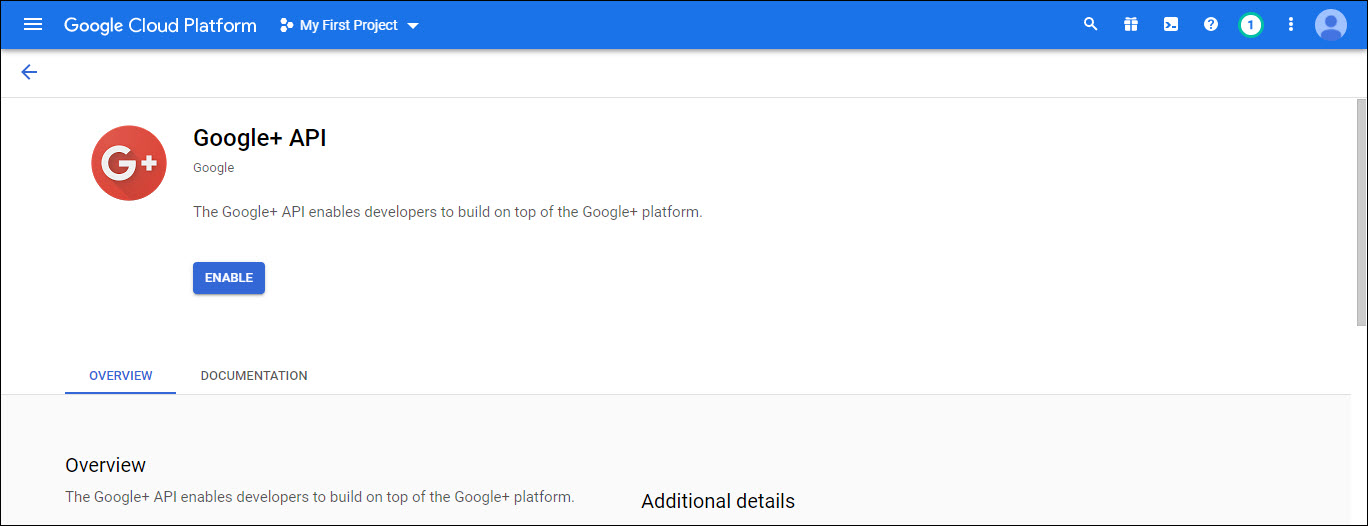
The Google+ API will get enabled and the dashboard is displayed.
Before starting a project has to be created. Click on the drop down on the top menu bar. The listing of current projects is displayed.
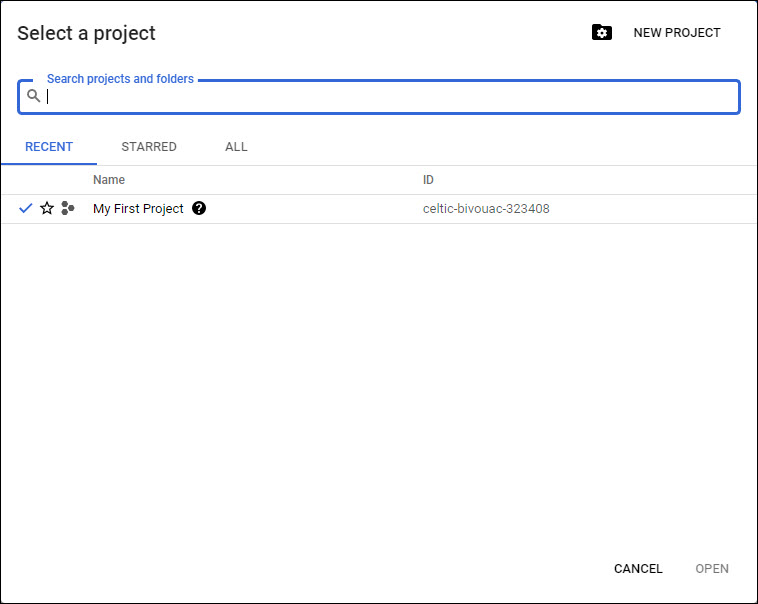
Click on 'NEW PROJECT' to create a new project.
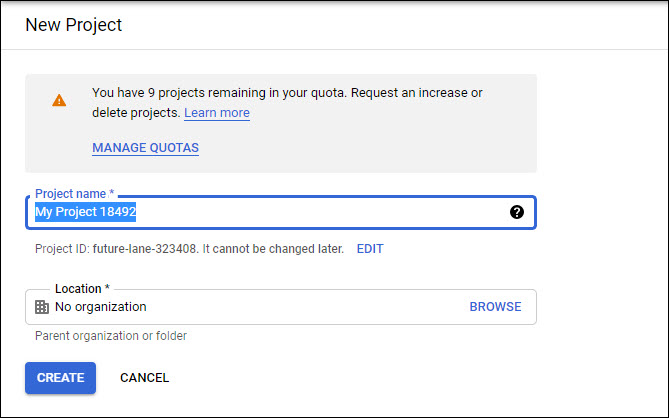
Edit the 'Project Name' (you can choose to leave the default name and it does not have any significance for SapphireIMS).
Click on 'CREATE'. A new project is created and you are returned to the Dashboard page.
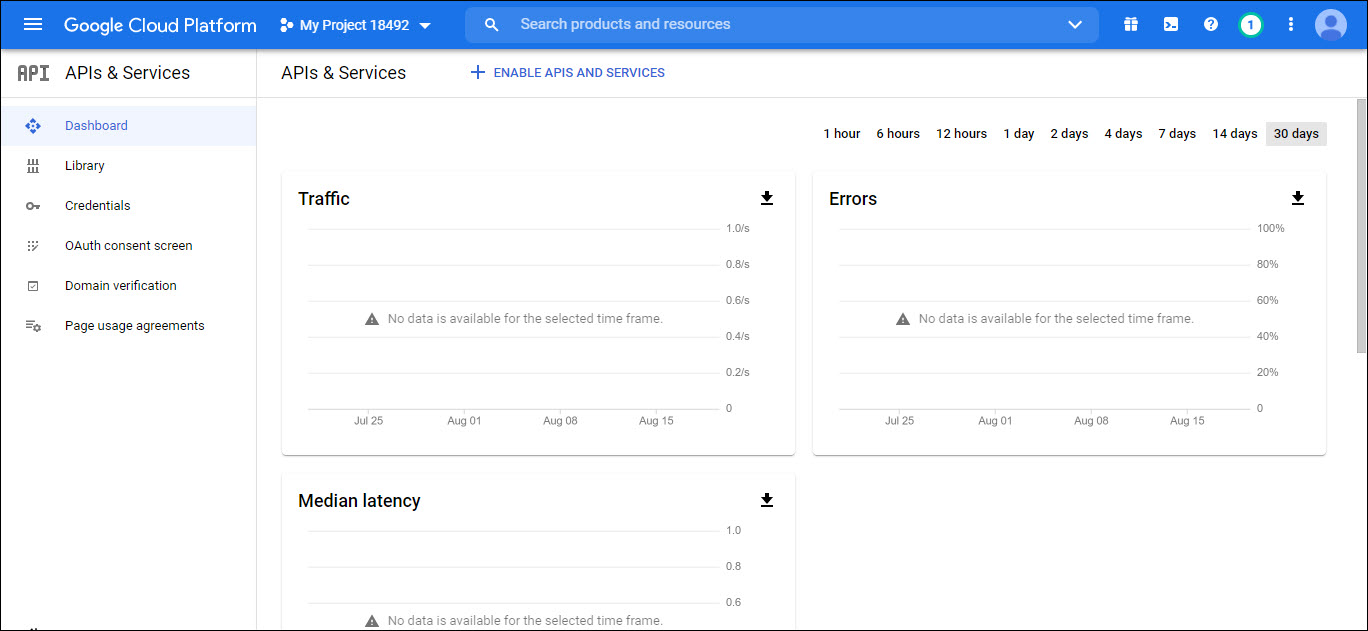
Click on 'OAuth Consent screen'. The following screen is displayed.
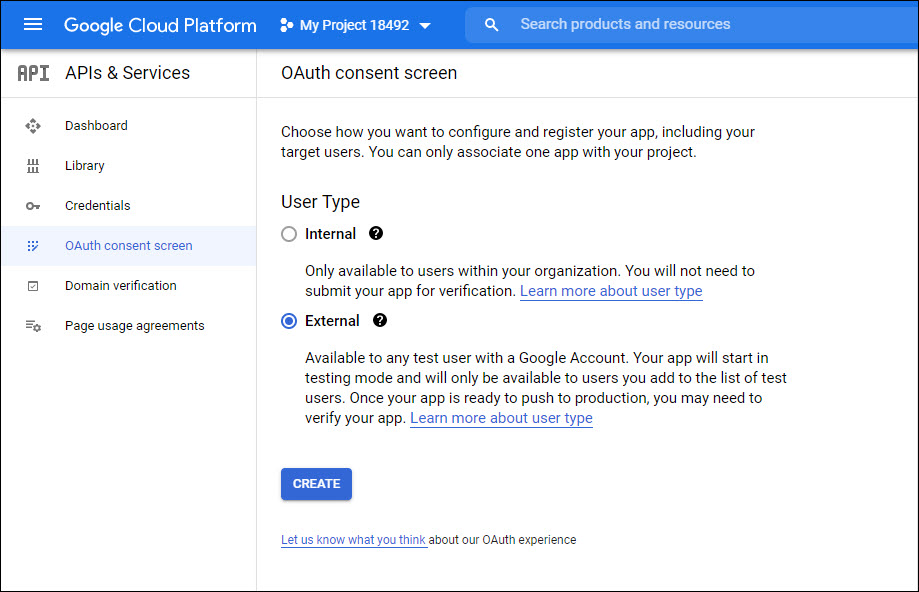
Select 'User Type' as 'Internal' if users are within the same organization or as 'External' if access is also allowed to users from outside the organization.
Click on 'CREATE'. The following screen is displayed.
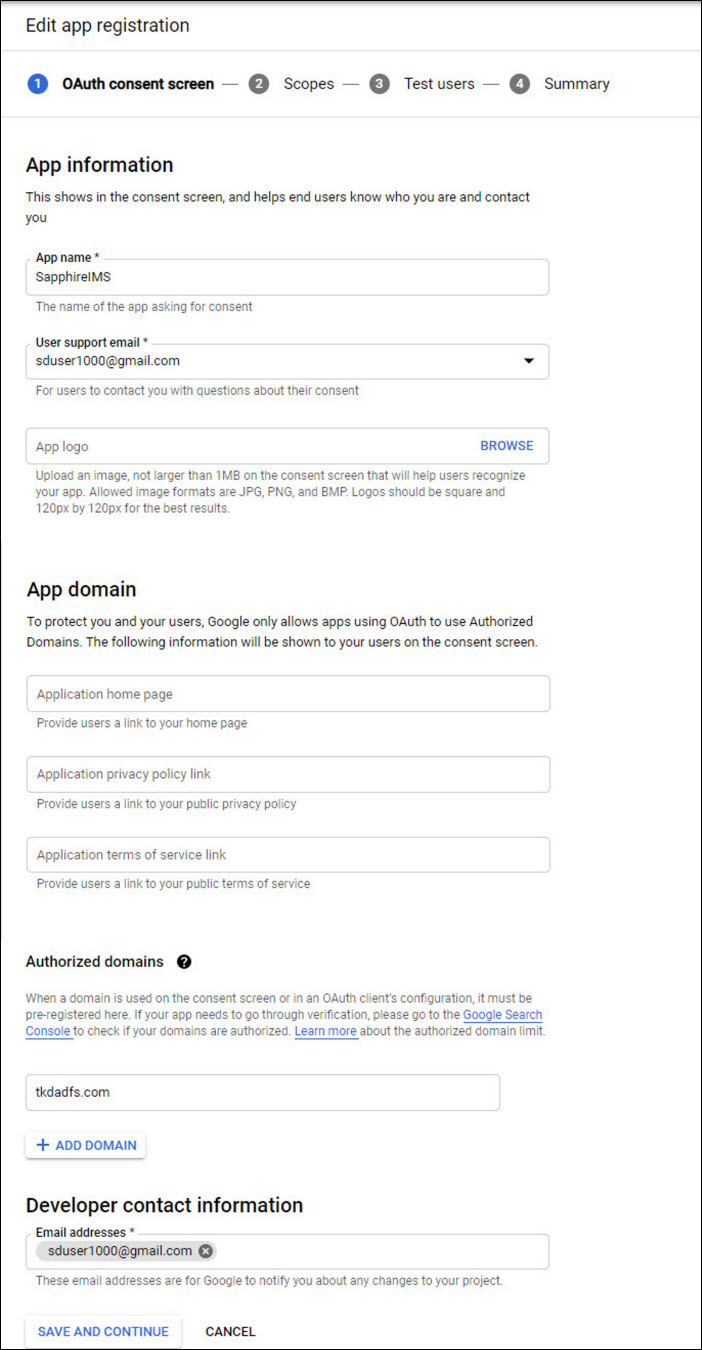
Enter the 'Application Name'. You can enter 'SapphireIMS'.
Enter the 'User Support email'.
Enter the 'Authorized Domain' which is your Domain Name.
Enter the 'Email address' under the Developer Contact Information.
Other fields can be left blank.
Click on 'SAVE AND CONTINUE'. The following screen is displayed.
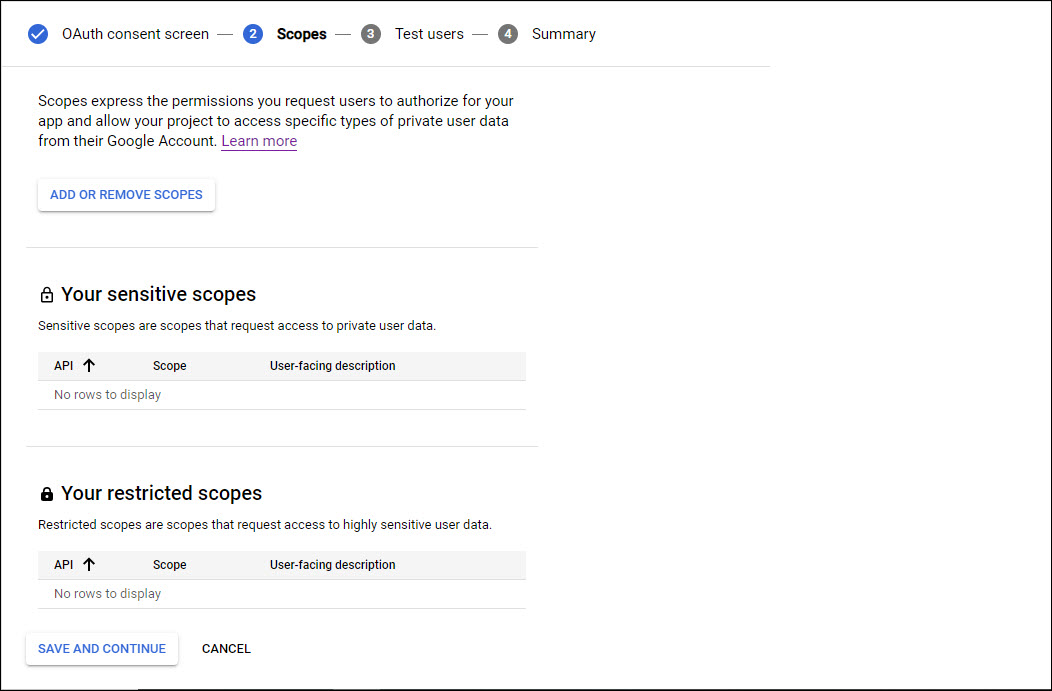
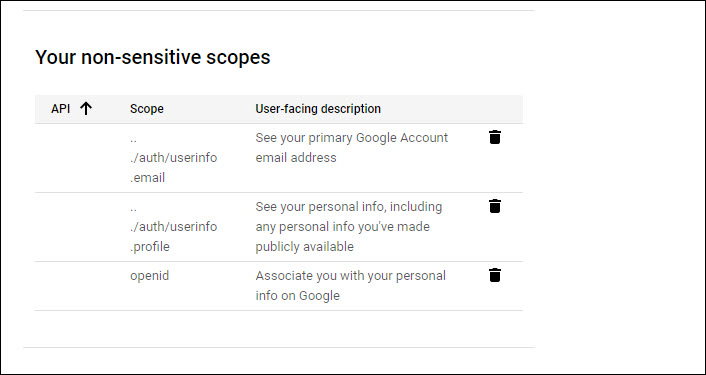
Click on 'ADD OR REMOVE SCOPES'. A screen pops-up with the list of scopes.
Select 'email', 'profile' and 'openid'.
Click on 'UPDATE'. The added scopes are displayed.
Next click on 'SAVE AND CONTINUE'. The screen to add Test users is displayed.
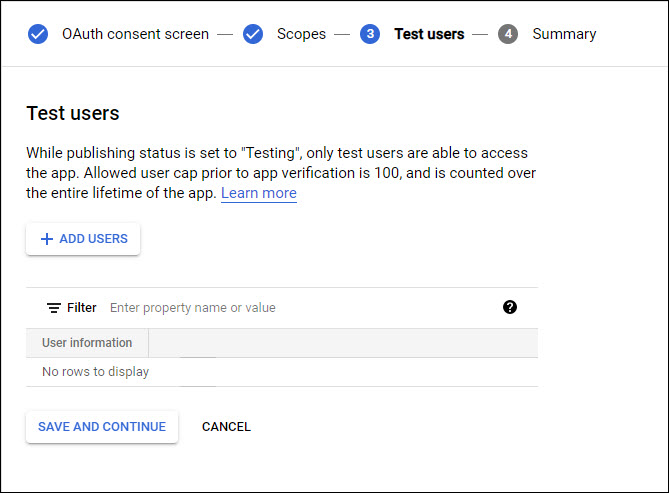
Nothing is to be added here. Click on 'SAVE AND CONTINUE' to return to the main screen. Click on 'Credentials'.
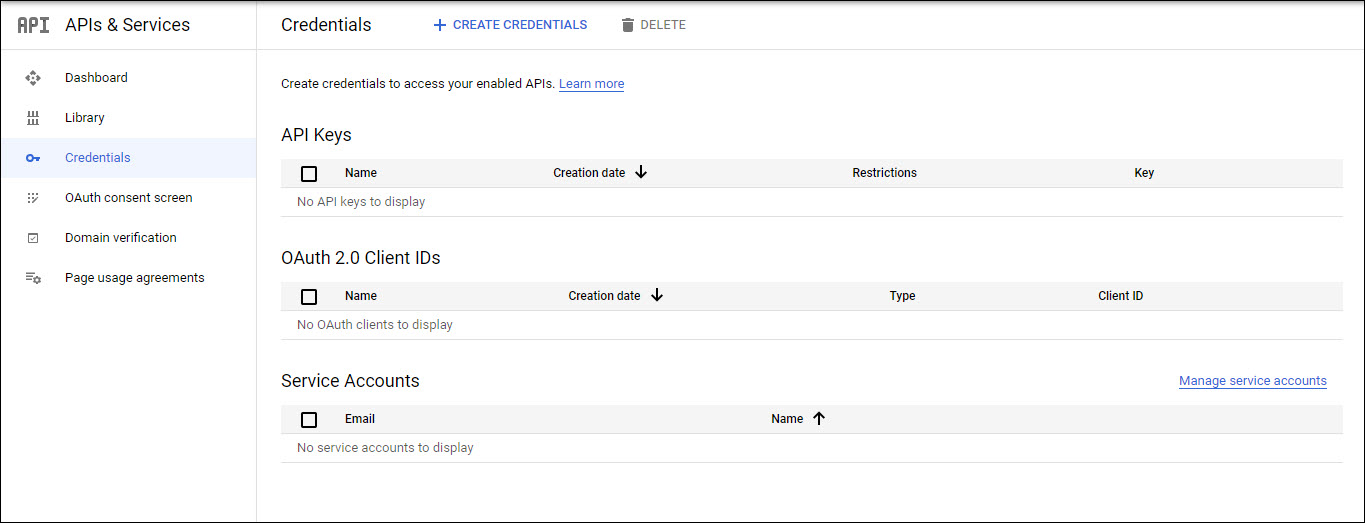
Next you need to create the credentials. Click on 'CREATE CREDENTIALS'. A drop-down menu is displayed as shown below.
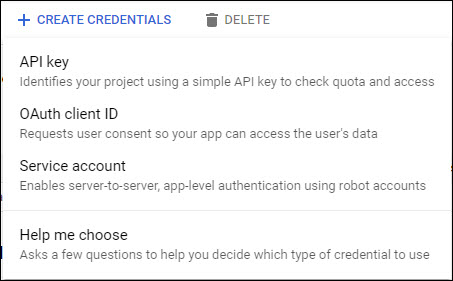
Click on 'OAuth Client ID'.

Next select the 'Application Type' as 'Web Application'.
Enter the 'Name' as 'SapphireIMS'.
Click on 'Create'.
 Note: You can leave the Authorized
redirect URIs field blank for the initial configuration and update it
later from the URI in SapphireIMS. Refer to the section on Adding Google IdP in SapphireIMS in
SapphireIMS.
Note: You can leave the Authorized
redirect URIs field blank for the initial configuration and update it
later from the URI in SapphireIMS. Refer to the section on Adding Google IdP in SapphireIMS in
SapphireIMS.
Note: You can add multiple
redirect URIs including one for the Mobile application or for other SapphireIMS
instances in the same organization.
Note: SapphireIMS Android
app needs to be allowed in G-Suite workplace to enable users to authenticate
using OAuth2.
A pop-up window is displayed with the Client ID and Client Secret. Copy these into a text file and save it as it is needed later while configuring Google as the IdP in SapphireIMS.
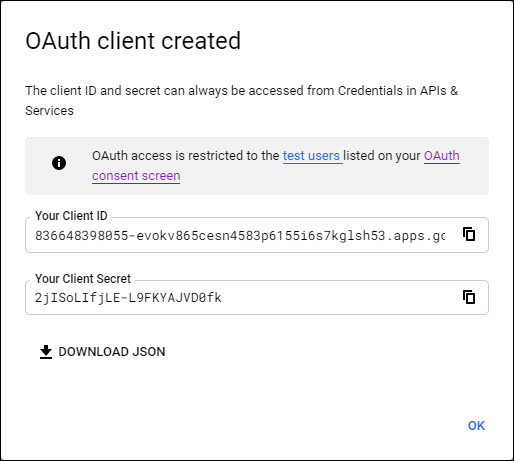
Click on 'OK'. Next proceed to add Google as the IdP in SapphireIMS.
Login to SapphireIMS as the administrator.
Click the 'Settings' tab. In the 'User Management' section, click on 'AD &LDAP Integration'.
Click on 'Identity Providers'. The listing screen is displayed.

Click
on the '![]() ' icon to change the base URL setting
as shown below. Enter
the base URL used to access the portal and click 'Update'.
' icon to change the base URL setting
as shown below. Enter
the base URL used to access the portal and click 'Update'.

Note: For the mobile application
use 'MobileApp' instead of 'SapphireIMS' in the base URL.
Click 'Add' to add an entry for a new Identity Provider. The IdP selection screen is displayed.

Select 'Google' as the 'Provider'. The following screen is displayed.
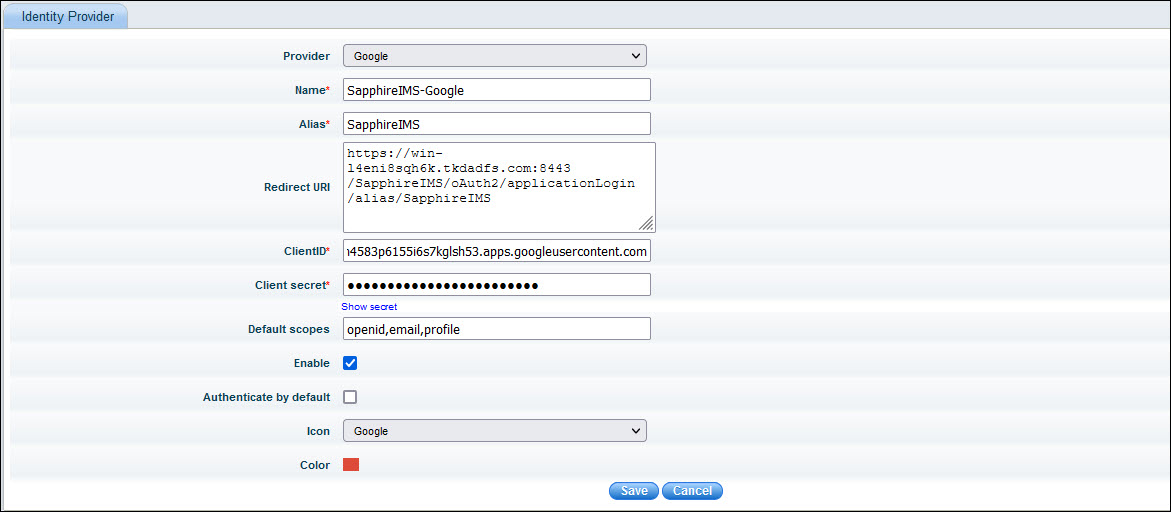
The fields are described in the table below.
| Sr. No. | Field Name | Description |
1 |
Identity Provider |
Select the name of the identity provider as 'Google'.
|
2 |
Name |
Enter a name for the IdP. |
3 |
Alias |
The alias uniquely identifies an identity provider and it is also used to build the redirect URI
|
4 |
Redirect URI |
The Redirect URI is used by Google to redirect the user to the application after authentication. This is a display-only field and is generated using the Base URL and Alias.
|
5 |
ClientID |
Enter the Client ID generated by Google |
6 |
Client secret |
Enter the Client secret generated by Google |
7 |
Default scopes |
SapphireIMS can ask for the scopes for authorization which are entered here. By default if left blank, SapphireIMS requests for email, profile and openid which are minimally required. Note that in Google OAuth Consent screen, these scopes should have been present. |
8 |
Enable |
Enable/Disable this identity provider
|
9 |
Authenticate by Default |
This setting needs to be enabled when the SapphireIMS login screen needs to be hidden. If enabled, on entering the SapphireIMS URL, it directly takes the user to the SapphireIMS home page if the user is already logged into Google or to the Google sign-in screen. By default, this is disabled. |
10 |
Icon |
Select the icon to click on the SapphireIMS login screen which will allow logging in via Google authentication. By default, the icon is set as Google. |
11 |
Color |
Select the color of the icon. |
Update the fields and click on 'Save'. This saves the IdP information and returns you to the listing page.