![]()
![]()
This section provides details on configuring OAuth2 based services provided by Office 365.
SapphireIMS should be enabled for SSL communication using https.
SapphireIMS application needs to be registered with Azure Portal. For the registered application, Client-ID and Client Secret should be obtained from Azure. Refer to the section Setting up OAuth2 Office 365 Service.
Users in SapphireIMS should have an Office 365 account. The users should be imported into SapphireIMS (using Excel user import).
SapphireIMS application needs to be registered with the Office 365 service. Upon registering Azure will issue the client credentials in the form of a client identifier (Client ID) and a client secret. The Client ID is a publicly exposed string that is used by the service to identify the application and is also used to build authorization URLs that are presented to users. The Client Secret is used to authenticate the identity of the application to the service when the application make a request to access a user's account and must be kept private between the application and the service.
Login to the Azure portal at the following URL https://portal.azure.com with your Office 365 credentials. Expand the menu.
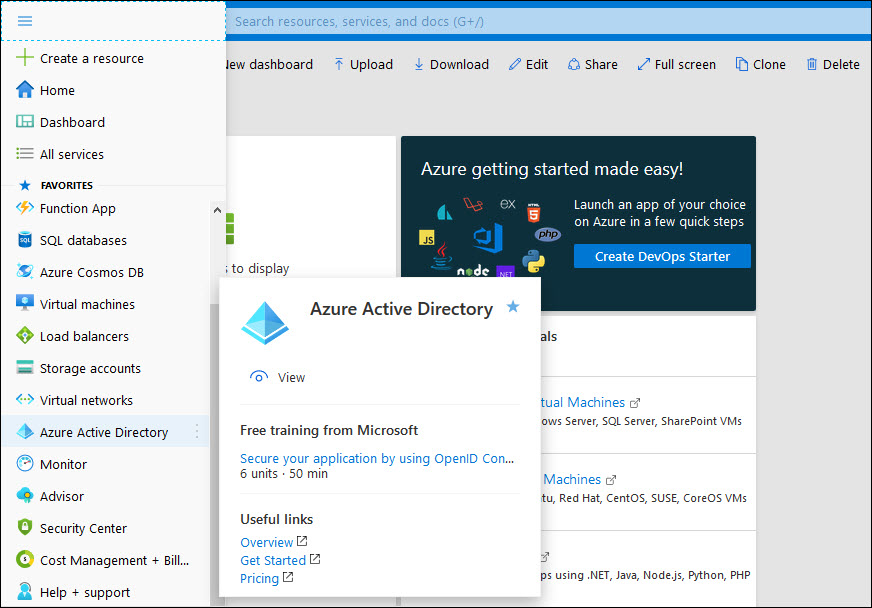
Select 'Azure Active Directory'. On the left hand menu, select 'App registrations'.
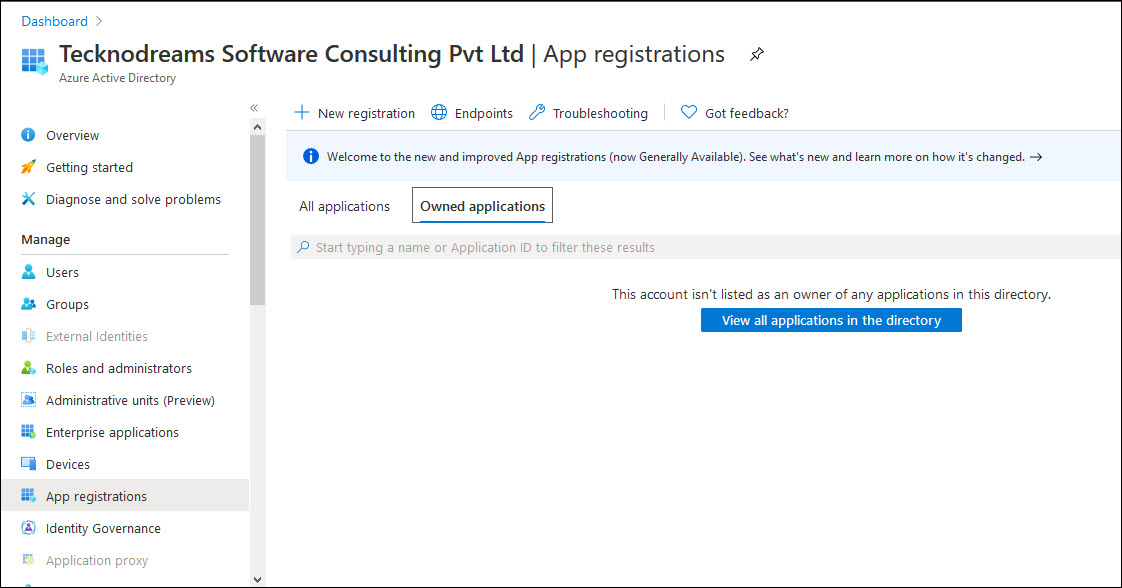
Click on 'New Registration'.
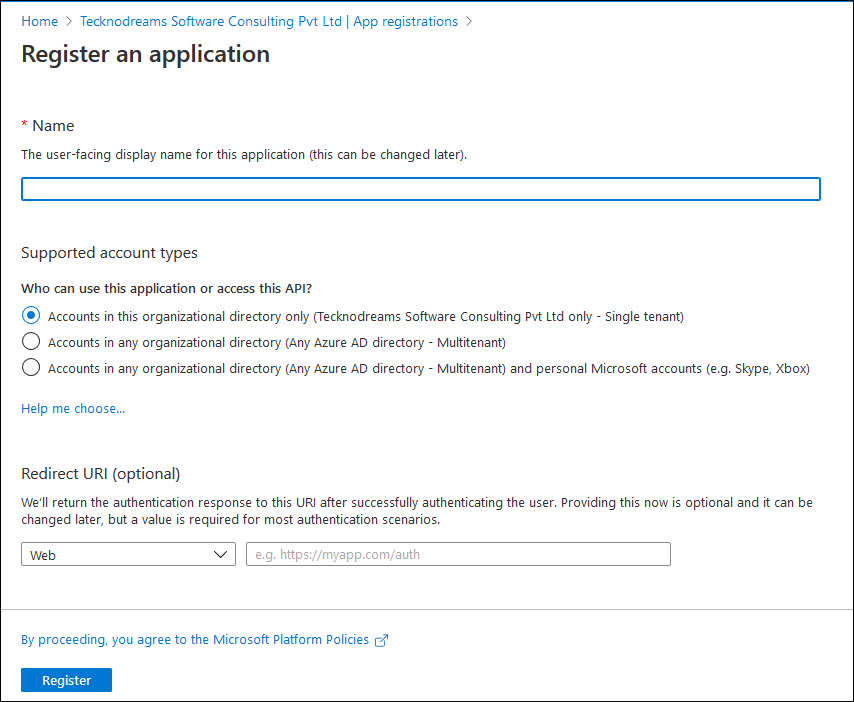
Enter the application 'Name' as 'SapphireIMS Office 365 Authentication'.
Select option 'Accounts in this organizational directory only'.
Select Redirect URI as Web and enter the URI as 'https://<FDQN/hostname>/SapphireIMS/oAuth2/applicationLogin/alias/<aliasname>'
Substitute the Fully Qualified Domain Name and hostname values. The aliasname can be 'SapphireIMS' and should be the same as what is entered in the IdP configuration in SapphireIMS.
 Note: You can leave this
field blank and later update it after getting the value from the SapphireIMS
IdP configuration screen.
Note: You can leave this
field blank and later update it after getting the value from the SapphireIMS
IdP configuration screen.
Note: You can add multiple
Redirect URIs including one for the Mobile application or for other SapphireIMS
instances in the same organization. Click on the registered application.
Click on 'Authentication' and 'Add URI'.
Click on 'Register'. A screen is displayed with the registration details.
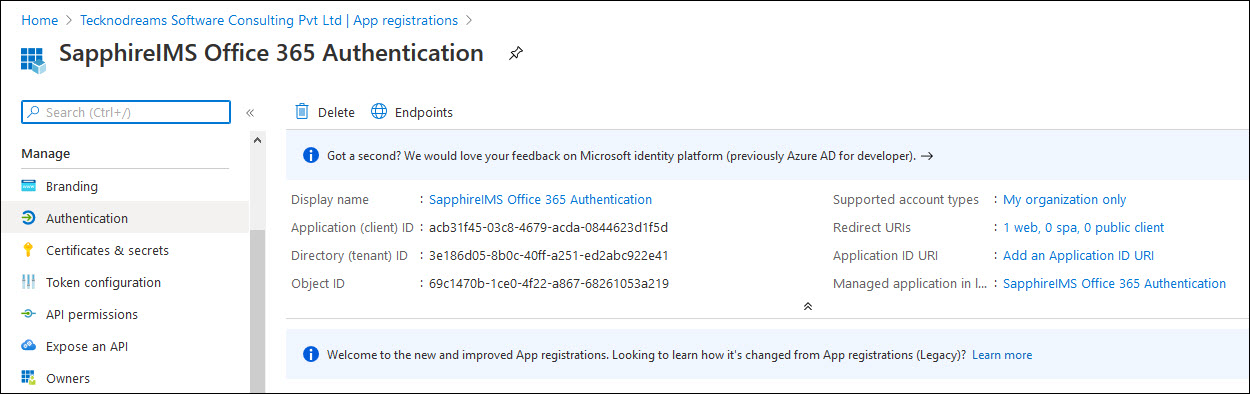
The Application (Client) ID and Directory (Tenant) ID are displayed. Copy it into the Notepad for later use during the configuration of the IdP in SapphireIMS.
Select 'Certificates and Secrets' on left hand menu and click on 'New Client Secret'.
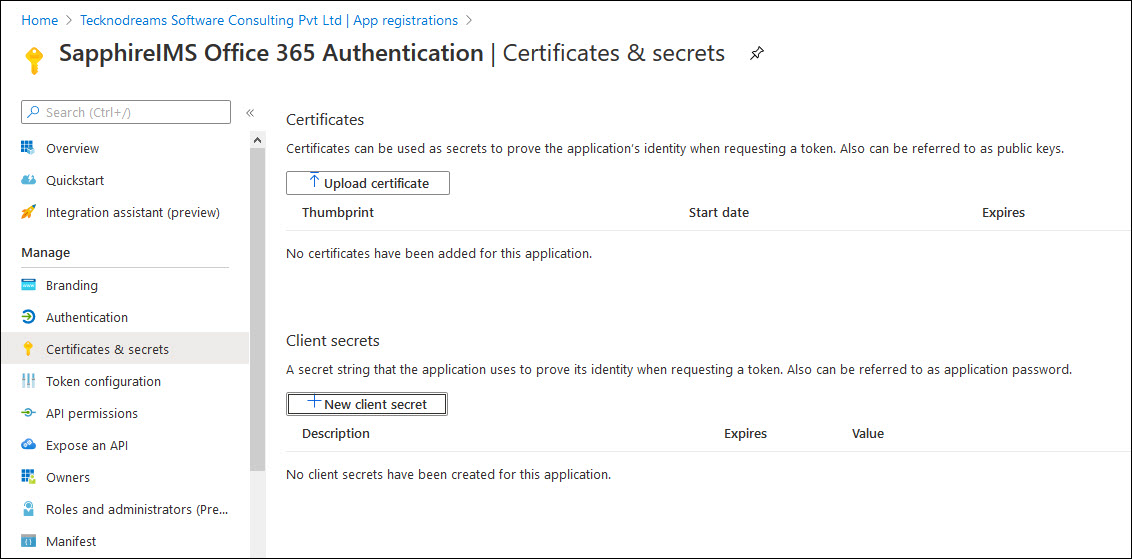
A screen to input details for generating the secret is displayed.

Enter a 'Description' and set the expiry period as desired.
Click on 'Add'.

Copy the secret 'Value' (to the Notepad) for using it later in the 'Client secret' field in the IdP configuration screen in SapphireIMS.
Select 'API Permissions' on left hand menu and click on 'Add a Permission'.
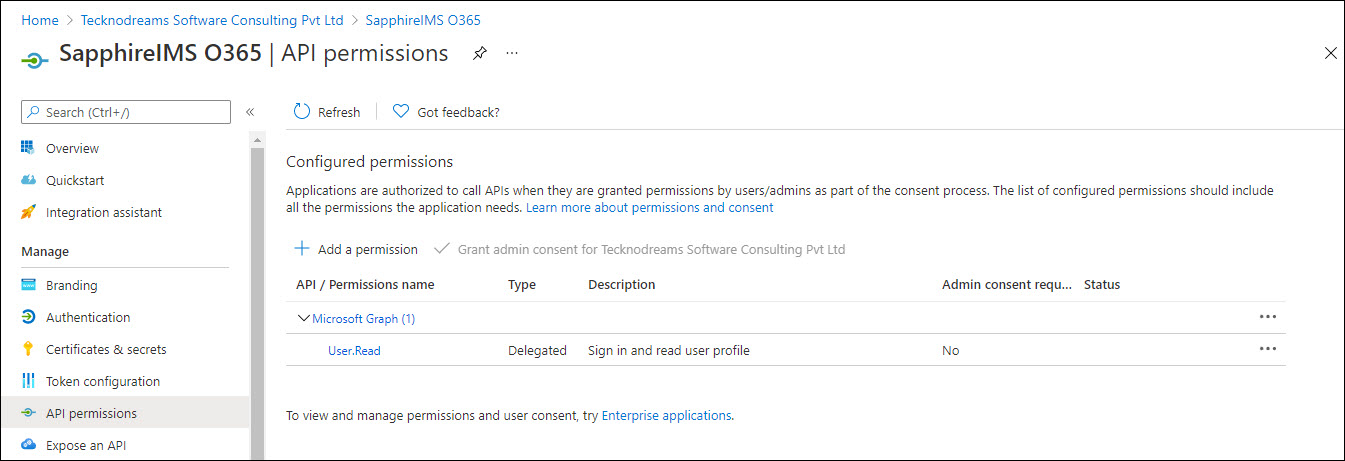
The API selection screen is displayed.

At the bottom of the selection, click on 'Azure Active Directory Graph'.
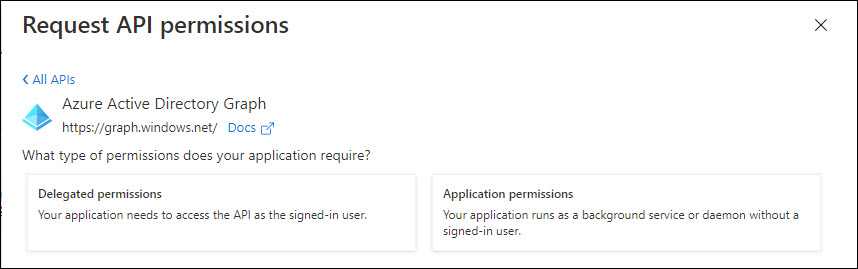
Click on 'Delegated permissions'. Select the permissions 'Directory.AccessAsUser.All', 'User.Read' and 'User.ReadBasic.All'.

Click on 'Add permissions'.
Exit the portal.
Next proceed to configure the Office 365 IdP in SapphireIMS.
Login to SapphireIMS as the administrator.
Click the 'Settings' tab. In the 'User Management' section, click on 'AD &LDAP Integration'.
Click on 'Identity Providers'. The listing screen is displayed.

Click on
the '![]() '
icon to change the base URL setting as shown below. Enter the
base URL used to access the portal and click 'Update'.
'
icon to change the base URL setting as shown below. Enter the
base URL used to access the portal and click 'Update'.
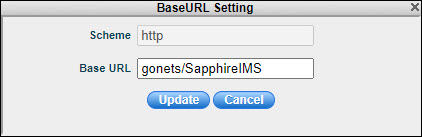
Note: For the mobile application
use 'MobileApp' instead of 'SapphireIMS' in the base URL.
Click 'Add' to add an entry for a new Identity Provider. The IdP selection screen is displayed.

Select 'Office 365' as the 'Provider'. The following screen is displayed.

The fields are described in the table below.
| Serial No. | Field Name | Description |
1 |
Identity Provider |
Select the name of the identity provider as 'Office 365'.
|
2 |
Name |
Enter a name for the IdP. |
3 |
Alias |
The alias uniquely identifies an identity provider and it is also used to build the redirect URI.
|
4 |
Redirect URI |
The Redirect URI is used by Office 365 to redirect the user to the application after authentication. This is a display-only field and is generated using the Base URL and Alias.
|
5 |
ClientID |
Enter the Client ID generated during SapphireIMS registration in Azure portal. |
6 |
Client secret |
Enter the Client secret generated during SapphireIMS registration in Azure portal. |
7 |
Default scopes |
SapphireIMS can ask for the scopes for authorization which are entered here. By default if left blank, SapphireIMS requests for email, profile, offline access and openid which are minimally required. Note that in Office 365 OAuth Consent screen, these scopes should have been present. |
8 |
Enable |
Enable/Disable this identity provider
|
9 |
Authenticate by Default |
This setting needs to be enabled when the SapphireIMS login screen needs to be hidden. If enabled, on entering the SapphireIMS URL, it directly takes the user to the SapphireIMS home page if the user is already logged into Office 365. By default, this is disabled. |
10 |
Icon |
Select the icon to click on the SapphireIMS login screen which will allow logging in via Office 365 authentication. The default is Microsoft. |
11 |
Color |
Select the color of the icon. |
Update the fields and click on 'Save'. This saves the IdP information and returns you to the listing page.