![]()
![]()
This section describes how to configure SapphireIMS to automate the OS and application deployment remotely for a group of machines
Step 1: Create a List of Computers on which OS will be Deployed
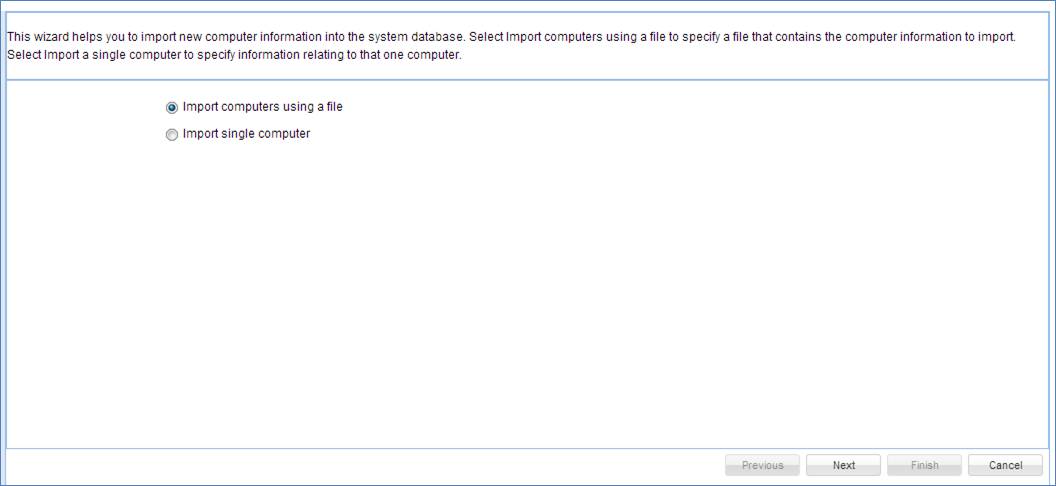
Go to Settings Tab-> OS Deployment-> Import Computer tab. Click on “Add”
Select an appropriate option: “Import computers using a file” (To add multiple computers in bulk) or “Import single computer” (To add a single computer)
Click on “Next”
If “Import computers using a file” is chosen then follow the steps as below
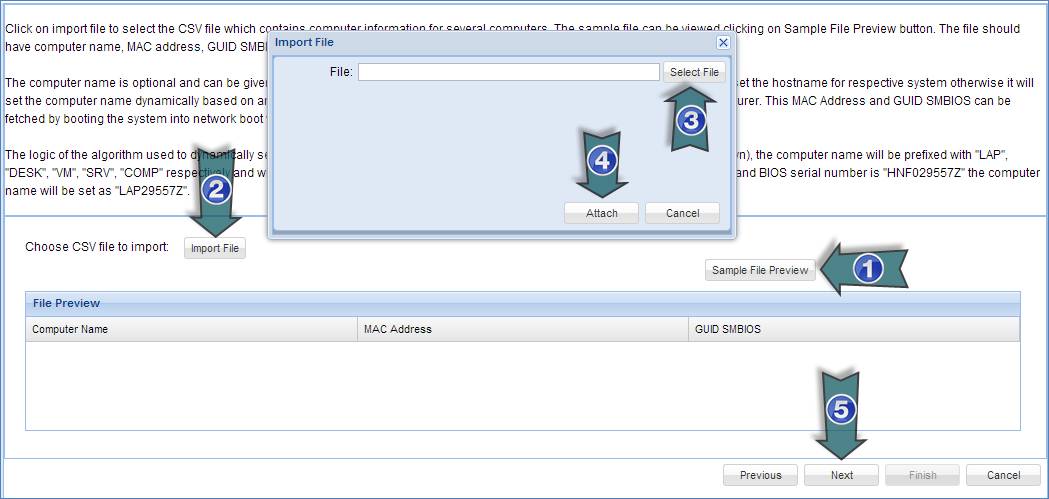
1. Click on “Sample File Preview” to view the patter in which the CSV file should be filled with the list of computers to be imported. The CSV file format is Host Name, MAC Address, SMBIOS GUID
2. Create a CSV file in the format specified in Step 1. Click on “Import File”
3. Click on “Select File”. Browse and choose the CSV file
4. Click on “Attach”
5. Click on “Next”
If “Import single computer” is chosen then follow the steps as below
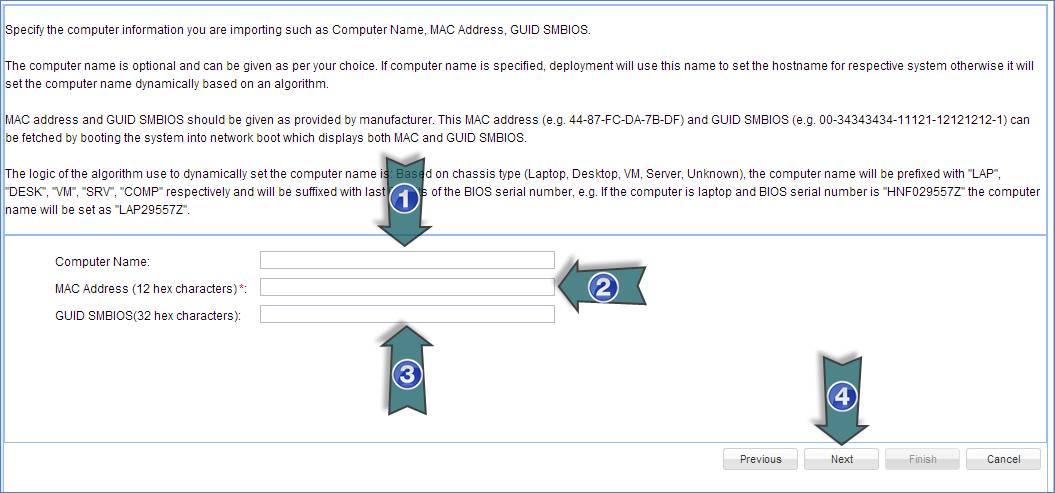
1. Type the Host Name of the computer in “Computer Name”
2. Type the MAC Address of the computer in “MAC Address (12 hex characters)”
3. Type the SMBIOS GUID of the computer in “GUID SMBIOS (32 hex character)”
4. Click on “Next”
Create and choose a “Compute Group” for which the imported computers will be member of
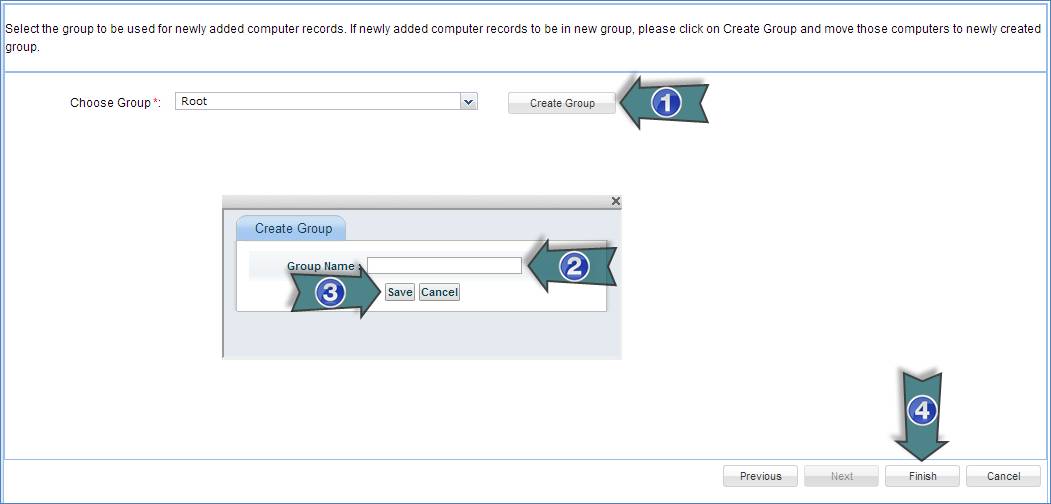
1. Click on “Create Group”
2. Type the Computer Group Name in “Group Name”
3. Click on “Save”
4. Click on “Finish”
View the List of Computers which are imported to the OS Deployment Computer List. Optionally you can change the Group of a computer
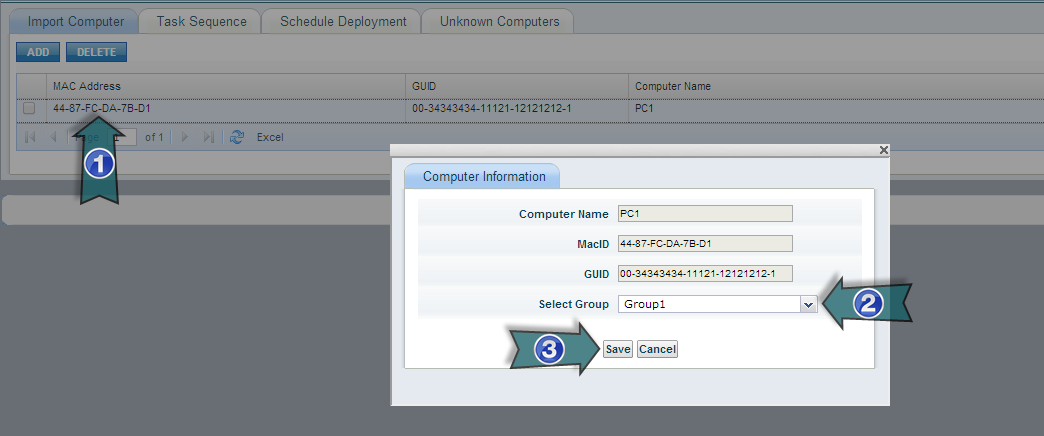
1. Click on the MAC Address of a computer in the list
2. Select a Computer Group from the “Select Group” dropdown list
3. Click on “Save”
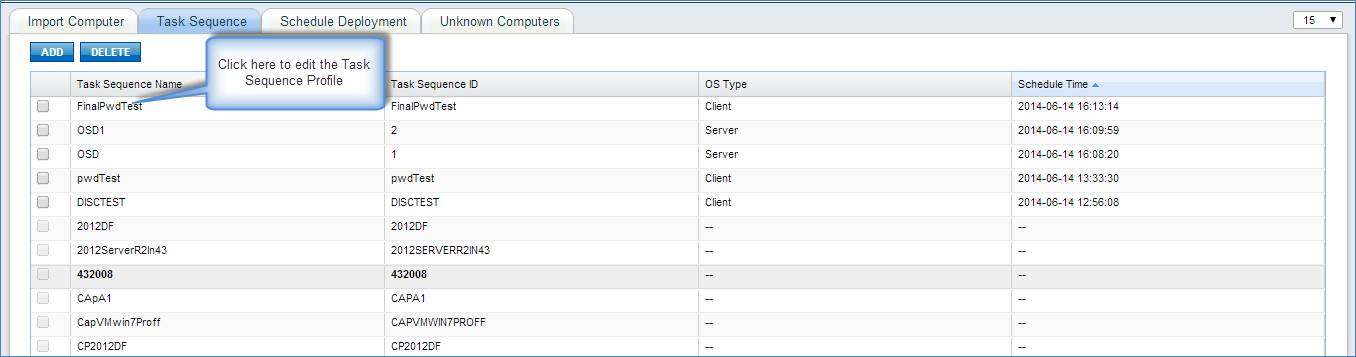
Step 2: Create a Task Sequence Profile to Install OS or to Capture an OS Image
Go to Settings Tab-> OS Deployment-> Task Sequence tab. Click on “Add”
Select the deployment server to be used for this task and click on "Next"
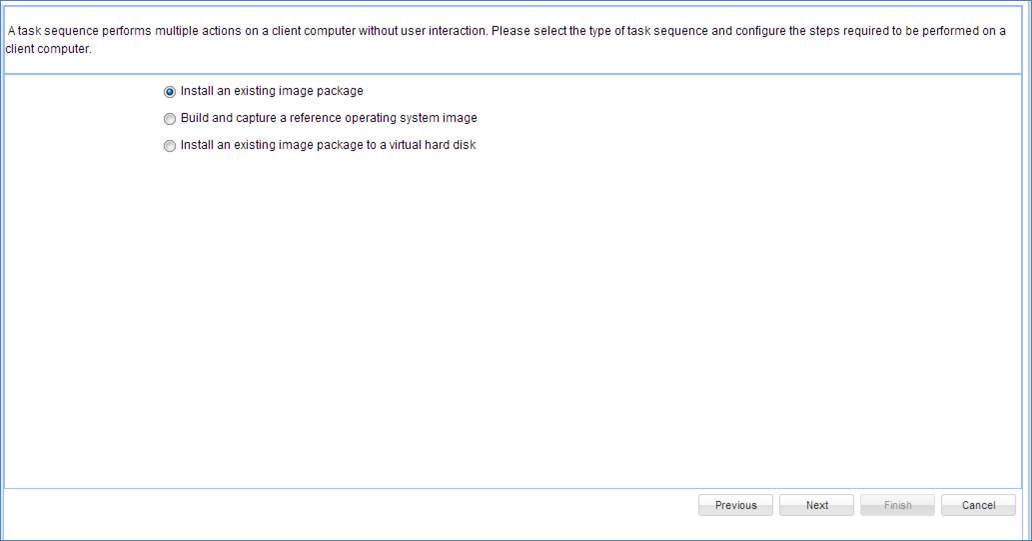
Select an appropriate option: “Install an existing image package”, “Build and capture a reference operating system image” or “Install an existing image package to a virtual hard disk”
Click on “Next”
If “Install an existing image package” or “Install an existing image package to a virtual hard disk” is chosen then follow the steps as below
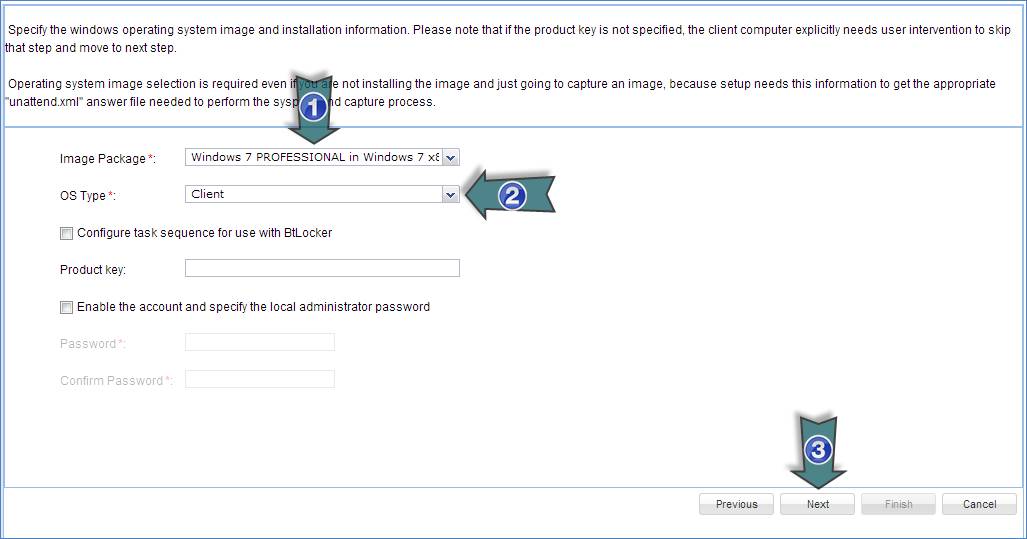
Specify the Windows Operating System Image and Installation information
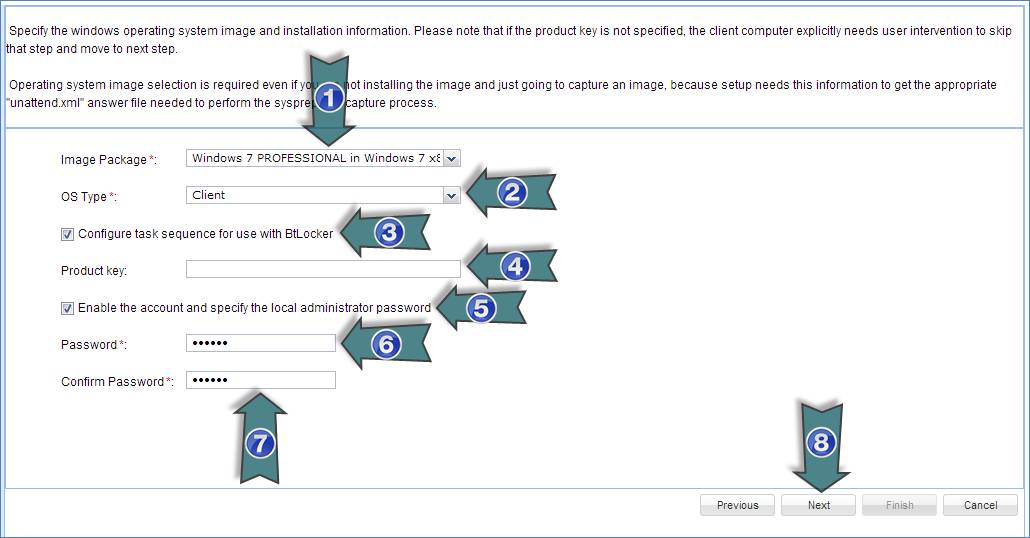
1. Select an Windows OS Image Package
2. Select the OS Type of the OS Image Package selected in Step 1
3. Check this checkbox if you want to use “BitLocker Drive Encryption” in the Task Sequence (Optional Step)
4. Type the Product Key of the Windows OS (Optional Step)
5. Check this checkbox if you want to Enable the Local Administrator Account and set a password for this account (Optional Step)
6. Type the Password (Optional Step. Mandatory if the checkbox in Step 5 is checked)
7. Retype the Password (Optional Step. Mandatory if the checkbox in Step 5 is checked)
8. Click on “Next”
Specify the Minimum Prerequisites to be met by the Client Computers to execute the Task Sequence
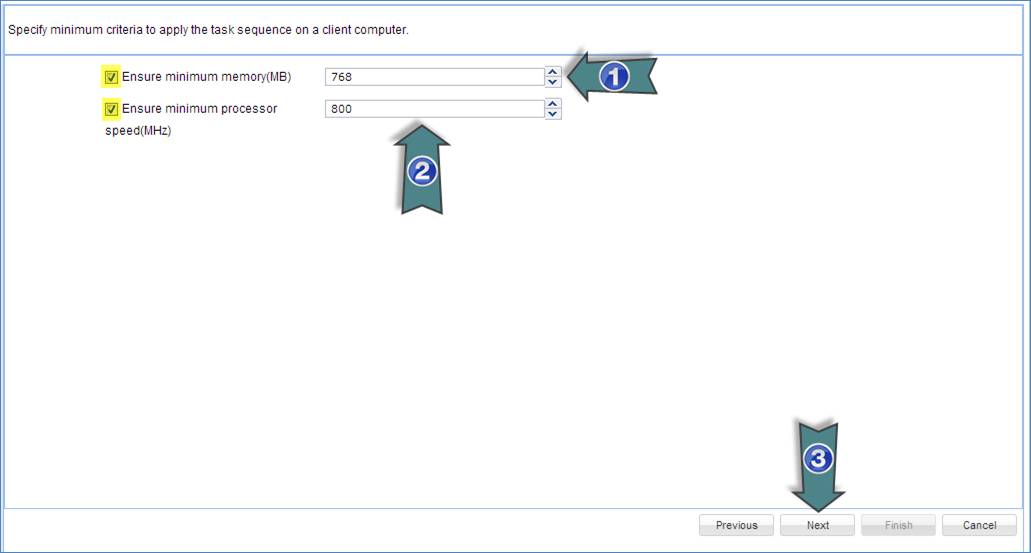
1. Check the box if you want to specify the Minimum Memory the Client Computers should have to execute the Task Sequence. Specify the Minimum Memory (in MB) in the text box
2. Check the box if you want to specify the Minimum Processor Speed the Client Computers should have to execute the Task Sequence. Specify the Minimum Processor Speed (in MHz) in the text box
3. Click on “Next”
Specify a Workgroup or Domain information that the Client Computers should join to
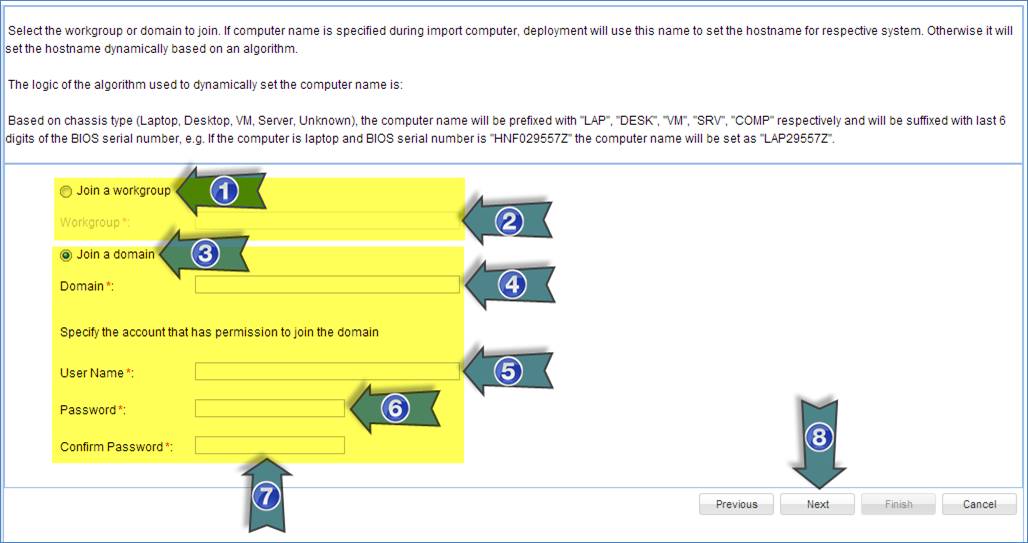
1. Select the “Join a workgroup” radio button if you want the Client Computers to a Workgroup
2. Type the Workgroup Name
3. Select the “Join a domain” radio button if you want the Client Computers to a Domain
4. Type the Domain Name
5. Type the Domain User Name which has permission to join the specified domain
6. Type the Password
7. Retype the Password
8. Click on “Next”
Specify the Physical Disk Layout to Partition and Format the Physical Disk on the Client Computer
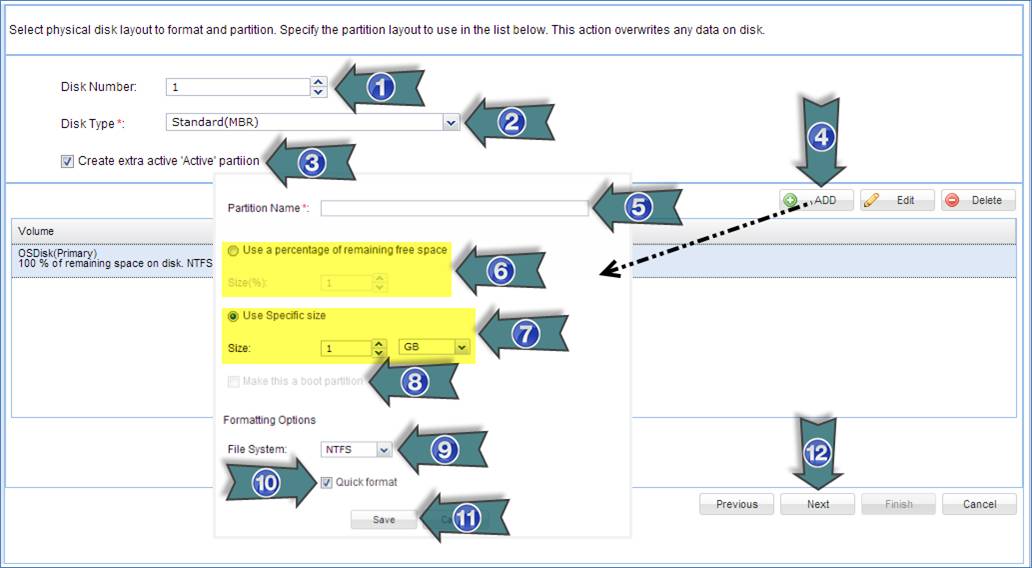
1. Enter the Disk Number
2. Select the Disk Type
3. Check this box to create an extra “Active Partition” (Optional Step)
4. Click on “Add” to add a Partition Details
5. Type the Partition Name
6. Select the “Use a percentage of remaining free space” radio button to Create a Partition with the Percentage (specified in the “Size(%)” text box) of the remaining Free Space in the Physical Disk
7. Select the “Use Specific size” radio button to Create a Partition with the size specified in the “Size” text box. Please select the Size Unit as “GB” or “MB” from the drop down list
8. Check this box to make this partition as a Boot Partition
9. Select the File System (NTFS or FAT) to be used while formatting the Partition
10. Check this box to perform a Quick Format
11. Click on “Save”
12. Click on “Next”
Note: You can select the added Partition and click on “Edit” to edit the Partition Settings. To delete a Partition select the Partition and click on “Delete”
Specify the Language Pack and Input Locale Details for the Client Computers
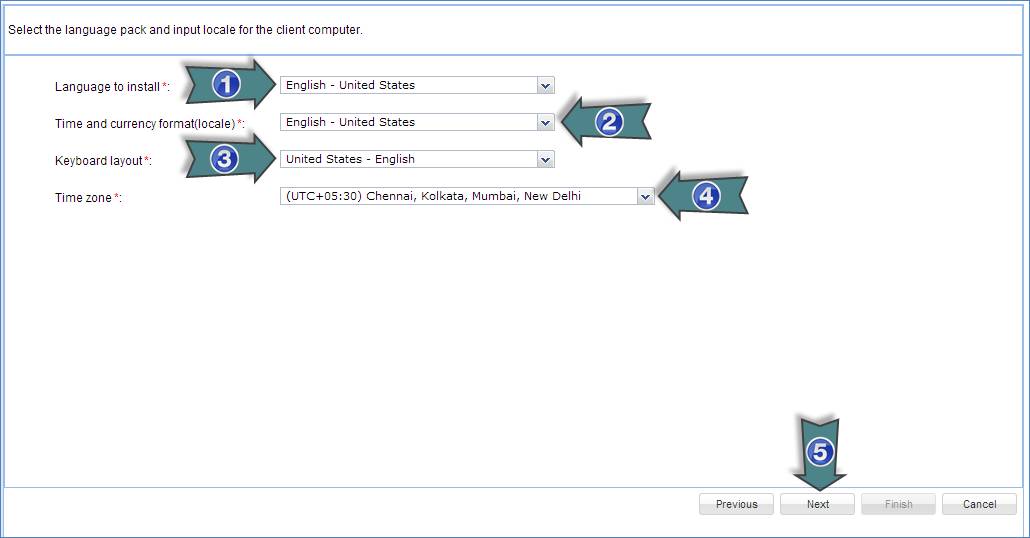
1. Select the Language to Install on the Client Computers
2. Select the format Time and Currency to be applied on the Client Computers
3. Select the Keyboard Layout to be set on the Client Computers
4. Select the Time Zone to be set on the Client Computers
5. Click on “Next”
Select the Software to be installed on the Client Computers during OS Deployment (Optional Step)
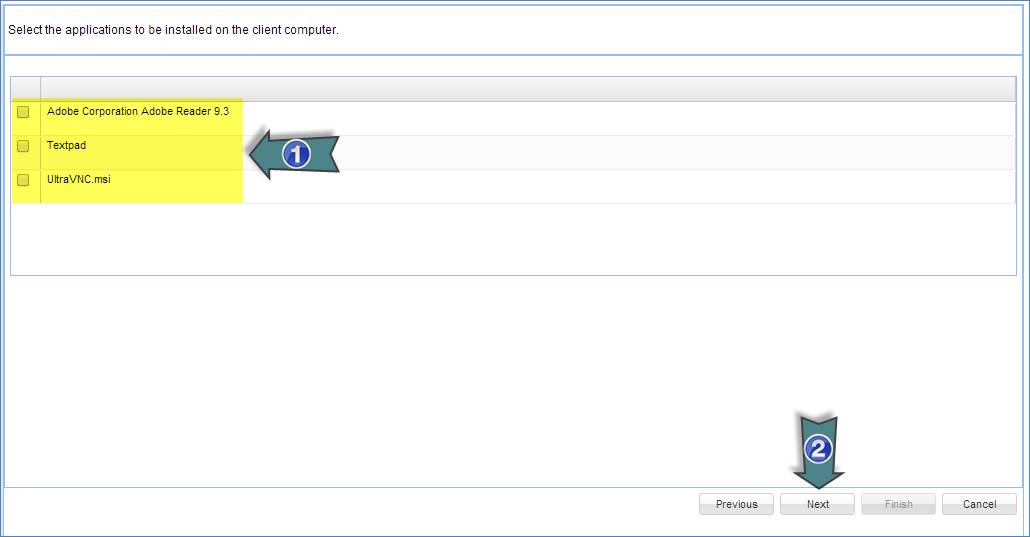
1. Select the Software to be installed on the Client Computers during OS Deployment
2. Click on “Next”
Select the Operating System Roles and Features to be installed on the Client Computers
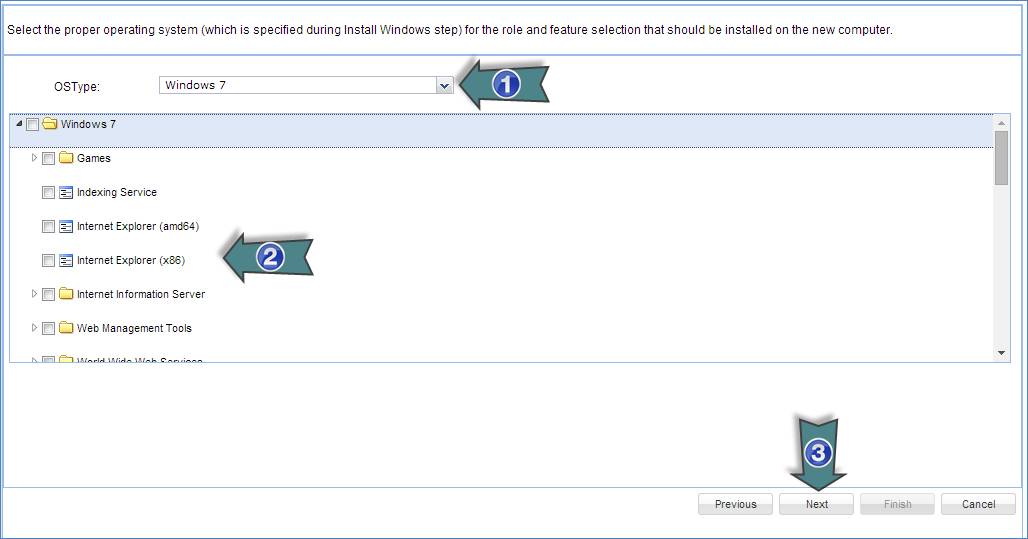
1. Select the Operating System which was specified in “Install Windows” step
2. Select the Roles and Features to be installed
3. Click on “Next”
Select the Device Drivers to be installed on the Client Computers during OS Deployment
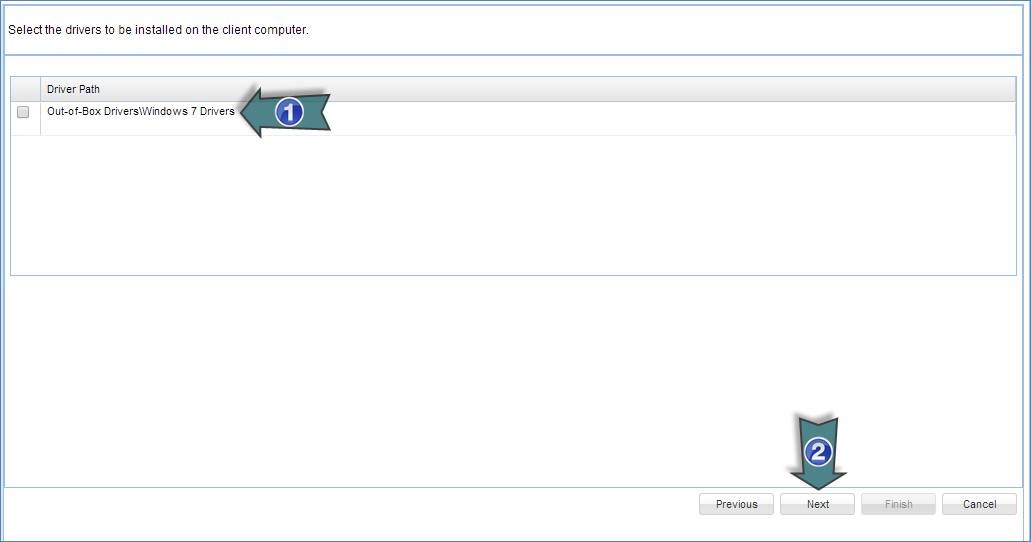
1. Select the Device Drivers to be installed on the Client Computers during OS Deployment
2. Click on “Next”
Specify the conditions to be checked before executing the Task Sequence on the Client Computers
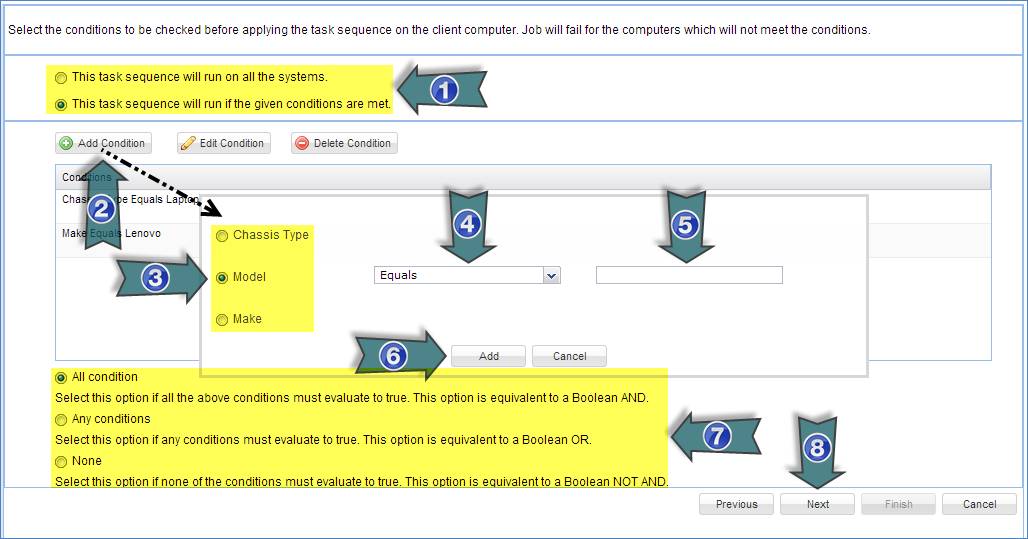
1. Select an option (If the “This task sequence will run if the given conditions are met” option is selected then follow the below steps)
2. Click on “Add Condition”
3. Select a Condition Type (“Chassis Type”, “Model” or “Make” of the Client Computers)
4. Select an Operator (“Equals” or “Not Equals”)
5. Type a Value to check
6. Click on “Add”
7. Select a Condition Evaluation Option
8. Click on “Next”
Note: You can select the added Condition and click on “Edit” to edit the Condition Settings. To delete a Condition select the Condition and click on “Delete”
Save the Task Sequence
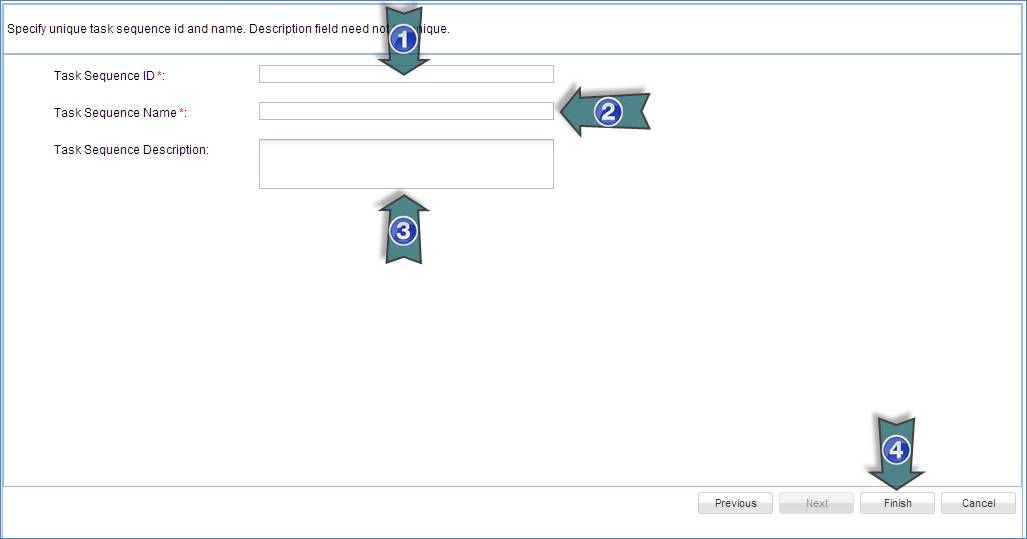
1. Type the Task Sequence Id
2. Type the Task Sequence Name
3. Type the Task Sequence Description (Optional Step)
4. Click on “Finish”
If “Build and capture a reference operating system image” is chosen, follow the steps as below
Specify the Windows Operating System Image information
1. Select an Windows OS Image Package (Operating System Image selection is required to capture an image because the setup needs this information to get the appropriate "unattend.xml" answer file which is required to perform the “sysprep” and “capture” process)
2. Select the OS Type of the OS Image Package selected in Step 1
3. Click on “Next”
Specify the Location and Access Details of the Image File to capture
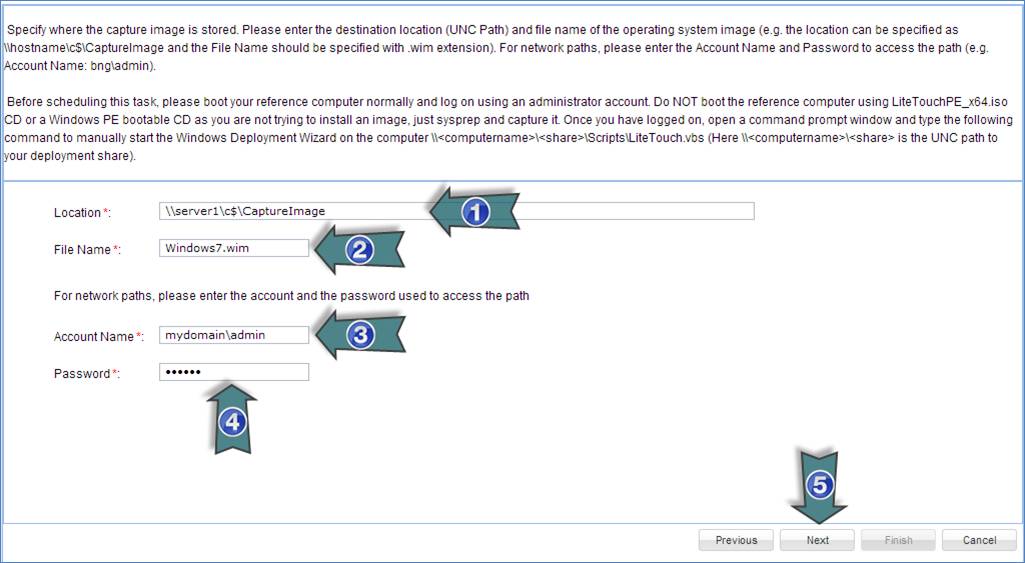
1. Type the UNC Path of the Location where the OS Image to be captured is stored
2. Type the File Name of the OS Image File (with .wim extension)
3. Type the User Account Name to access the UNC Path
4. Type the Password for the User Account mentioned in Step 3
Save the Task Sequence
1. Type the Task Sequence Id
2. Type the Task Sequence Name
3. Type the Task Sequence Description (Optional Step)
4. Click on “Finish”
Run “System Preparation” process (As Administrator) in the Target System from which the OS Image will be captured
1. Go to <OS Install Drive>\windows\system32\sysprep
2. Open sysprep.exe
3. Select the options in the “System Preparation Tool” as shown in the below screenshot
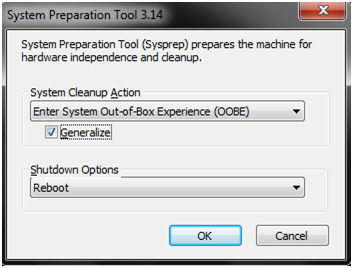
4. Click “Ok”
This will reboot the system and start the “System Preparation” process
View the Task Sequence Profile in the Task Sequence Profile List
Step 3: Schedule OS Deployment or OS Image Capture
Go to Settings Tab-> OS Deployment-> Schedule Deployment tab. Click on “Add”
Select the Deployment Server
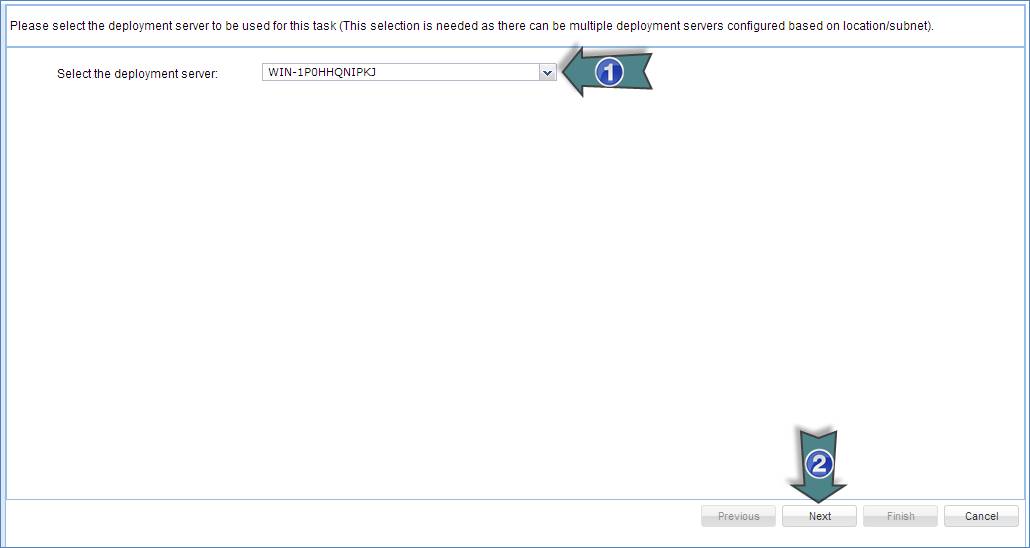
1. Select a Deployment Server
2. Click on “Next”
Select the Task Sequence, Boot Image and the Client Computers
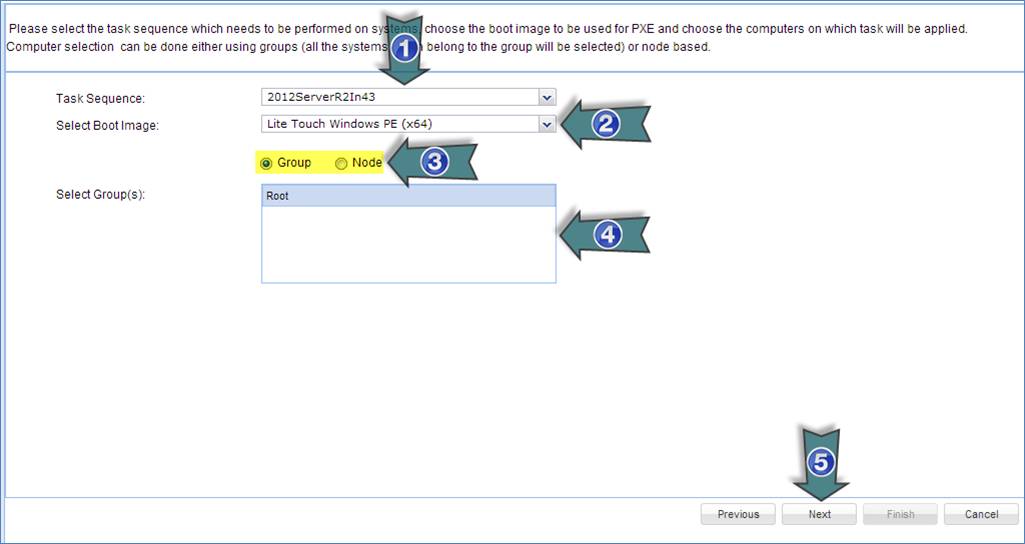
1. Select a Task Sequence to run on the Client Computers
2. Select a Boot Image to apply on the Client Computers
3. Select “Group” radio button to view the Computer Groups or Select “Node” radio button to view the Client Computers (Created during “Import Computer” step)
4. Select the required Computer Groups or Client Computers
5. Click on “Next”
Select the option to be used to Wake up the Client Computers if they are turned off
If “Use power on commands if computer support this technology, otherwise use wake-up packets” is chosen then follow the steps as below
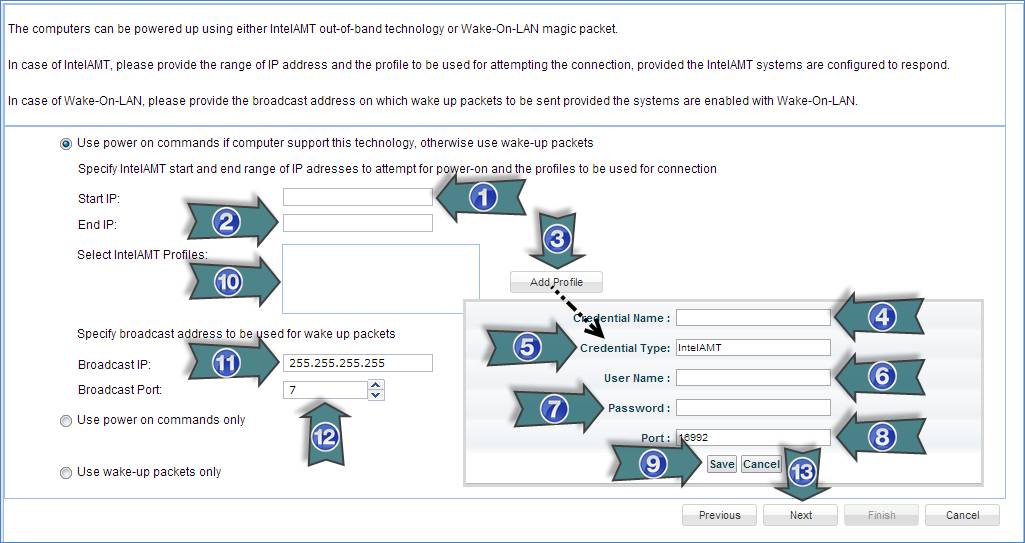
1. Type the Start IP Address of the Client Computers to Wakeup
2. Type the End IP Address of the Client Computers to Wakeup
3. Click on “Add Profile” to add a new Intel AMT Credential Profile (Skip This Step to Step 9 if profile is already created)
4. Type the Intel AMT Credential Profile Name
5. This is a read only Textbox
6. Type the Intel AMT User Name
7. Type the Password for the User Name mentioned in Step 6
8. Type the Intel AMT Port
9. Click on “Save”
10. Select the Intel AMT Profile
11. Type the Broadcast IP address
12. Enter the Broadcast Port Number
13. Click on “Next”
If “Use power on commands only” is chosen then follow the steps as below
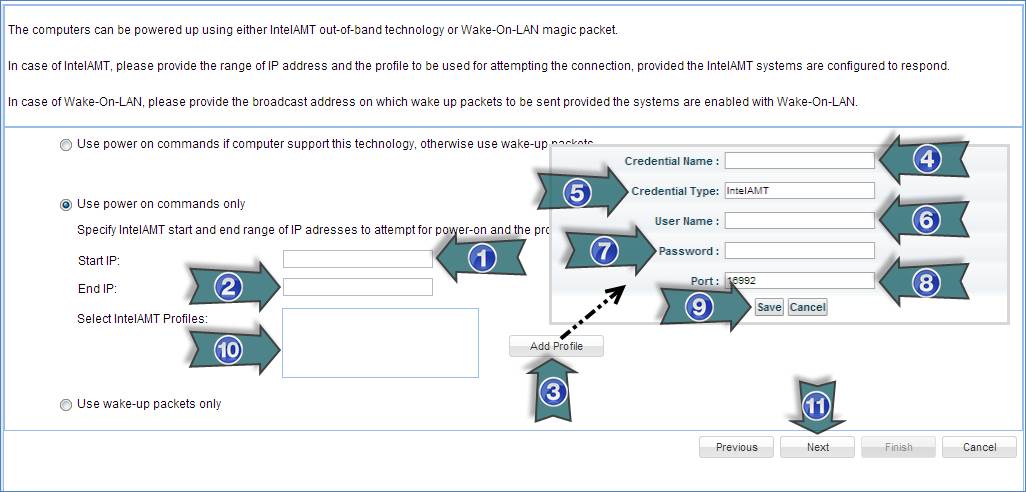
1. Type the Start IP Address of the Client Computers to Wakeup
2. Type the End IP Address of the Client Computers to Wakeup
3. Click on “Add Profile” to add a new Intel AMT Credential Profile (Skip This Step to Step 9 if profile is already created)
4. Type the Intel AMT Credential Profile Name
5. This is a read only Textbox
6. Type the Intel AMT User Name
7. Type the Password for the User Name mentioned in Step 6
8. Type the Intel AMT Port
9. Click on “Save”
10. Select the Intel AMT Profile
11. Click on “Next”
If “Use wake-up packets only” is chosen then follow the steps as below
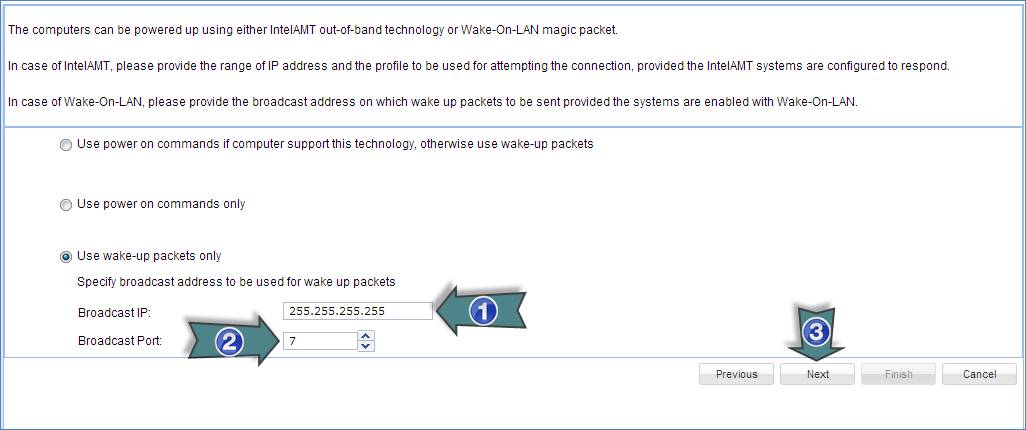
1. Type the Broadcast IP address
2. Enter the Broadcast Port Number
3. Click on “Next”
Specify the conditions to start the OS Deployment Process
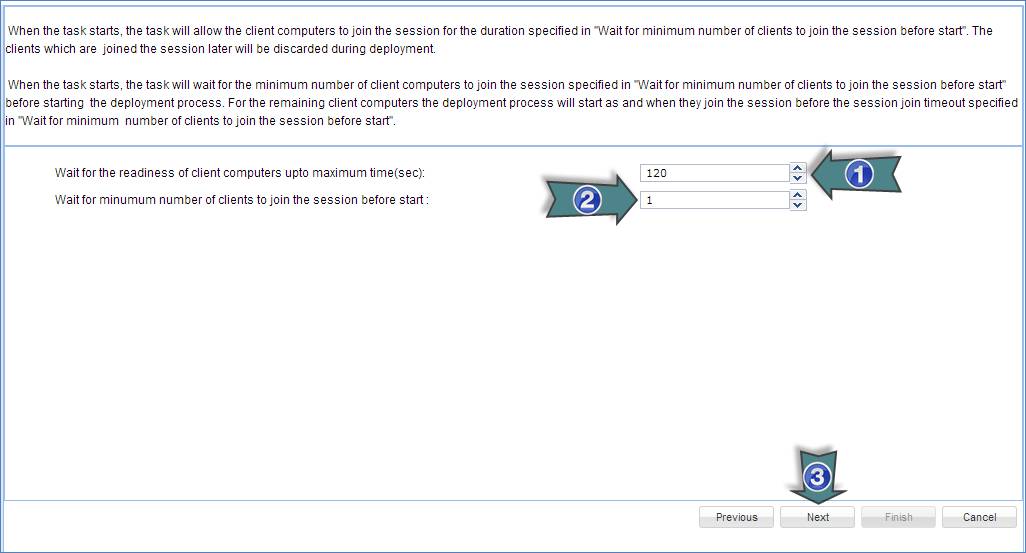
1. Enter the Maximum Time (in Second) to wait for the Client Computers to join the OS Deployment Session before starting the OS Deployment Process
2. Enter the Minimum Number of Client Computers to join the OD Deployment Session before starting the OS Deployment Process
3. Click on “Next”
Save the Deployment Profile

1. Check this checkbox to rerun OS Deployment on previously deployed computers (Optional Step)
2. Select the Date and Time to start the OS Deployment Process
3. Type the Name of the OS Deployment Profile
4. Click on “Finish”
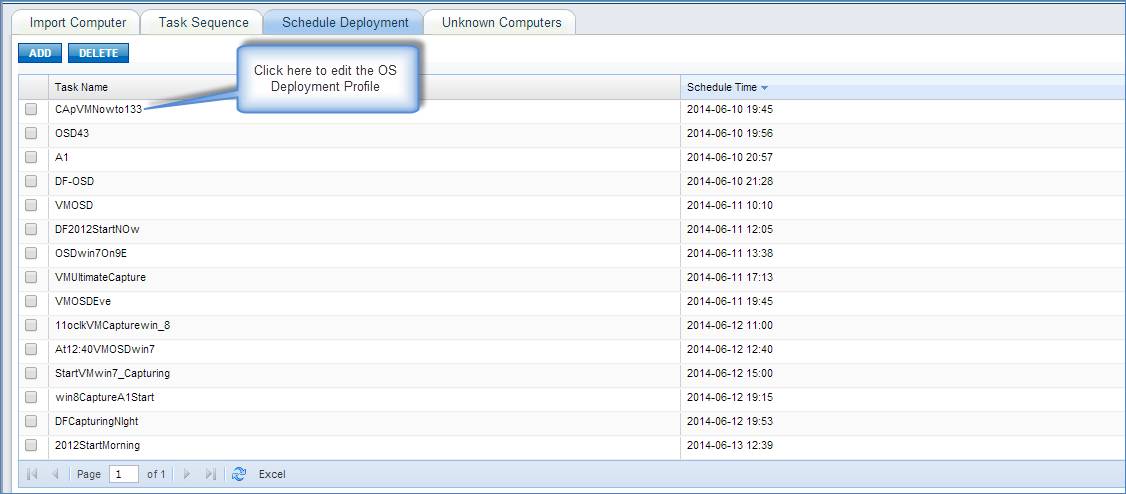
View the OS Deployment Profile in the OS Deployment Profile List
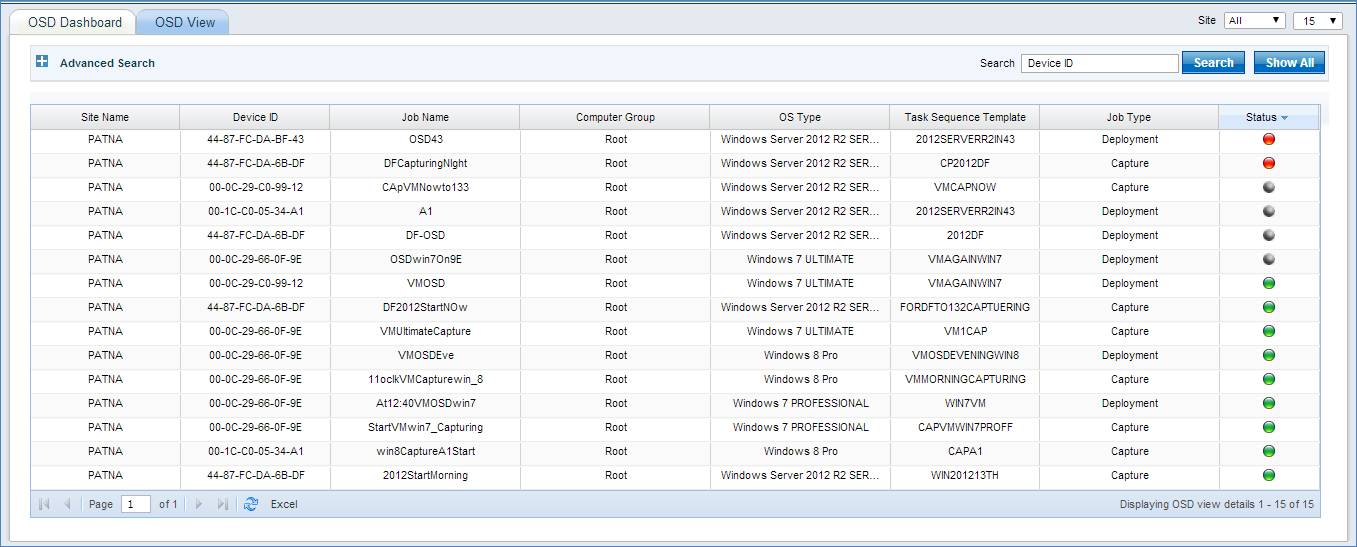
Step 4: Track the Status of the OS Deployment and Image Capture Tasks
Go to IT Automation Tab-> OS Deployment-> OSD View tab
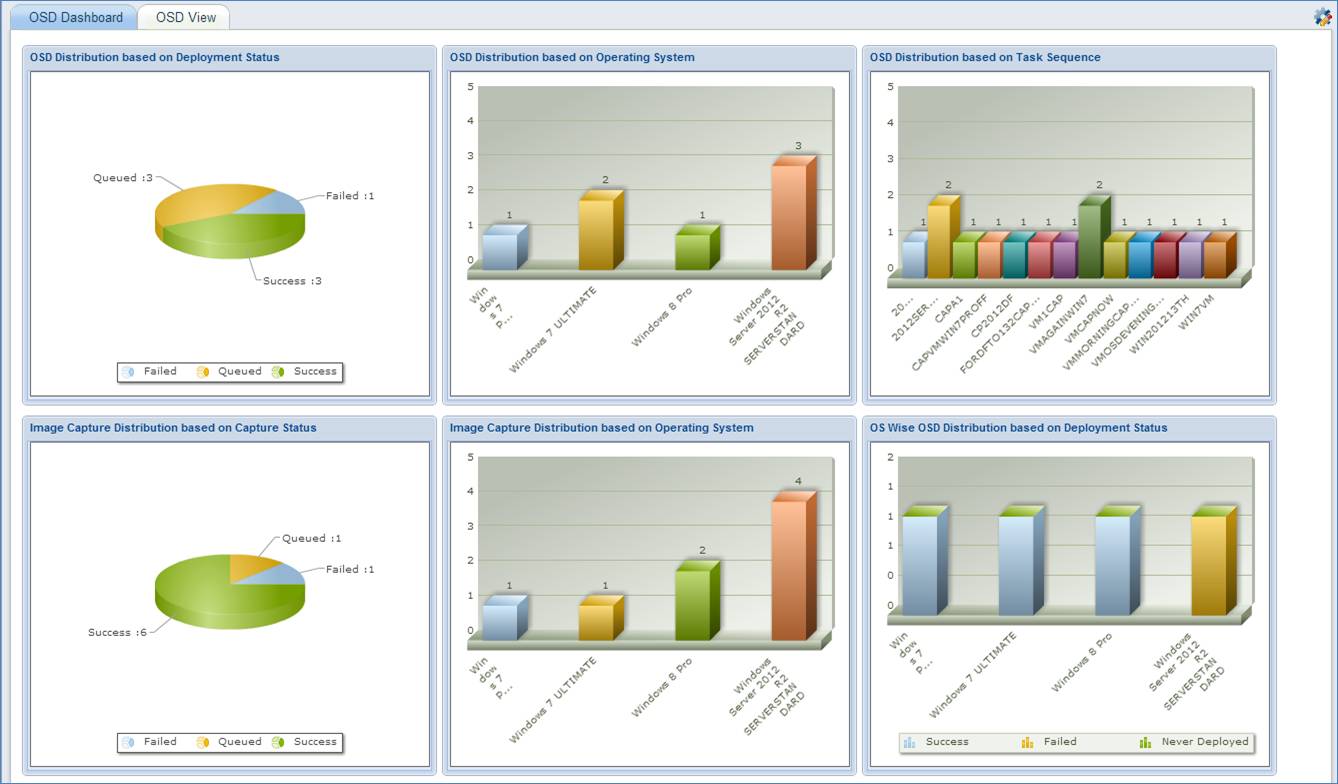
Go to IT Automation Tab-> OS Deployment-> OSD Dashboard tab
Note: During OS Deployment if any Computer joins the OS Deployment Session which is not in the list of Computers added in the “Import Computer” Step then that Computer will be shown in Settings Tab-> OS Deployment-> Unknown Computers tab. You can select these Unknown Computers and click on “Move To Known Computers” to add them to the “Import Computer” List
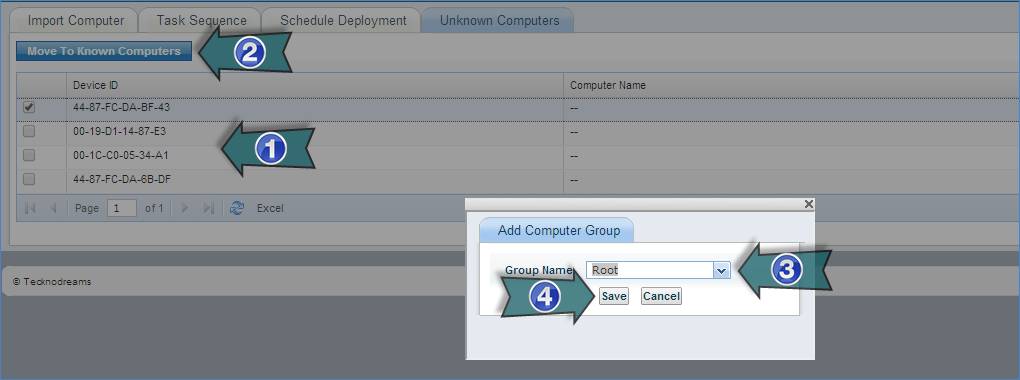
1. Select the Unknown Computers
2. Click on “Move To Known Computers”
3. Select a Computer Group
4. Click on “Save”