![]()
![]()
This section details the steps for installing the Microsoft tools on the OS Deployment server.
Windows Server 2012 R2 64-Bit
Need Xeon Quad Core Processor, 8 GB RAM and Minimum of 160 GB Hard Disk Free Space
Static IP Address should be assigned to the OS Deployment Server
Microsoft Deployment Toolkit (MDT)
Assessment and Deployment Kit (ADK)
Windows Deployment Services (WDS)
Supports Deployment of Operating Systems from Windows 7 onwards
Step 1 - Install Microsoft Deployment Tool kit (MDT 2013)
Download MDT Installer from the below link: https://www.microsoft.com/en-in/download/confirmation.aspx?id=50407
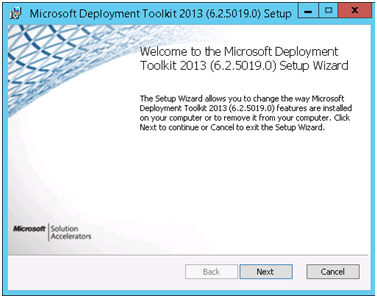
Double Click on the MDT Installer Setup. This will open the Welcome Screen of the MDT installer Wizard. Click on “Next”
Accept the license agreement and click on “Next”
You can change the Default Installation Path and the Components to be installed if needed. Click on “Next”
If you like to accept the CEIP (especially in labs), select “Yes” otherwise select “No” and click on “Next”

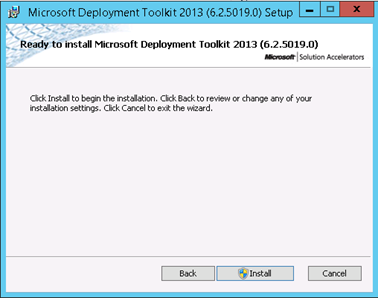
Click on “Install”
Once the installation is completed click on “Finish”

Note: After installing MDT and before you configure it, make sure that ADK is installed
Step 2: Install Assessment and Deployment kit (ADK)
Download ADK Installer from the link: https://developer.microsoft.com/en-us/windows/hardware/windows-assessment-deployment-kit
Double Click on the ADK Installer Setup. Select the option “Install the Windows Assessment and Deployment Kit for Windows 10 to this computer” and click on “Next”
Option1: Install the Windows ADK kit to a location on the computer
Option 2: Enter or select the download path if the installation is on a separate computer
Click on "Next"
Click on "Accept"
Choose the options as shown in the above screen shot and click on “Install”
Once the installation is completed, click on “Close”
Step 3: Create a Deployment Share
Go to Start Menu-> All Programs and open “Deployment Workbench”. In the left panel right click on “Deployment Share” and click on “New Deployment Share”

This will open the “New Deployment Share Wizard”. Type the Full Physical Local Path of the folder in “Deployment share path” (e.g. c:\DeploymentShare) which will contain the Deployment Share (If you have created a folder manually by yourself then you can click on “Browse...” to select the folder). Click on “Next”
Note: The folder used for Deployment Share should be a local folder (i.e. a folder on the same server where MDT is installed)
Once you click “Next” the mentioned folder will be created automatically (if the folder does not exist) and also the folder will be shared automatically with the required Access Permissions. Please do not change the Access Permission for the share

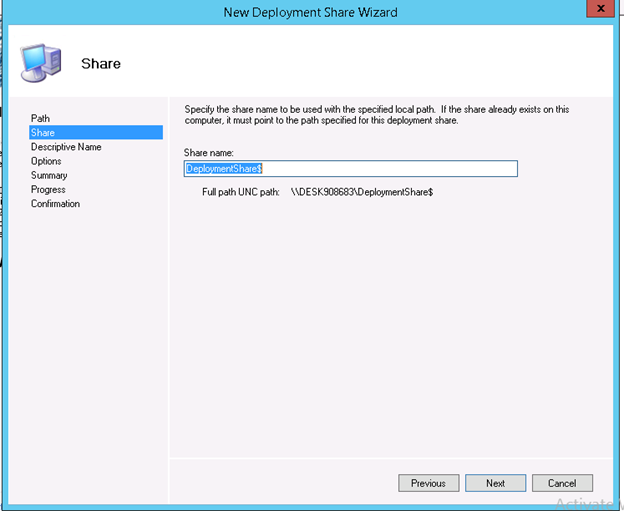
Type the “Share Name”, e.g. if there is a Shared Folder called “DeploymentShare” in C Drive, then type the “Share Name” as “DeploymentShare$”. Click on “Next”
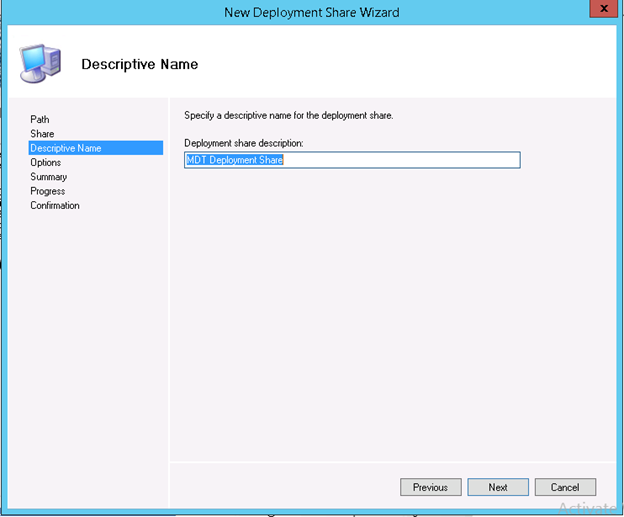
Type the description of the Deployment Share in “Deployment share description” and click on “Next”
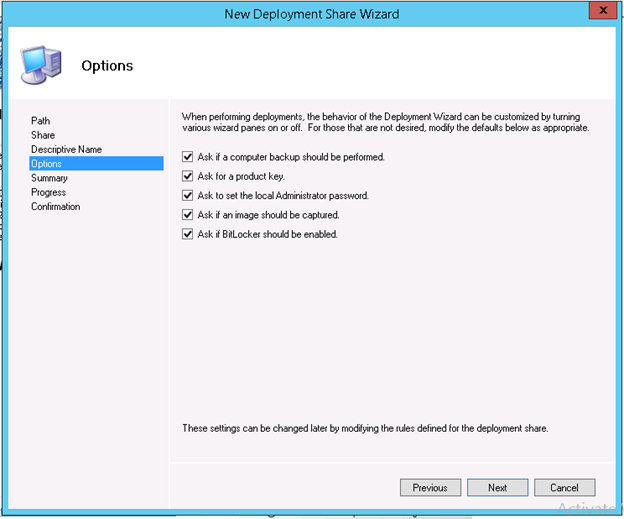
Make sure that all the options are checked and click on “Next”
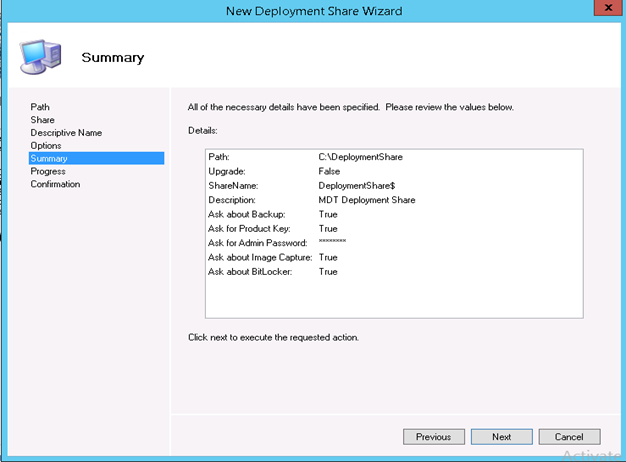
Check the Summary and click on “Next”
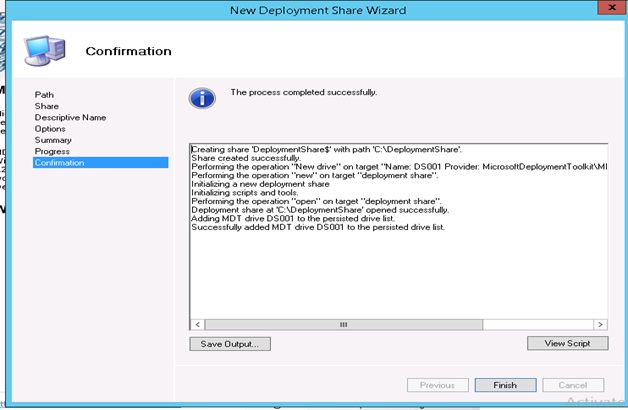
When Deployment Share Creation is completed click on “Finish”. Optionally you can click on “Save Output” to save the Deployment Share Creation details for future reference
Go to the Deployment Share physical path (in this example it is “c:\DeploymentShare”). Go to the “Control” folder. Open the “Bootstrap.ini” with Notepad. Replace the whole content with the following:
[Settings]
Priority=Default
[Default]
SkipBDDWelcome=YES
DeployRoot=\\<OS Deployment Server Hostname>\<Deployment Share Name>$
UserID=<Windows Administrator User Account Name>
UserDomain=<If the OS Deployment Server is in Workgroup then type the IP Address of the OS Deployment Server. Otherwise type the Domain Name>
UserPassword=<Windows Administrator User Account Password>
Go to the Deployment Share physical path (in this example it is “c:\DeploymentShare”). Go to the “Control” folder. Open the “CustomSettings.ini” with Notepad. Replace the whole content with the following:
[Settings]
Priority=MacAddress, Default
Properties=MyCustomProperty
[Default]
_SMSTSOrgName=IT Organization
_SMSTSPackageName=OS Deployment Using Task Id: %tasksequenceid%
ProductKey=
SkipProductKey=YES
SkipSummary=YES
SkipFinalSummary=YES
SkipCapture=YES
SkipApplications=YES
SkipAppsOnUpgrade=YES
SkipTaskSequence=YES
SkipAdminPassword=YES
SkipUserData=YES
SkipComputerBackup=YES
SkipBitLocker=YES
SkipDeploymentType=YES
SkipComputerName=YES
SkipComputerName=YES
SkipDomainMembership=YES
SkipLocaleSelection=YES
SkipTimeZone=YES
SkipRoles=YES
EventService=http://<OS Deployment Server Hostname>:9800
Step 4: Create a Boot Image
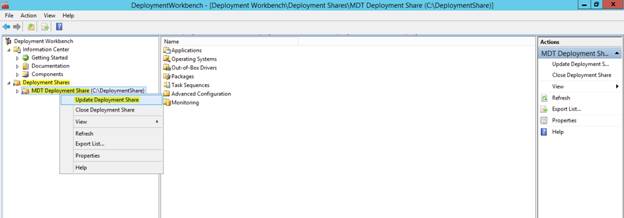
Go to Start Menu-> All Programs and open “Deployment Workbench”. In the left panel expand “Deployment Shares”, right click on a Deployment Share Name (in the screenshot it is “MDT Deployment Share”) and click on “Update Deployment Share”
This will open the “Update Deployment Share” Wizard. Select “Completely regenerate the boot images” and click on “Next”. This will create a Boot Image in a folder named “Boot” the Deployment Share folder

View the Summary and click on “Next”

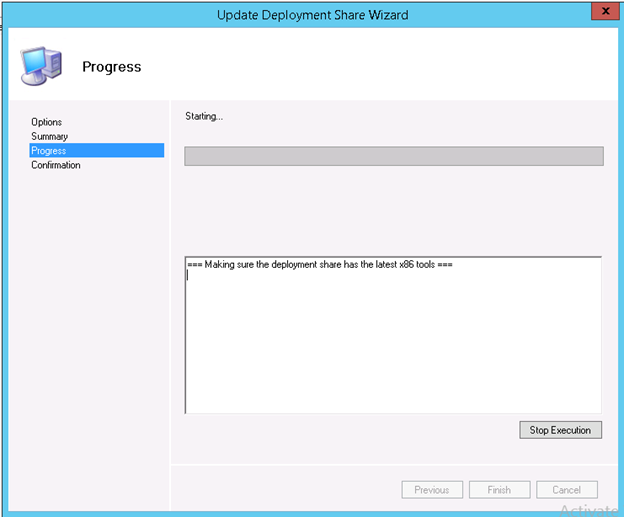
View the progress. Once the Boot Image Creation is completed click on “Finish”. Please do not click on “Stop Execution”
Step 5: Import of OS Files to the Deployment Share
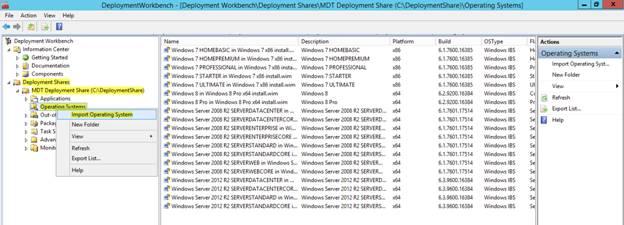
Go to Start Menu-> All Programs and open “Deployment Workbench”. In the left panel expand “Deployment Shares”, expand a Deployment Share Name (in the screenshot it is “MDT Deployment Share”), right click on “Operating Systems” and click on “Import Operating System”
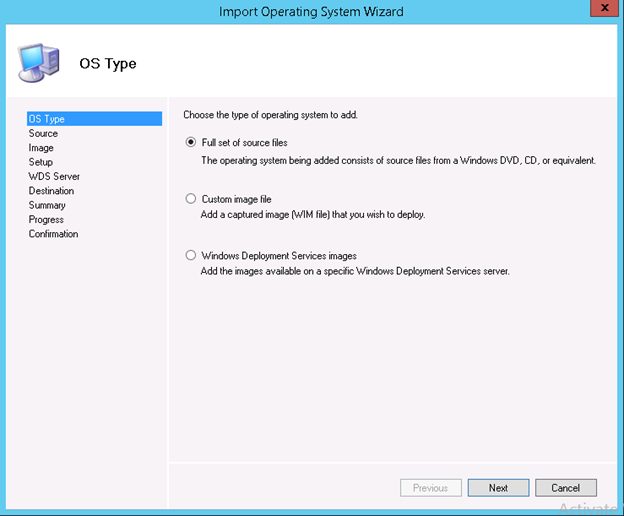
This will open the “Import Operating System” Wizard. Select “Full set of source files” and click on “Next”
Click on “Browse...” and select the source of the OS files (e.g. CD Drive etc). Click on “Next”

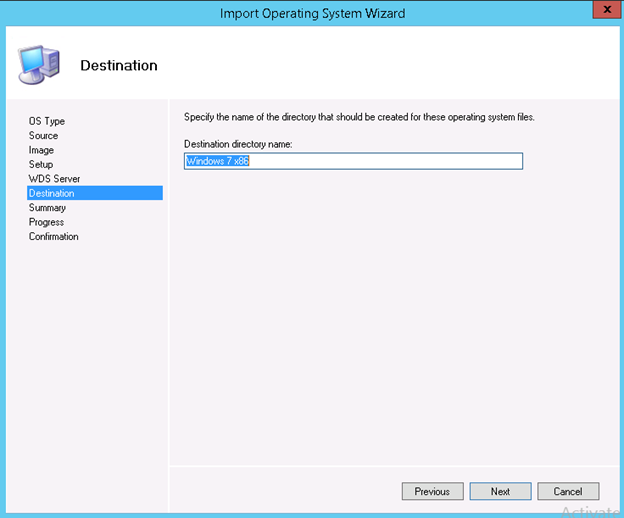
Specify the Destination Folder Name in “Destination directory name”. Click on “Next”. A folder with this name will be created inside the Deployment Share to store the Operating System files copied from the source mentioned in the previous step
Check the summary and click on “Next”

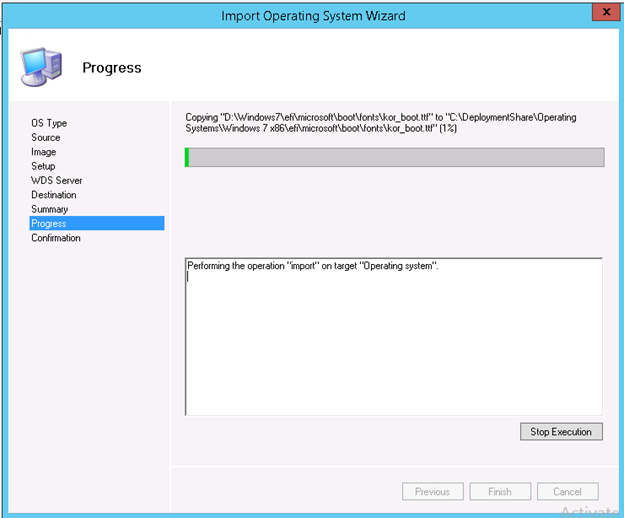
View the progress. Once OS Import is completed click on “Finish”. Please do not click on “Stop Execution”
Step 6: Import Software Installer Files to the Deployment Share
Go to Start Menu-> All Programs and open “Deployment Workbench”. In the left panel expand “Deployment Shares”, expand a Deployment Share Name (in the screenshot it is “MDT Deployment Share”), right click on “Applications” and click on “New Application”

Select “Application with source files” and click on “Next”

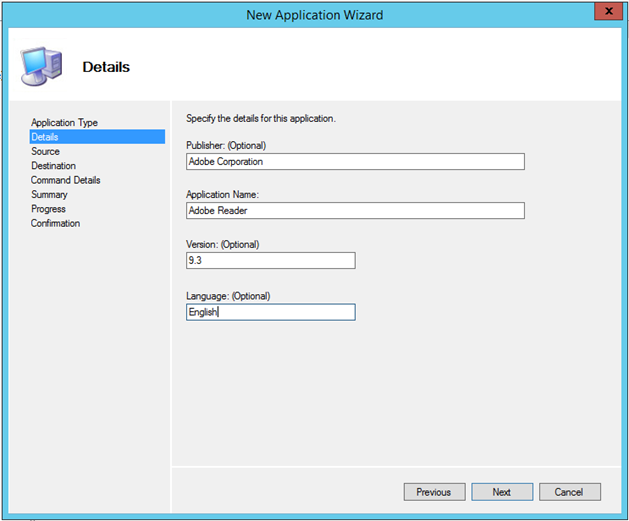
Type the Publisher Name, Application Name, Application Version and Language. Click on “Next”
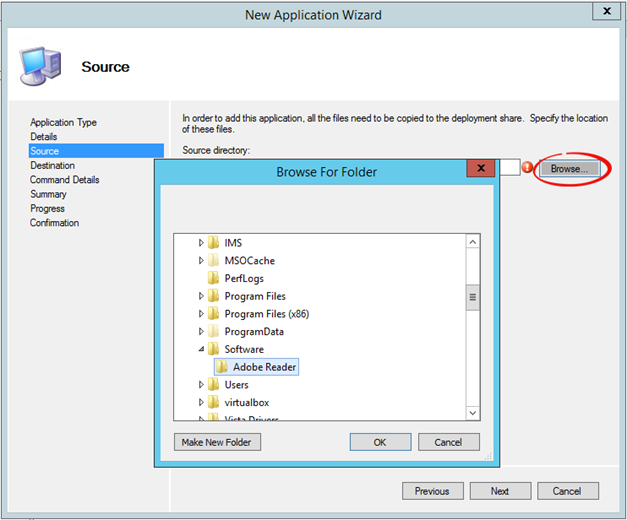
Click on “Browse”, select the folder containing the Software Installer Files and click on “Ok”. Click on “Next”
Type the name of the folder to be created in MDT Deployment Share. Click on “Next”

Type the Command Line Arguments to install the software silently and click on “Next”

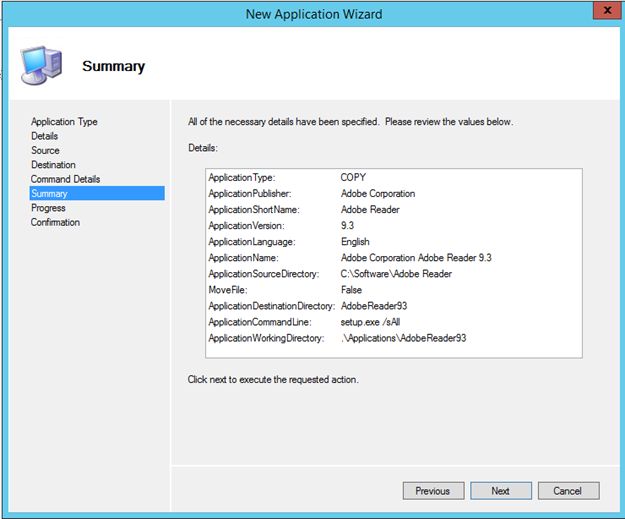
View the summary and click on “Next”. This will start the application creation process
Click on “Finish”
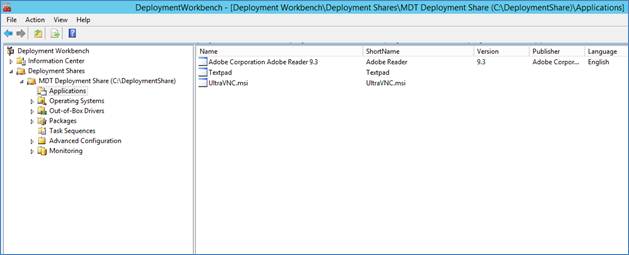
In “Deployment Workbench” left side panel expand “Deployment Shares”, expand a Deployment Share Name (in the screenshot it is “MDT Deployment Share”) and click on “Applications”. In the right side panel the newly added software will be listed
Step 7: Import Device Drivers to the Deployment Share
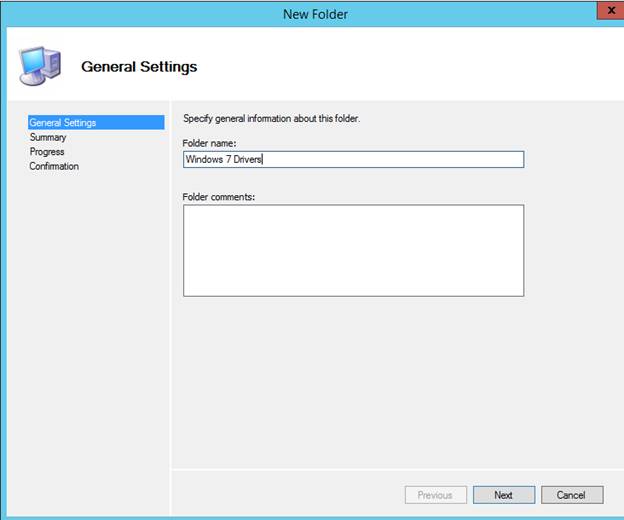
Go to Start Menu-> All Programs and open “Deployment Workbench”. In the left panel expand “Deployment Shares”, expand a Deployment Share Name (in the screenshot it is “MDT Deployment Share”), right click on “Out-of-Box Drivers” and click on “New Folder”
Type the Folder Name. Click on “Next”
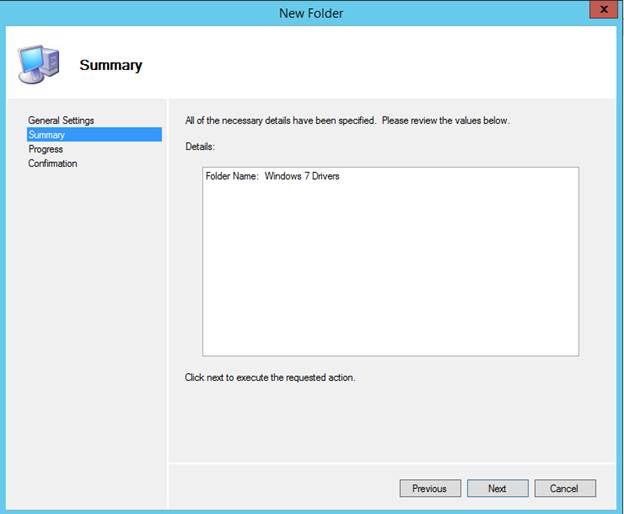
Click on “Next”
Click on “Finish”

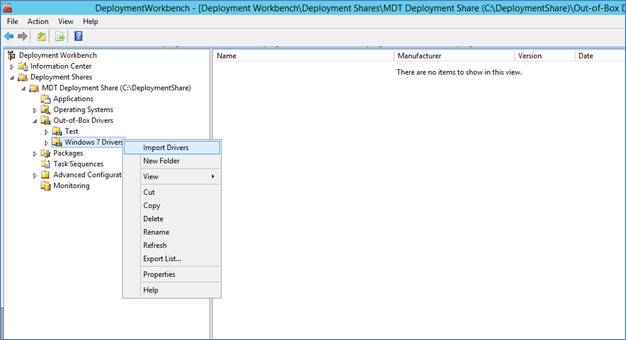
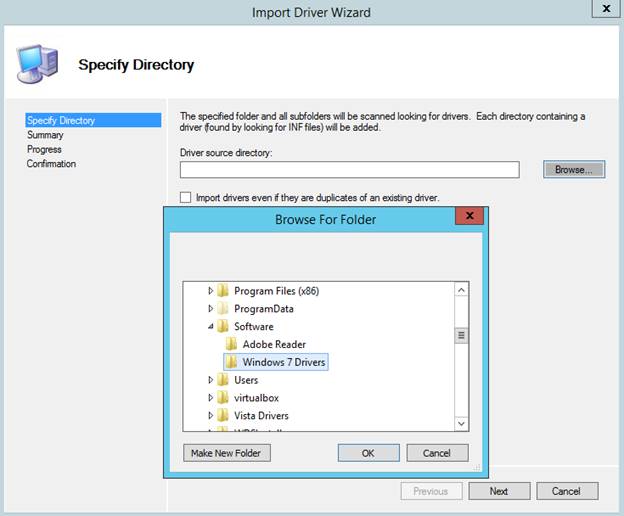
In the “Deployment Workbench” left panel under “Out-of-Box Drivers” right click on the newly created folder and click on “Import Drivers”
Click on “Browse”, select the folder containing the Driver Files and click on “Ok”. Click on “Next”
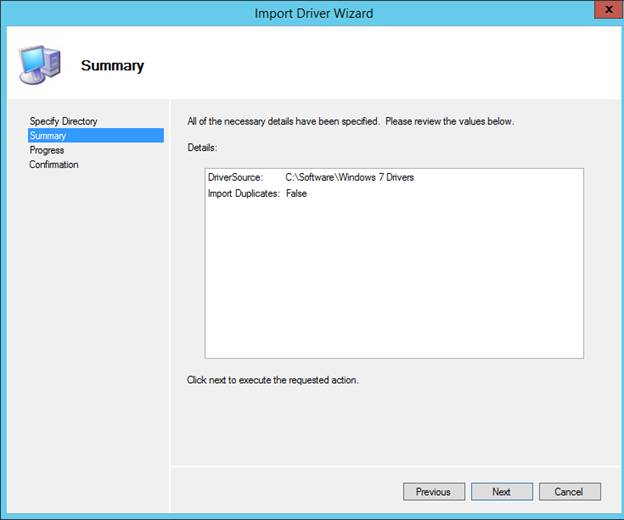
Click on “Next”
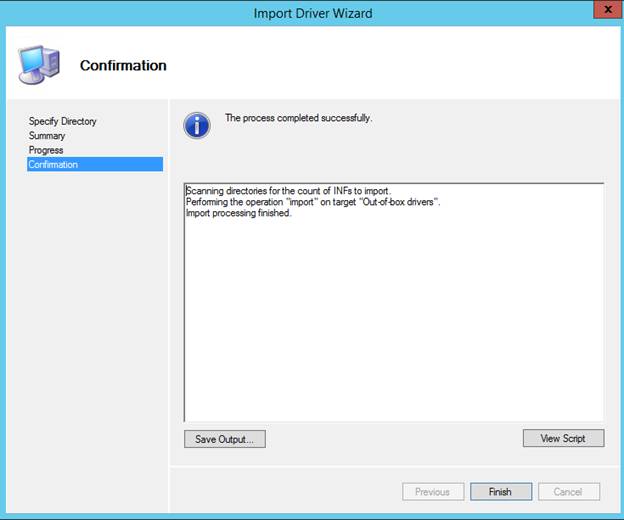
Click on “Finish”
In “Deployment Workbench” left side panel expand “Deployment Shares”, expand a Deployment Share Name (in the screenshot it is “MDT Deployment Share”), expand “Out-of-Box Drivers” and click on the New Drivers Folder (in the screenshot it is “Windows 7 Drivers”). In the right side panel the newly added drivers will be listed

Step 8: Install Windows Deployment Services (WDS)
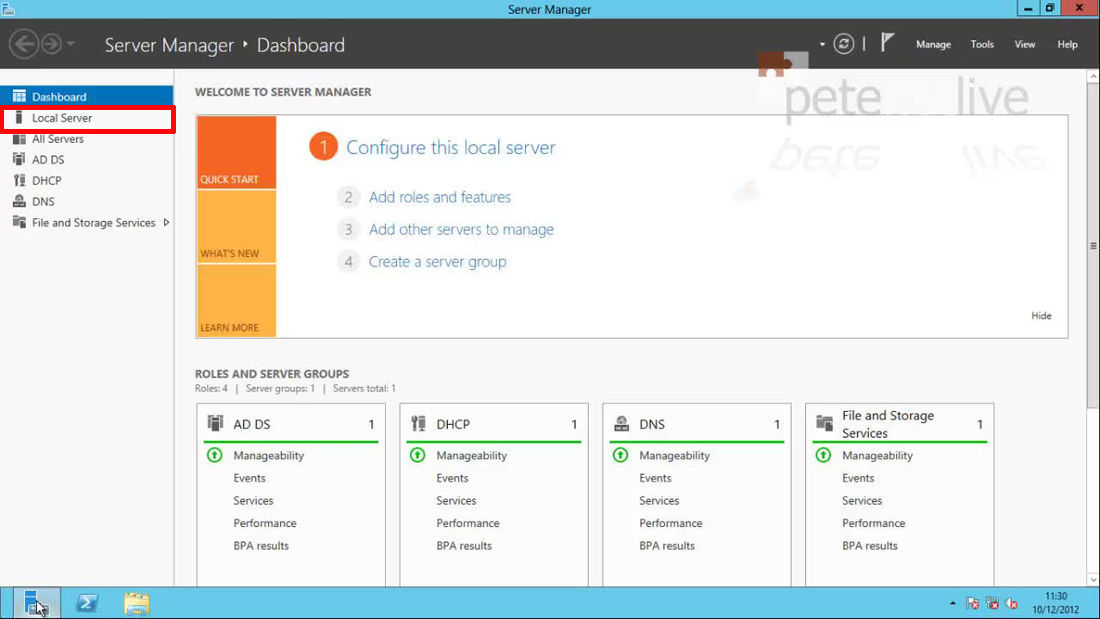
Open Server Manager (ServerManager.exe). In the left side Navigation Panel click on “Local Server”
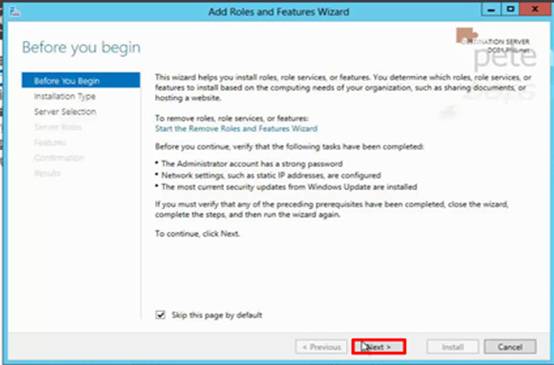
Click on the Manage Menu on the right side top corner and click on “Add Roles and Features”

Click on “Next”
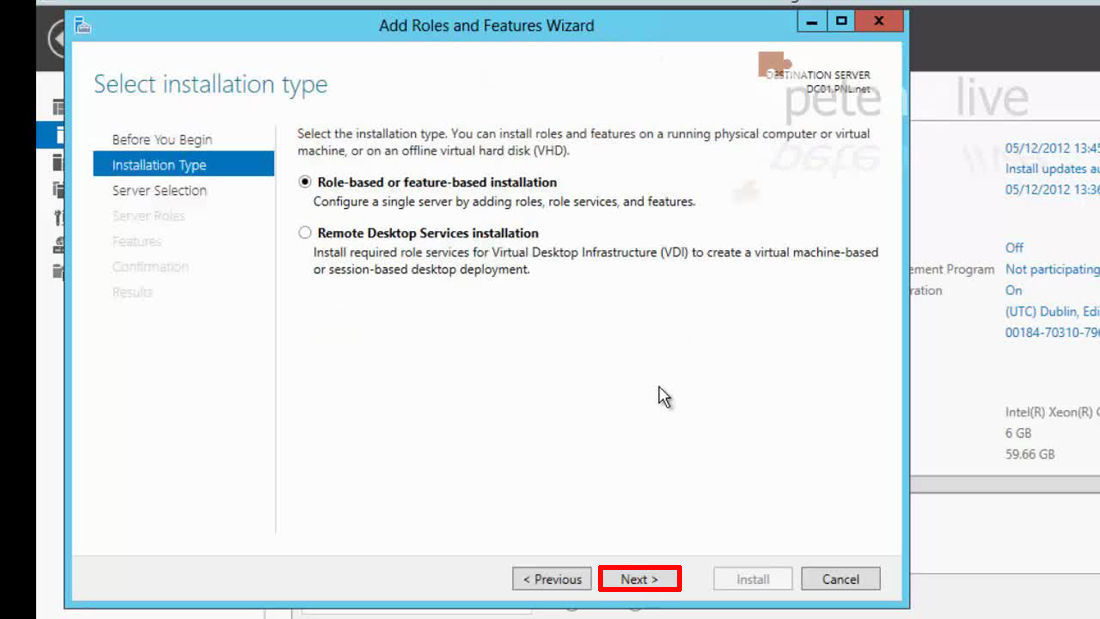
Select “Role-based or feature-based installation” and click on “Next”
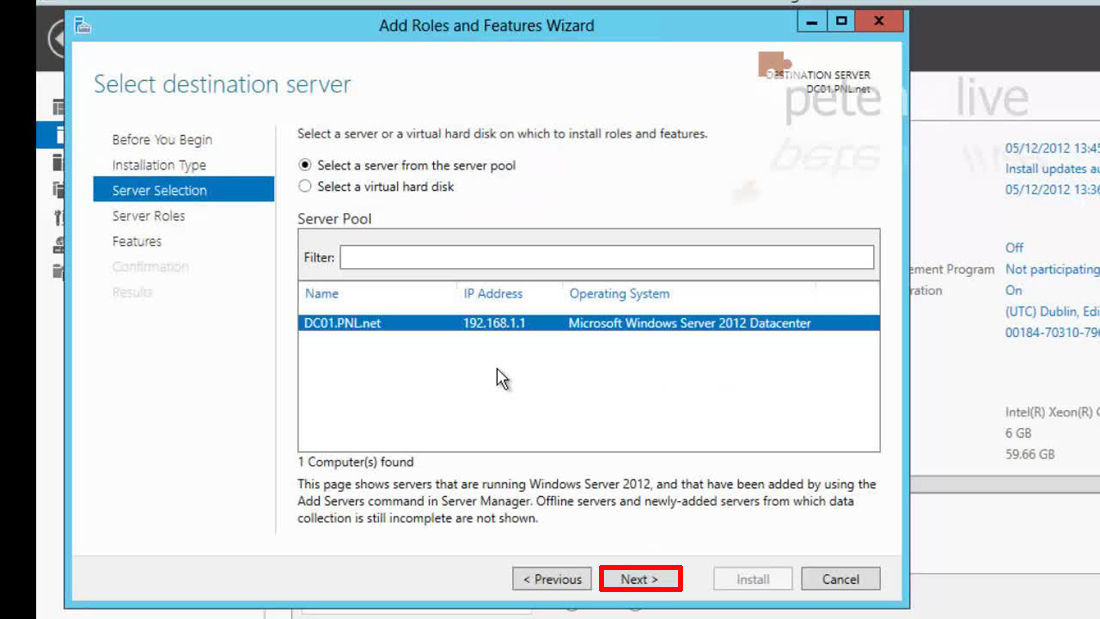
Select “Select a server from the server pool”. In the Server Pool select the local server. Click on “Next”
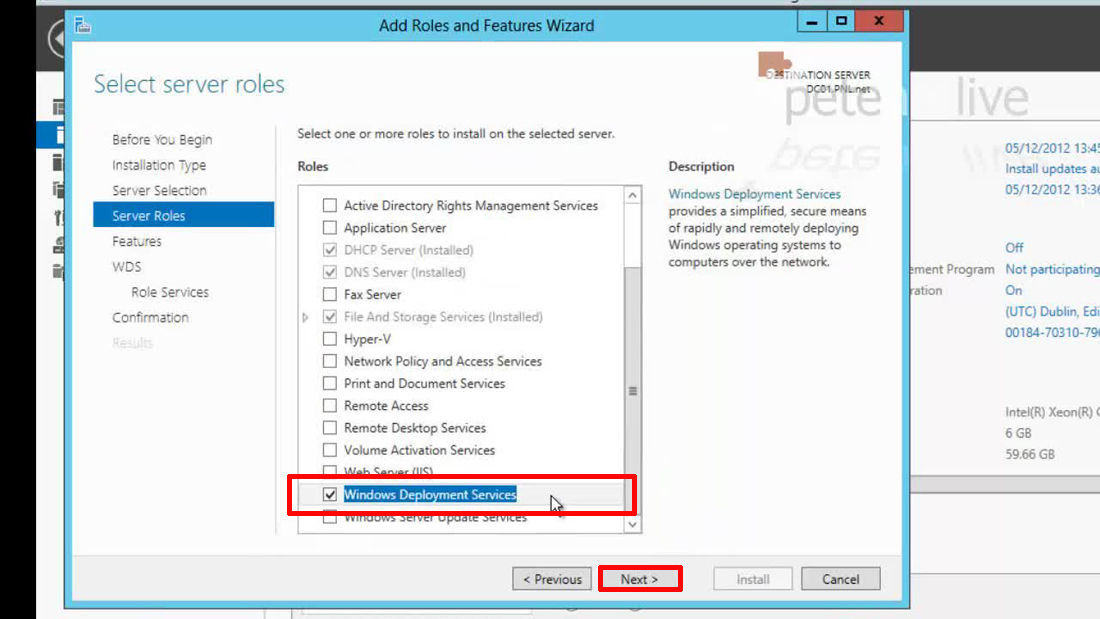
Select Windows Deployment Services. It will ask you to install the dependency roles. Allow it and click on “Next”
Click on “Next”

Click on “Next”
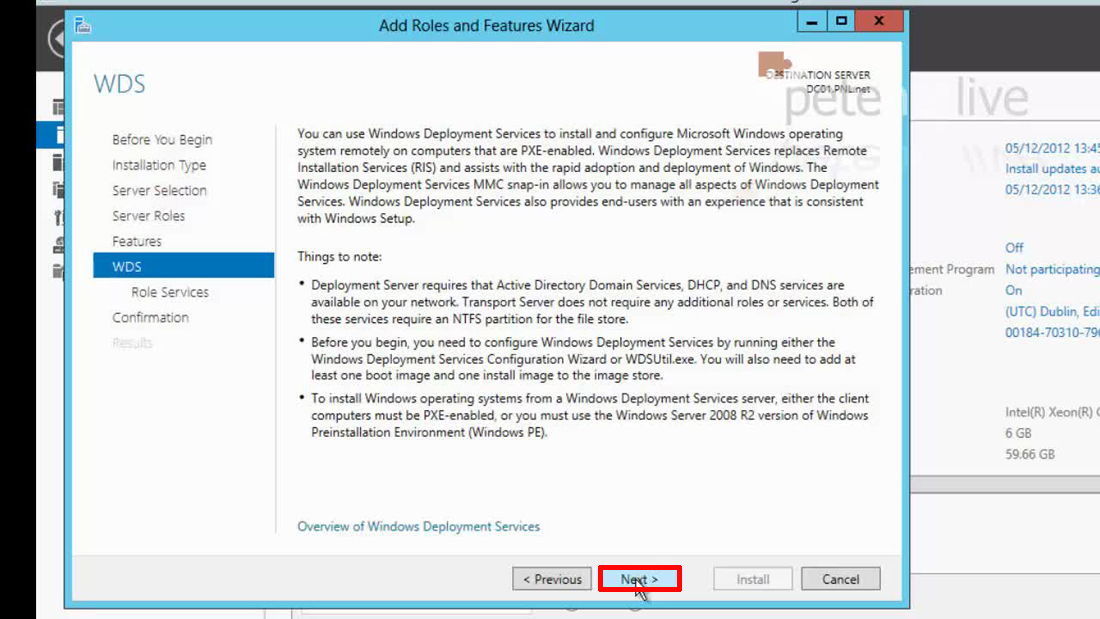
Select both “Deployment Server” and “Transport Server”. Click on “Next”

Click on “Install”

Step 9: Add WDS Server
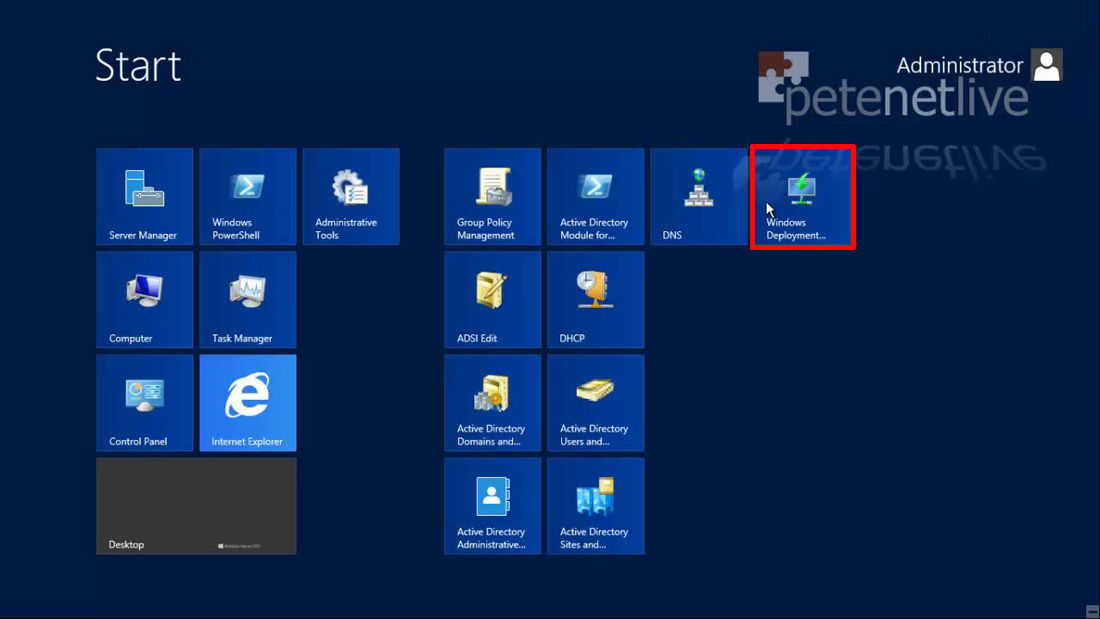
Go to Start Menu and open the Windows Deployment Services Management Console
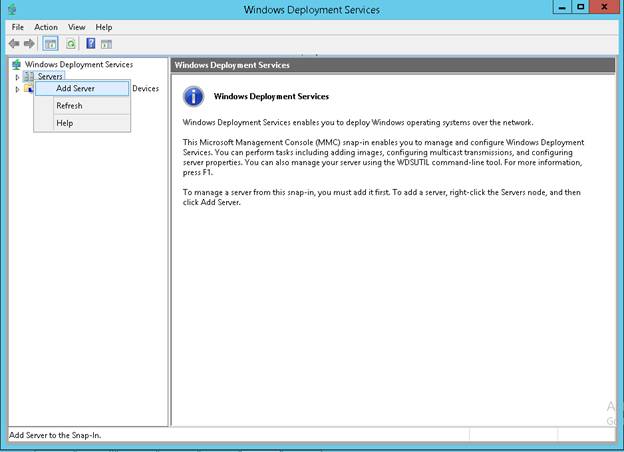
In the left side Navigation Panel right click on Servers and click on “Add Server”
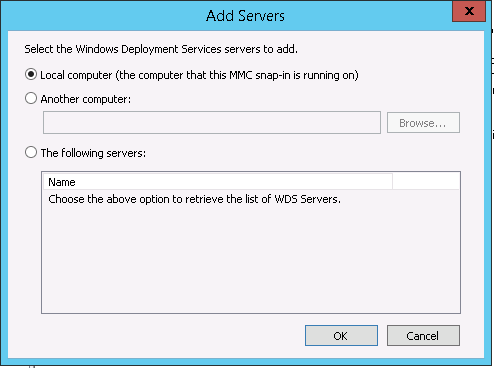
Select “Local computer” and click “Ok”
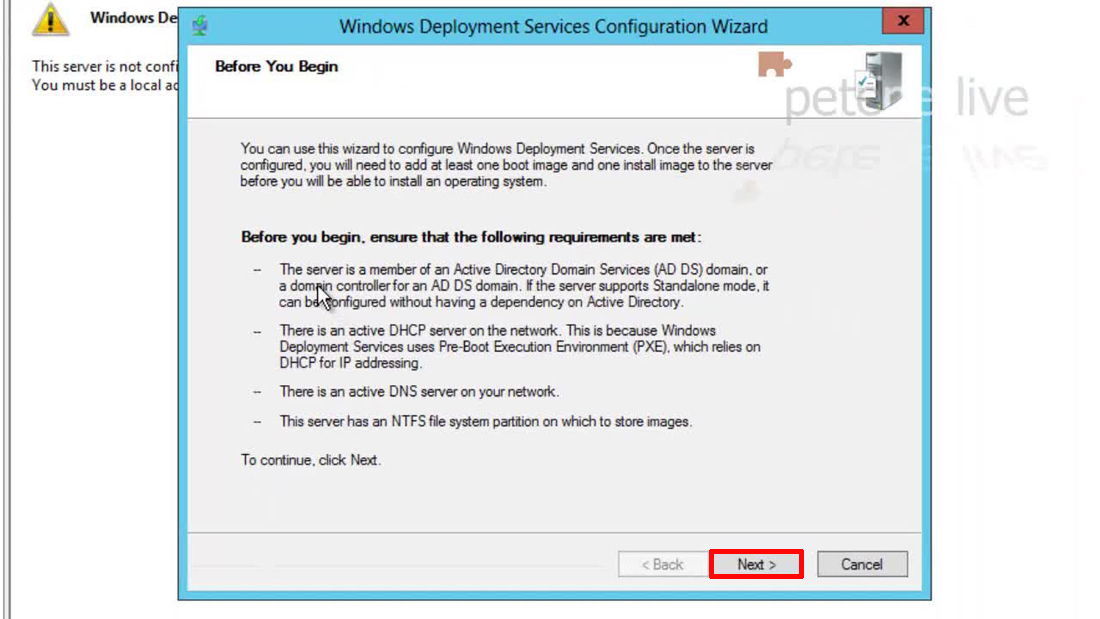
Read the prerequisites and click on “Next”
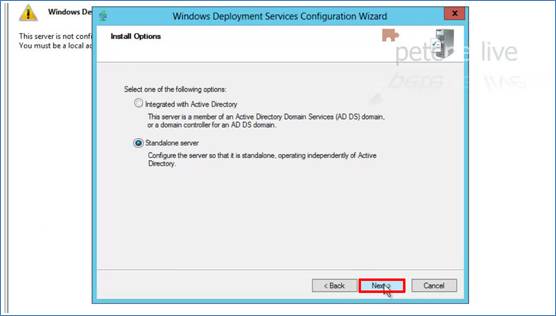
Select “Standalone server” and click on Next
In the WDS server, go to Windows Properties dialog box and select the PXE response policy
Select the boot policy settings
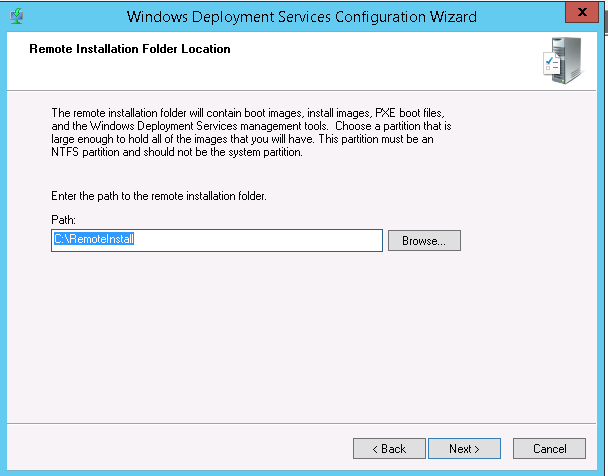
In the Windows Deployment Services Configuration Wizard, type the Full Physical Local Path of the folder in “Path” (e.g. c:\RemoteInstall) which will store the Boot Images, Install Images etc (If you have created a folder manually by yourself then you can click on “Browse...” to select the folder). Click on “Next”
Select “Respond only to known clients computers” and click on “Next”

This will start the WDS configuration. Once the configuration is completed click on “Finish”. Please do not check “Add images to the server now”

Open Windows Deployment Services Management Console. On the left side Navigation Panel expand Servers. Right click on a WDS Server, Go to All Tasks and click on “Start” to start the WDS Server

Step 10: Add Boot Image to the WDS Server
Open Windows Deployment Services Management Console. On the left side Navigation Panel expand Servers and expand a WDS Server. Right click on the “Boot Images” folder and click on “Add Boot Image…”

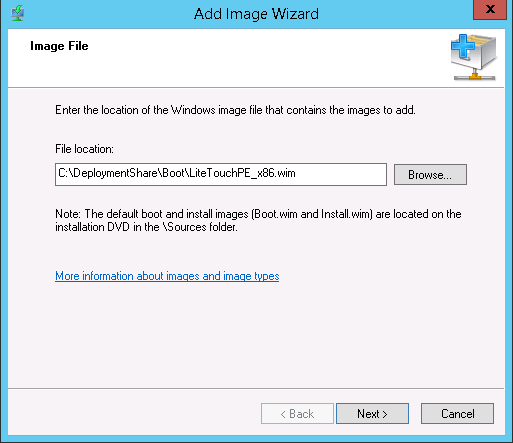
Click on “Browse…” and select the Windows Image File (.wim) from the “Boot” folder in the “Deployment Share” folder created in Step 2. Click on “Next”
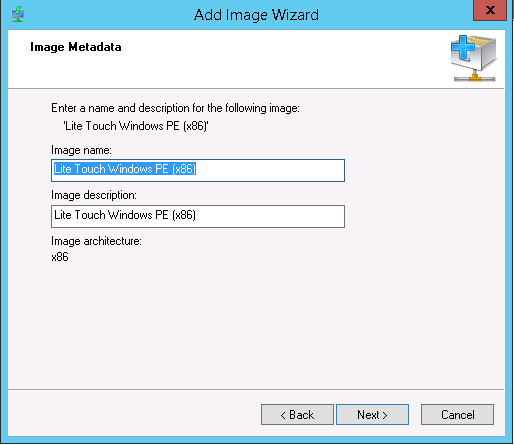
Type the Image Name and Image Description. Click on “Next”
Click on “Next”
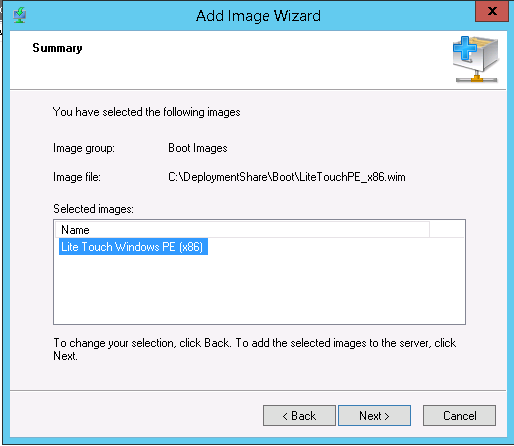
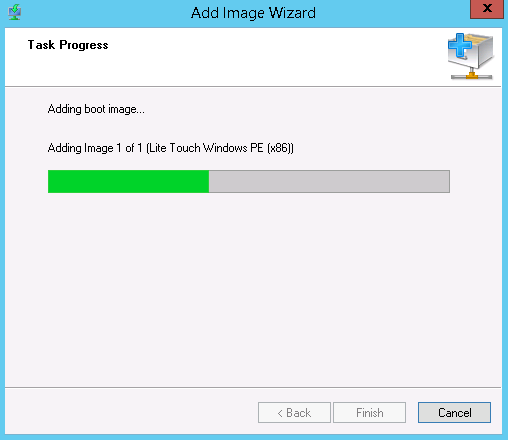
This will start the Add Boot Image task
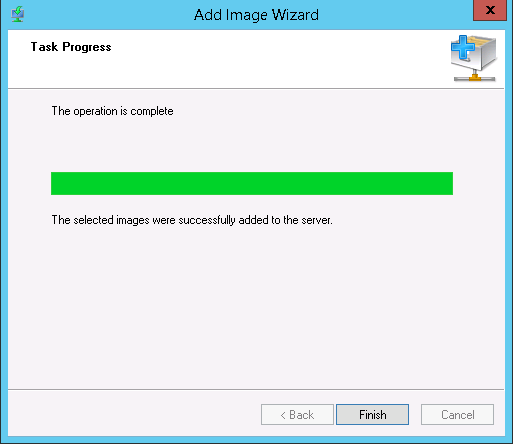
Once the task is completed click on “Finish”
Open “Command Prompt” (Run as Administrator). Type the command: “Wdsutil.exe /set-server /prestageusingMAC:yes” and press Enter
Step 11: Install DHCP Server (Optional Step. Should be configured only if DHCP Server is not present in the network)
Open Server Manager (ServerManager.exe). In the left side Navigation Panel click on “Local Server”
Click on the Manage Menu on the right side top corner and click on “Add Roles and Features”
Click on “Next”
Select “Role-based or feature-based installation” and click on “Next”
Select “Select a server from the server pool”. In the Server Pool select the local server. Click on “Next”
Select DHCP Server. It will ask you to install the dependency roles. Allow it and click on “Next”
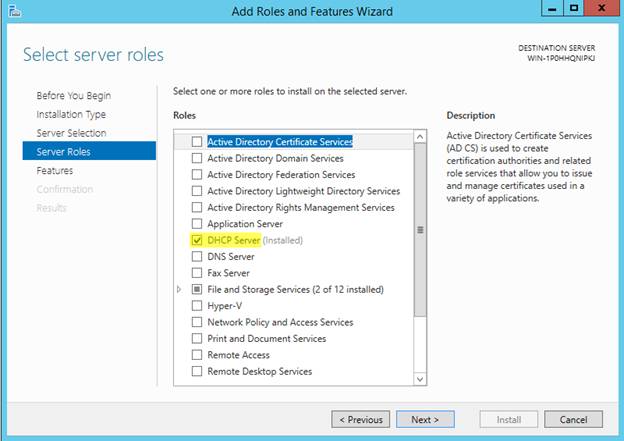
Click on “Next”
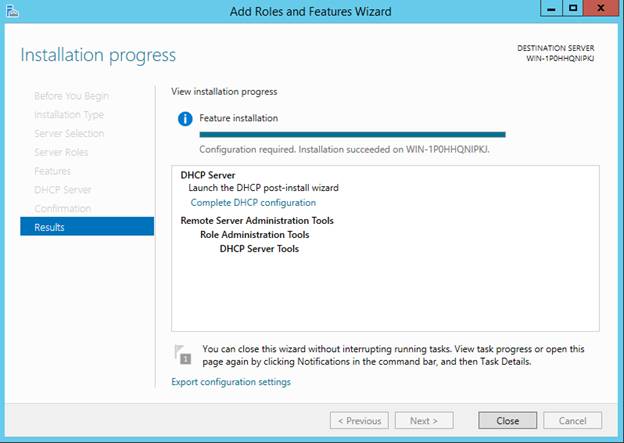
Click on “Install”
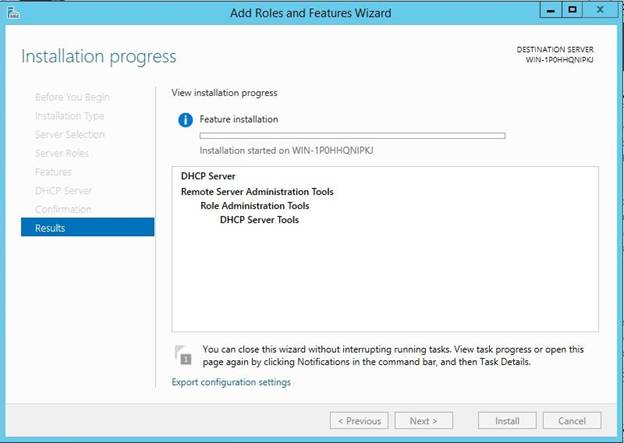
Click on “Close”
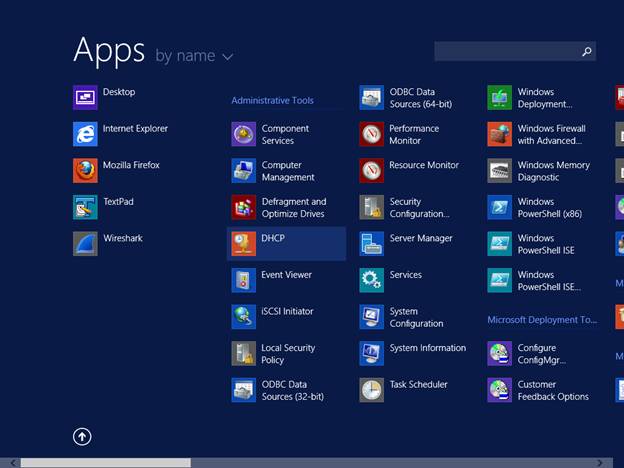
Go to Start Menu and open the DHCP Management Console
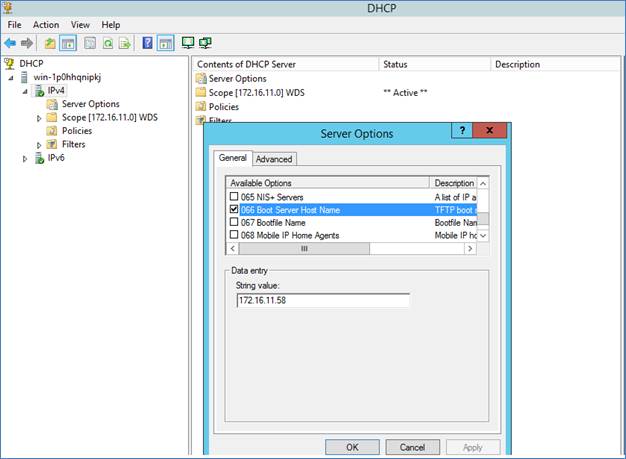
Expand the Active Scope, Expand IPv4. Right click on Server Options and click Configure Options…

Check option 066. In the “Data Entry” section in “String value” type the IP Address of the local server (i.e. WDS Server). Click on “Ok”
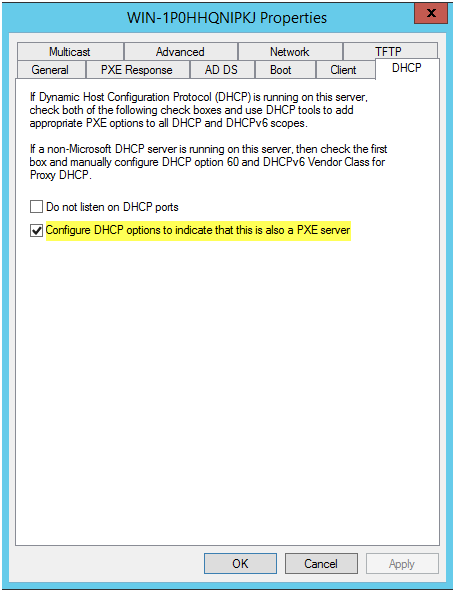
Step 12: Configure DHCP Settings for WDS
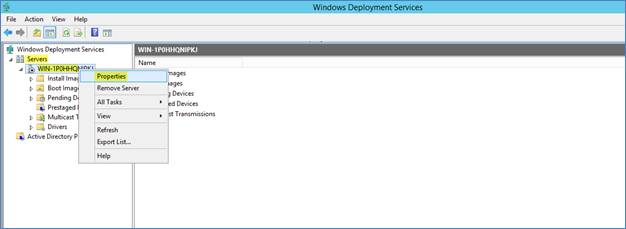
Go to Start Menu and open the Windows Deployment Services Management Console
In the left side Navigation Panel expand “Servers”. Right click on a WDS Server and click on “Properties”
Go to “DHCP” tab. If DHCP Server is installed on the WDS server then check the option “Configure DHCP options to indicate that this is also a PXE server”. If DHCP Server is present outside the WDS Server then uncheck this option. Click on “Ok”
Step 13: Install SapphireIMS OS Deployment Agent
Install MySQL ODBC Connector 64-Bit. (Copy and execute the file “mysql-connector-odbc-5.1.13-winx64.msi” from “pre-requisites\OSDeployment” folder present in SapphireIMS Server Installation folder)
Install Microsoft Visual C++ 2010 Redistributable 64-Bit. (Copy and execute the file “vcredist_x64.exe” from “pre-requisites\OSDeployment” folder present in SapphireIMS Server Installation folder)
Copy the file “SIMS_OSD.zip” from “<SapphireIMS Server Install Path>\SapphireIMS\ConsoleManagement\ExternalWar\SoftwareRepository.war” to the desktop of this “OS Deployment Server”
Extract the “SIMS_OSD.zip” file. This will provide a folder named “SIMS_OSD”. Open this folder
Open the file “SapphireSetTask.vbs” with Notepad. Search for “172.16.11.24” and replace it with the content as shown in the below screenshot (you will find this IP Address is two places):
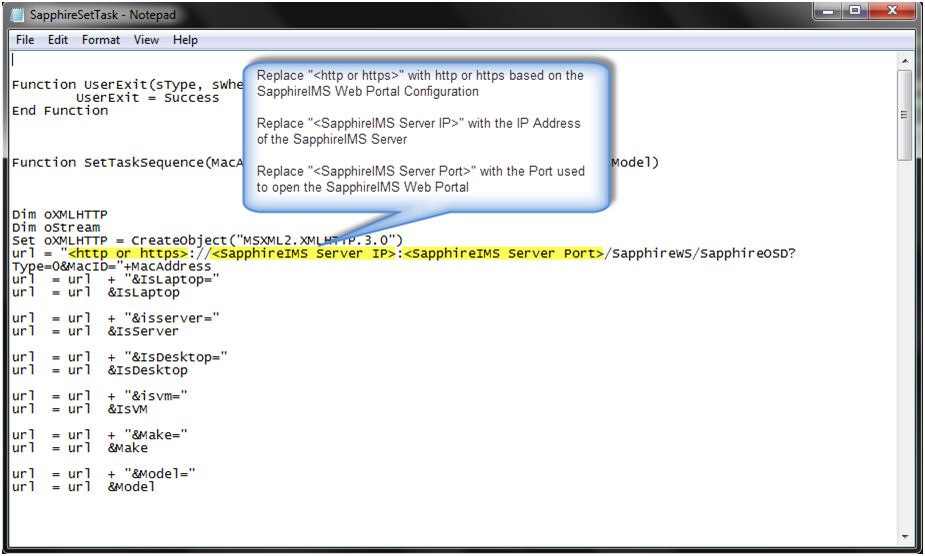
Copy the file “SapphireSetTask.vbs” and place it in the “Scripts” folder in “Deployment Share Path” (Please refer to Step 2 to find the “Deployment Share Path”)
Open Control Panel and search for “ODBC”. Click on “Set up ODBC data sources (64-bit)”. Go to “System DSN” tab and click on “Add”
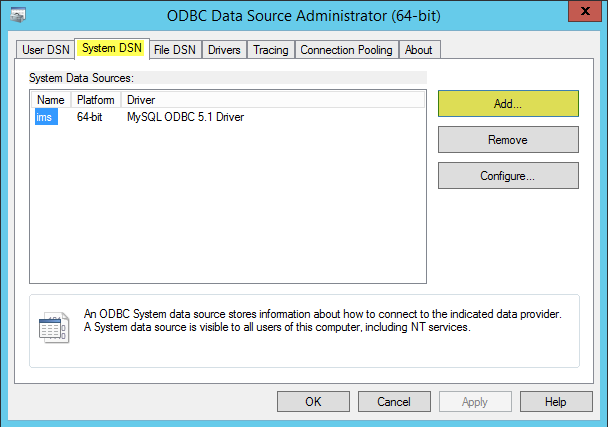
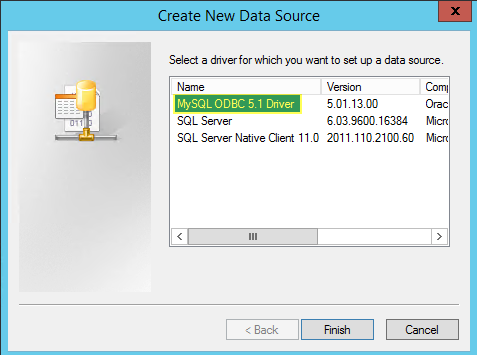
Click on “MySQL ODBC 5.1 Driver” and click on “Finish”
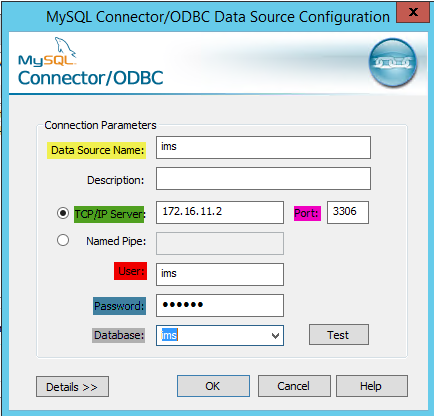
Provide the following information in the “MySQL Connector/ODBC Data Source Configuration” dialogue box:
Data Source Name: ims
TCP/IP Server: IP Address of the SapphireIMS MySQL Server
Port: Port of the SapphireIMS MySQL Server
User: ims
Password: ims123
Database: ims
Click on “Test”. If test result is successful then click on “Ok”
Execute the file “OSD_Agent_Install.bat” as Administrator and enter the following information:
Deployment Share Name
Deployment Share Path
OS Deployment Server IP Address
Windows Administrator Account User Name
Windows Administrator Account Password
Domain or Workgroup Name for the OS Deployment Server