![]()
![]()
SapphireIMS supports use of Bar code or QR codes for managing the assets physically. The code can be generated in a PDF document which can be printed on stickers. The stickers can be fixed to the asset. The asset can be then physically tracked using the bar code or QR code. SapphireIMS has a mobile application through which the sticker can be scanned and the asset can be verified. This is useful while conducting physical audits for financial reporting etc.
The following sections contain the details for configuring the Barcode or QR code.
Click on 'Assets' in the main 'Settings' screen. On the left hand menu click on 'Barcode/QR code Configuration'. The Bar code / QR code listing is displayed.

The list of currently configured Barcode and QR code is displayed. You can create a different type of Barcode or QR code for each asset type
To create a new Barcode click on 'ADD'. The configuration screen is displayed.
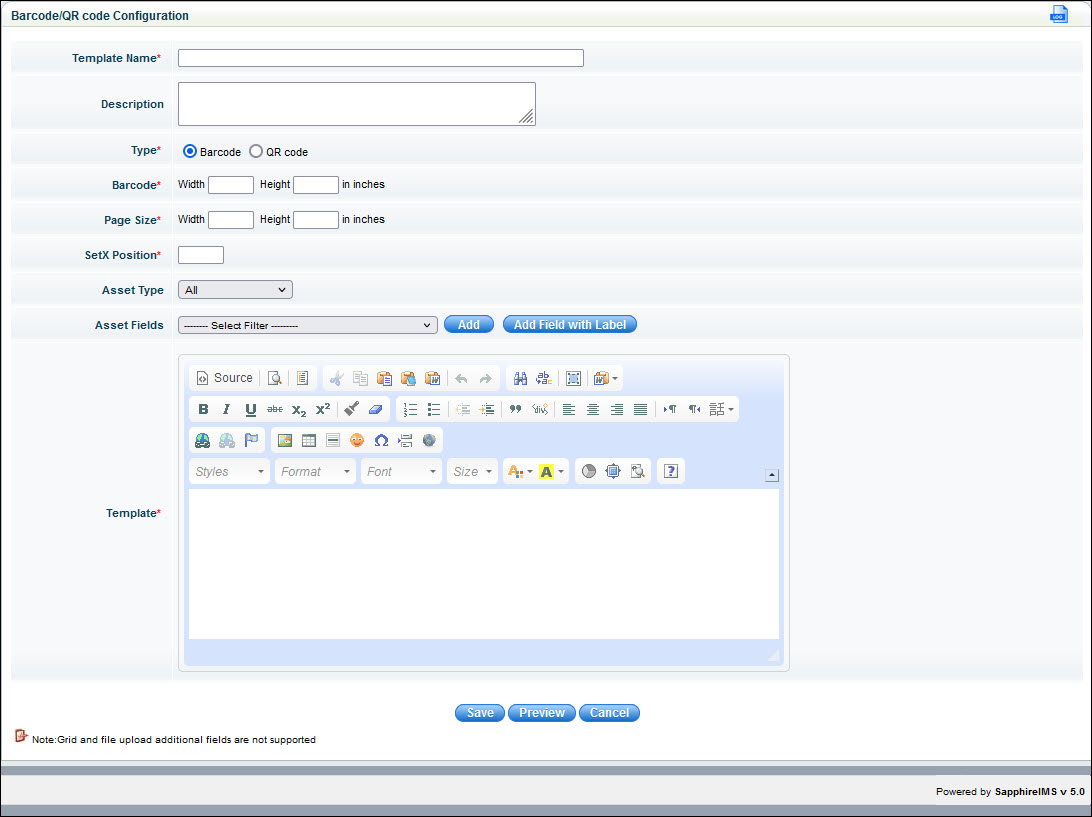
The fields for the bar code are described below.
|
Once the fields are entered, you can click on 'Preview' to view the format. Note that in the preview the macros appear as they are.
Click on 'Save'.
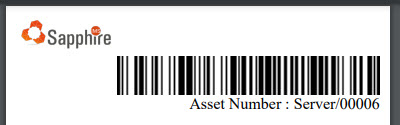
A sample Barcode generated is shown below.
SapphireIMS allows you to configure the QR code for assets.
To create a new QR Code click on 'ADD' in the listing screen. The configuration screen is displayed.
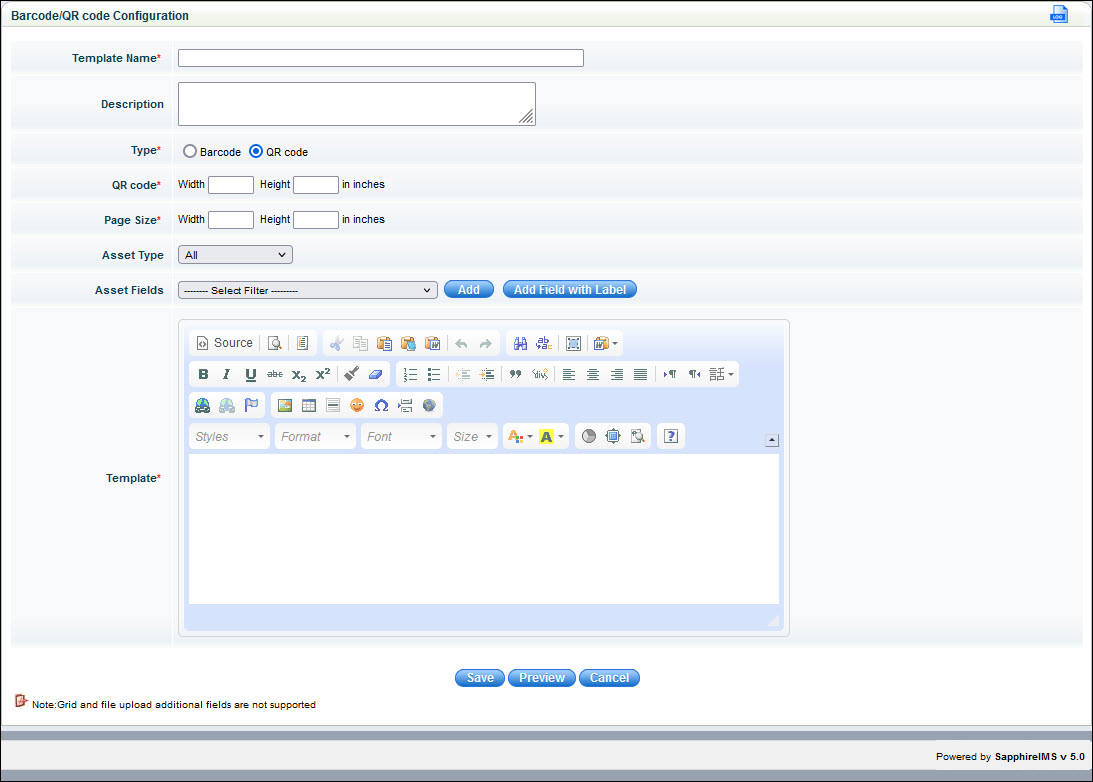
The fields for the QR code creation are described below.
|
Once the fields are entered, you can click on 'Preview' to view the format. Note that in the preview the macros appear as they are.
Click on 'Save'.
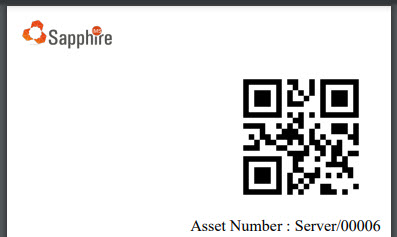
A sample QR Code generated is shown below.
 Note: You need to
select and add 'Barcode/QR code' field which is the place holder
for the barcode/QR code and without which the code will not be
printed.
Note: You need to
select and add 'Barcode/QR code' field which is the place holder
for the barcode/QR code and without which the code will not be
printed.