![]()
![]()
SapphireIMS provides an option to import the assets in your existing setup to avoid entering each asset manually. This list of assets can be imported into SapphireIMS from an Excel sheet by following the steps mentioned below. As a first step, a template needs to be generated. This can be manually populated and uploaded. You have an option to import the entire data (the first time) or update (incremental changes).
Click on 'Asset Import' under 'Service Desk Configuration' in 'Settings'. The asset import screen is displayed.
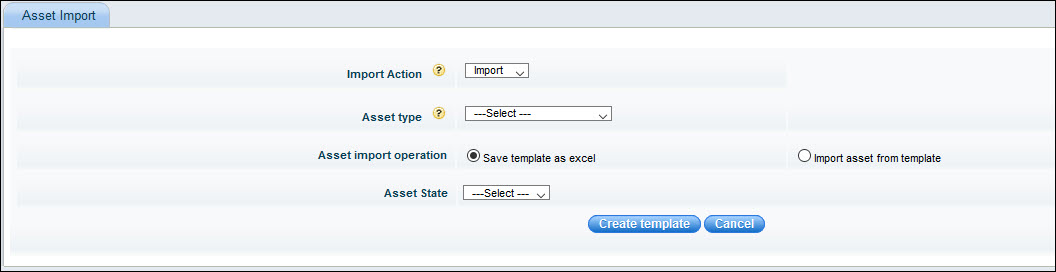
Select 'Import Action' as 'Import'.
Select 'Asset Import operation' as 'Save template as excel'.
Select the 'Asset type'.
Click on 'Create template'. An excel sheet is created with all the attributes for the asset type in columns. Mandatory fields are marked with an '*'.
Update the data in the excel and save in CSV format.
Click on 'Asset Import' under 'Inventory and Assets' in 'Settings'. The asset import screen is displayed.
Select 'Import Action' as 'Import'.
Select 'Asset Import operation' as 'Import Asset from Template'.
Select 'Username format'. While importing assets, an option is provided to import either the Username or Full name of the user. Username is the user login name.
Select the 'Inventory Linking format' which is either the name of the host or IP address of the host discovered through inventory. This value will be used for linking the inventory resource with the asset.
Select the 'Link with Inventory' option. If the option is 'Yes', the Inventory is checked for the corresponding resource. If the resource is found, the asset is linked with the inventory resource, else the asset is considered as a bad record. If the option is 'No', the asset is added without an inventory resource check.
Select the action to be performed on old asset records. You can either 'Preserve all old records' or 'Purge all old records'.
Select the action to be performed on import of a bad record. If an error occurs while importing a record, the record is termed as a ‘bad record’.
Click 'Browse' to select the asset template file which should be in CSV format.
Click on 'Save'.
Click 'Validate' to validate the asset data in the uploaded Asset Import Template File. If any Bad Record is found then an Excel File will be automatically downloaded with the bad record cells highlighted in “Red” color.

Click 'Execute' to complete the asset import process.
At the end of the import, a count of number of assets imported is displayed.
Click on 'Asset Import' under 'Inventory and Assets' in 'Settings'. The asset import screen is displayed.
Select 'Import Action' as 'Update'.
Select 'Asset Import operation' as 'Save template as excel'.
Select the 'Asset type'.
Select the 'Fields' of the Asset which need to be imported by moving it to the right side.
Click on 'Generate template'. An excel sheet is created with the selected attributes for the asset type in columns. Mandatory fields are marked with an '*'.
Update the data in the excel and save in CSV format.
Click on 'Asset Import' under 'Inventory and Assets' in 'Settings'. The asset import screen is displayed.

Select 'Import Action' as 'Update'.
Select 'Asset Import operation' as 'Update Asset from Template'.
Select the 'Asset type'.
Select 'Username format'. While importing assets, an option is provided to import either the Username or Full name of the user. Username is the user login name.
Click 'Browse' to select the asset template file which should be in CSV format.
Click on 'Save'.
 Note:
Contracts and CI can also be uploaded from a template. Select the corresponding
'Asset Type' as Contract or CI as the case may be.
Note:
Contracts and CI can also be uploaded from a template. Select the corresponding
'Asset Type' as Contract or CI as the case may be.