![]()
![]()
SapphireIMS allows you to send e-mail as well as SMS notifications related to any change in service desk records. Changes could be change in the state of the record, modifications to the record, addition or modification to enclosures or change in the work group. Notifications can also be sent for any event pertaining to Knowledge Base or Known Error Database.
After the templates are created (refer previous topic), you need to define the rules which specify in what states of the record the notifications have to be sent and to whom. SapphireIMS supports two different kinds of notifications, Specific and Info. Specific notifications are directed at the stakeholders for the record which include the Owner (person acting on the record), Submitter and Approval Manager. The Info notifications are for informational purpose only and can be sent to anyone mapped to a selected roles as well as external e-mail addresses. SapphireIMS allows you to configure separate templates for the two kinds of notifications.
The mail notifications are sent as per the notification rule configurations.
In the 'Settings' panel, click on the '+' sign to expand 'Email & SMS Notifications'. Click on 'Email Notification Rules' to display the Email Notification Rules configuration page.
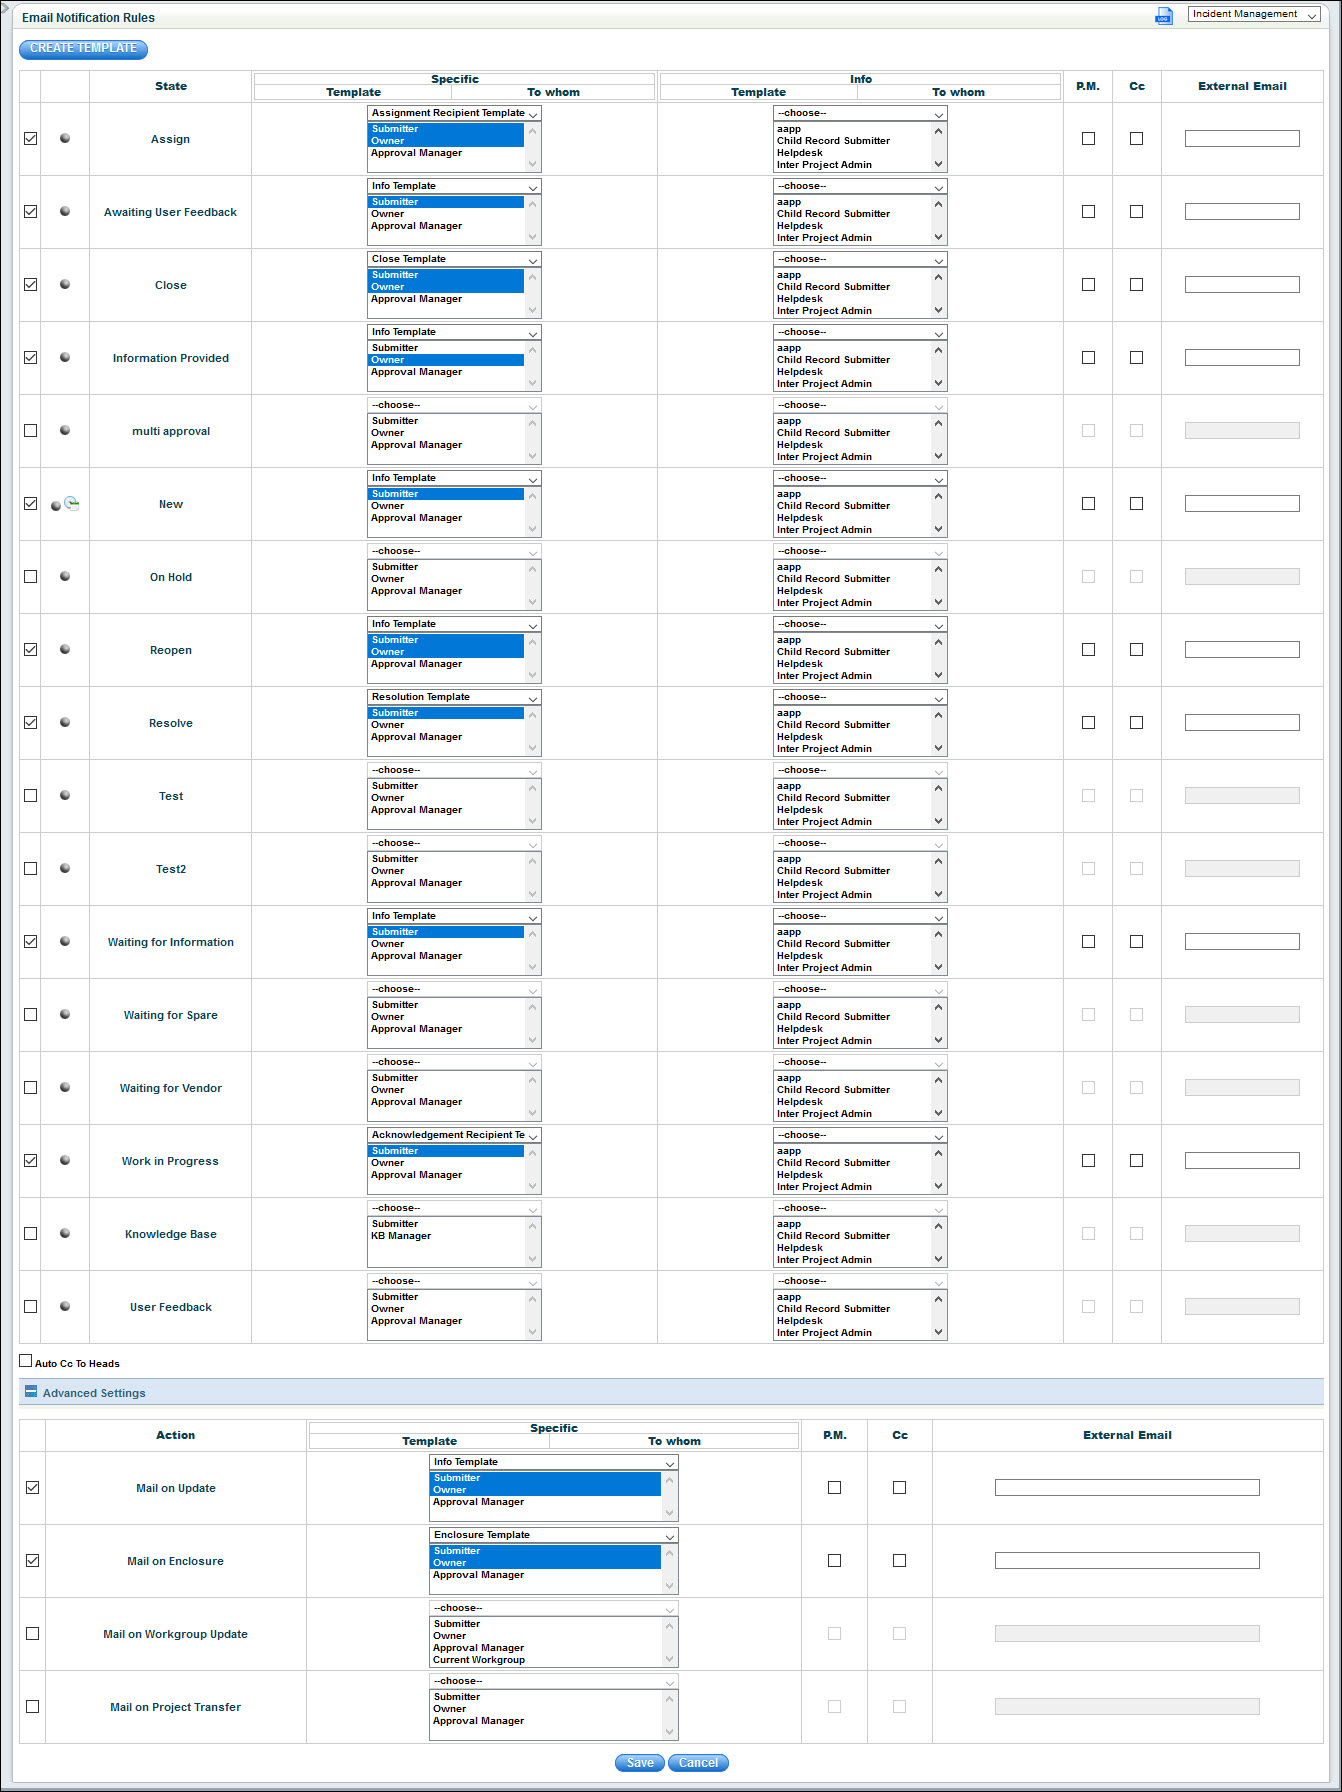
You can click on the 'CREATE TEMPLATE' button to create a new template.
The fields in the notification rule are described below.
|
Note: To configure
business notification during non-business hours when the record is in
"New" state, click on ' ' icon, select the
notification templates and the business hours and holiday profiles. If
non business hours profile is selected, then the e-mail notification is
sent only during non business hours, else the e-mail notifications are
sent during business as well as non business hours.
' icon, select the
notification templates and the business hours and holiday profiles. If
non business hours profile is selected, then the e-mail notification is
sent only during non business hours, else the e-mail notifications are
sent during business as well as non business hours.
To send attachments in e-mail communication on the state change of the service desk record, follow the steps below.
1. Click Service desk Settings > Config Settings
2. Enter Setting Value of Enable/Disable record attachments in e-mail communication as 1 to enable and 0 to disable attachments in e-mail communication.
3. Restrict the type of attachments allowed in e-mail by specifying Setting Value of the Type of attachments allowed in e-mail communications
You can customize a notification rule for all the states to use a custom script which further can include any or all of the service desk fields for notification purposes.
Use the class file and the property file mentioned below to perform the scripted action. These files are located in
‘<InstalledDirectory>\WebManagement\server\default\deploy\Sapphire.war\WEB-INF\classes\sapphire\mailroutingscripts’ directory.
Action Script = Class file name: ‘sapphire.mailroutingscripts.GetCustomEmailAddress’
Properties = Property file name: ‘SDMailNotificationScript.properties’
1. Select the notification template, specify the class name and the property file name as mentioned above.
2. Multiple class files and property files can be specified.
3. Contact the support team to obtain the property file as per your requirement.