![]()
![]()
SapphireIMS agent for Windows and Linux machines can be installed from the SapphireIMS server portal to a range of machines by specifying the IP address and server details of the destination machines.
Follow the below steps to install SapphireIMS agent on Windows machines remotely:
On the SapphireIMS menu, point to IT Automation and click Automation Tasks
Click Discovery and click Agent Installation
Sr. No |
Field Name |
Description |
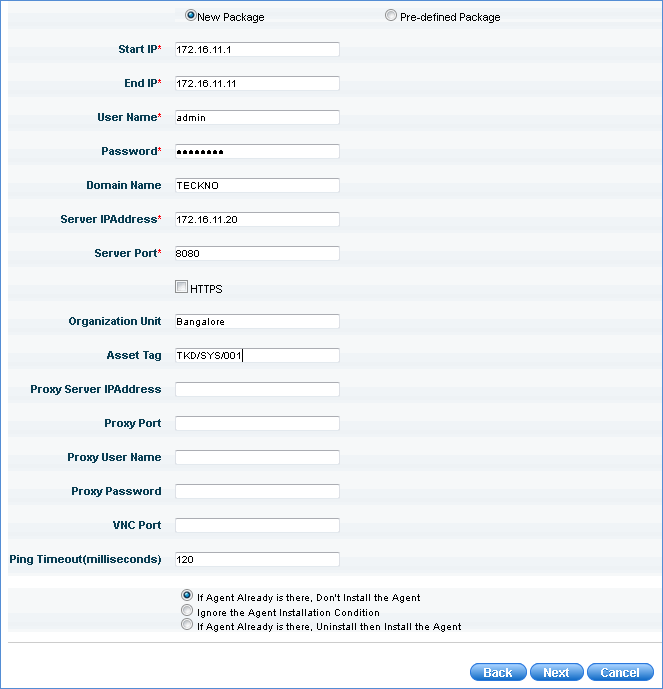
1
|
Start IP
|
Enter the start range of IP address for agent installation
|
2
|
End IP
|
Enter the end range of IP address for agent installation
|
3
|
User name and password
|
Enter the user name and password used to connect the target machines to SapphireIMS server for agent installation
|
4
|
Domain name
|
Enter the domain name for the range of systems
|
5
|
Server IP Server Port
|
Enter the SapphireIMS server IP address and port number in which the server is running
|
6
|
HTTPS
|
Check this box if the installation has to be performed securely
|
7
|
Organization Unit
|
Select the OU to which the target machines belong to
|
8
|
Asset Tag |
Enter the asset tag provided to the target machines at the time of discovery
|
9. Proxy Server Details - Enter the IP Address, port, user name and password if the agent machines need to connect to SapphireIMS server via a proxy server
|
||
10 |
VNC Port
|
Enter VNC Port number to enable remote access for the machines Note: This is related to remote access of the agent machines and not considered by the installer.
|
11
|
Ping Timeout
|
Enter 'Ping Timeout' in milliseconds to declare an IP address as 'System Unreachable'
|
1. Select option for agent installation.
2. Click Next
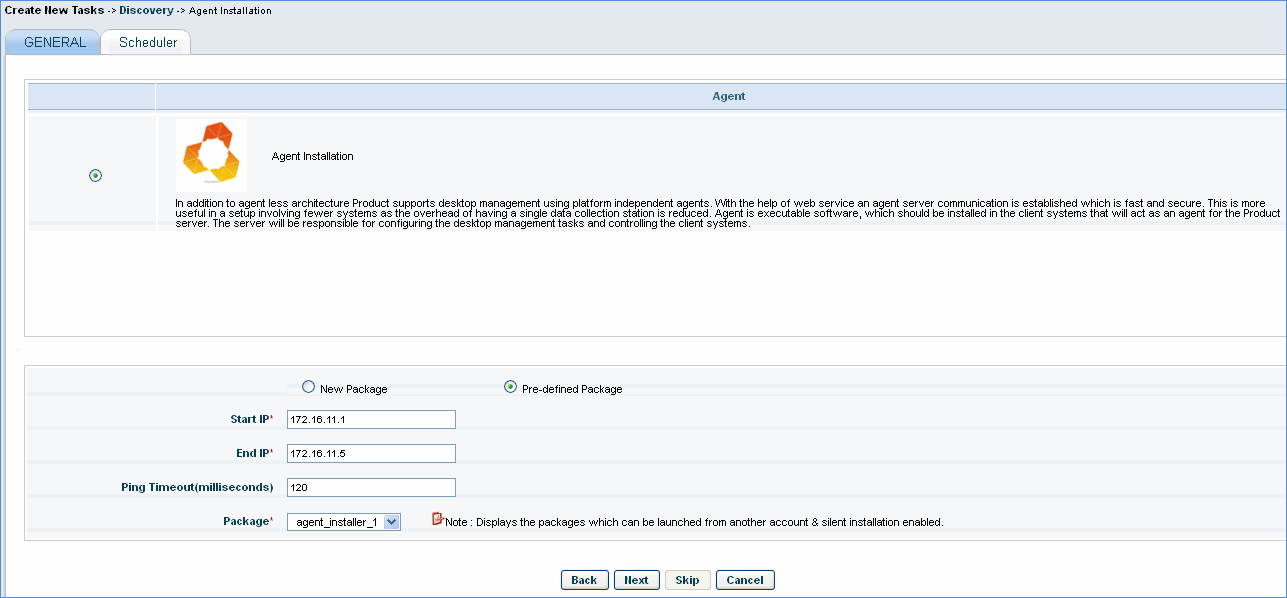
Enter Start IP and End IP of the nodes on which agent installation has to take place.
Enter 'Ping Timeout' in millisecond to declare an IP Address as 'System "Unreachable'
Select the pre-defined agent installation package and click ‘Next’
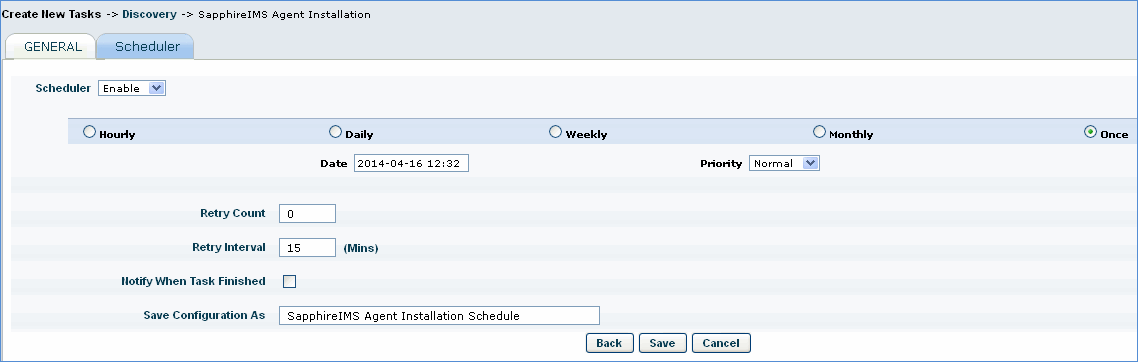
1. Select the schedule for agent installation.
2. Notify To: Check this box if any notification has to be sent after agent installation.
3. Enter agent installation configuration name and click Save