![]()
![]()
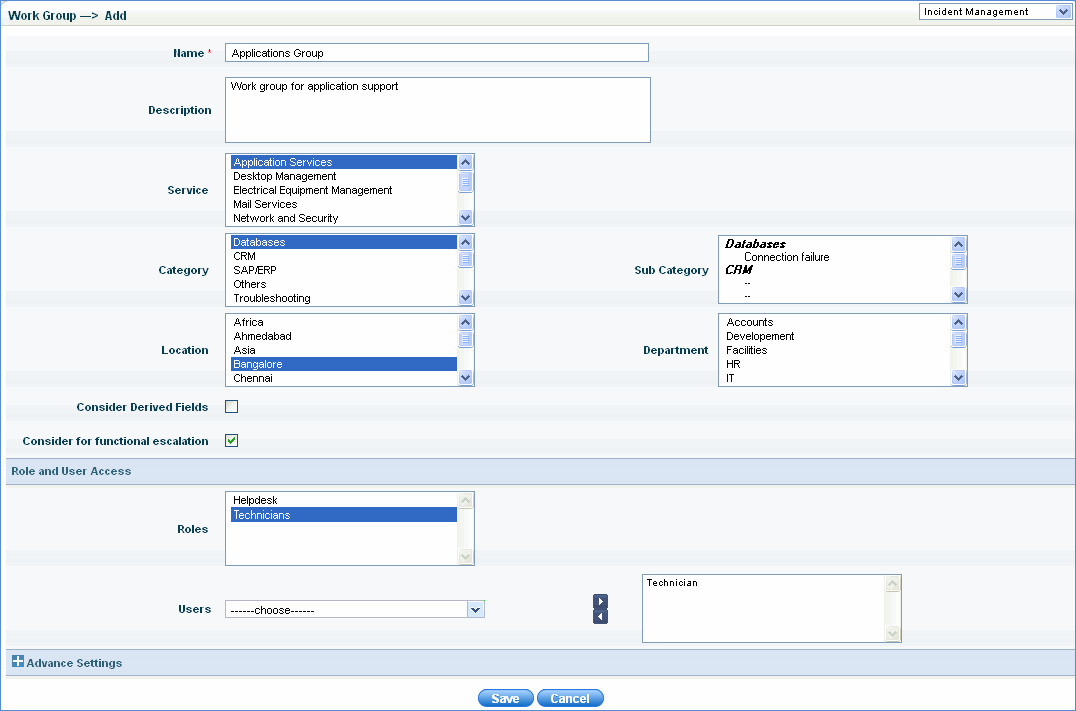
Work group is useful for grouping services, categories, locations and roles. For example, only 'Application Service' related records can be moved to 'Application Group'.
Also, a work group can be functionally escalated.
This feature is useful to configure privileges to a group of people to work on the service desk record.
Follow the steps below to configure the work group rule to include a service, category, sub category, location or department as mentioned below.
1. To enable display of the 'My Workgroup' tab, click ‘Config Settings ’and locate the variable ‘Enabling Group Assign Feature in Service Desk’. Enter the ‘Setting Value’ as 1.
2. In the 'Settings' panel, click on the '+' sign to expand 'User Role Management'. Click on 'Workgroup' to display the Workgroup listing page. Click 'ADD' to define a rule.
| ||||||||||||||||||||||||||||||||||||||||||
Note: 'My Work Group' tab will be visible only if the user has ‘Approval Manager’ or ‘Technician’ role allocated.
Once a work group is defined, the tickets related to the service/category are visible to the users with the work group access. Refer to the image below.
E.g. the records 'INC-068’, 'INC-067', 'INC-063' and 'INC-045' are submitted automatically in the technicians ‘My Work Group’ tab as these records are submitted in the service 'Application Services' which matches with the defined work group rule in the above image
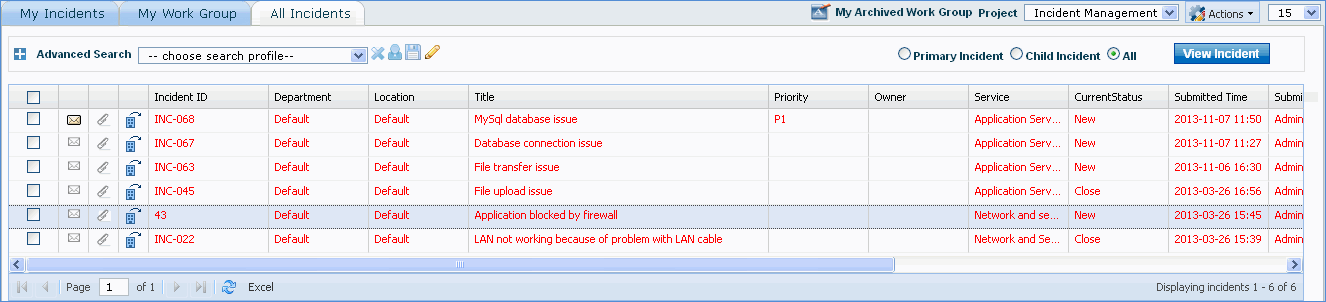
Click the record to display the ‘Edit Request’ screen. Refer to the ‘Work Group’ field. The work group rule defined will be selected by default as the record submitted matches with the rule defined.
Note: Go to Home > My Home to view the workgroup dashboard for the work group manager
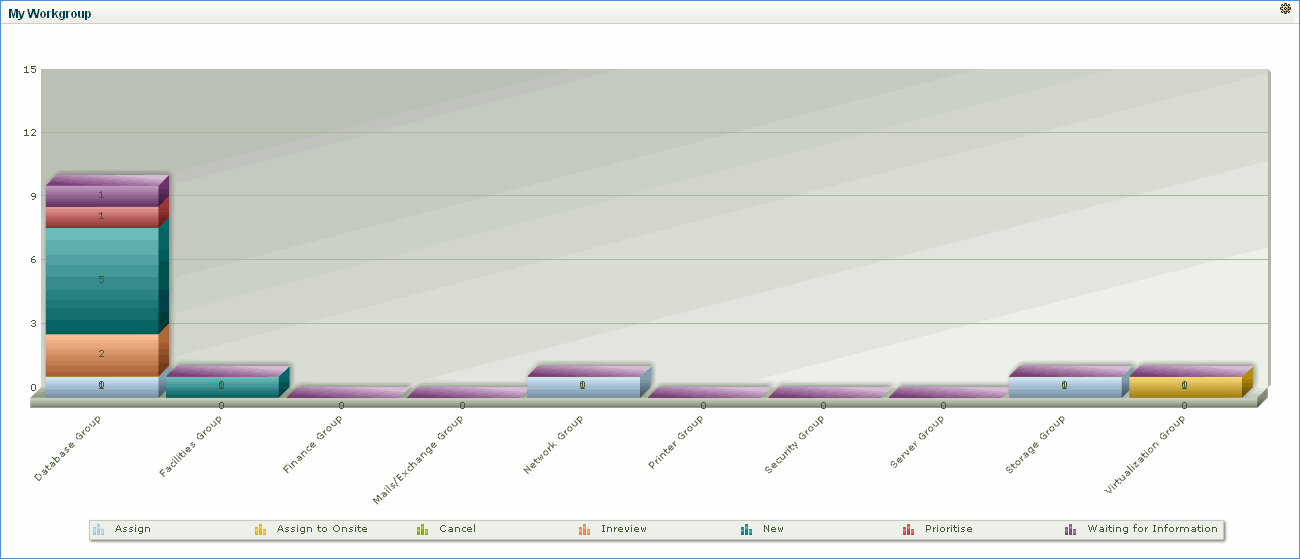
The dashboard displays the number of tickets in each state for a particular work group. Click a state to view the tickets belonging to that state.
 Note:
Note: