![]()
![]()
As part of the service delivery process flow you may encounter the need for collecting more inputs as part of the service desk record. The built-in fields provided as part of SapphireIMS may not be enough to achieve this. You may require additional fields to be defined as per your process needs.
To achieve this, SapphireIMS provides a standard list of custom fields. The following section explains how to create custom fields and also use the same as part of specific service desk records.
In the 'Settings' panel, click on the '+' sign to expand 'Fields & Forms'. Click on 'Additional Fields' to display the Additional Fields configuration page.
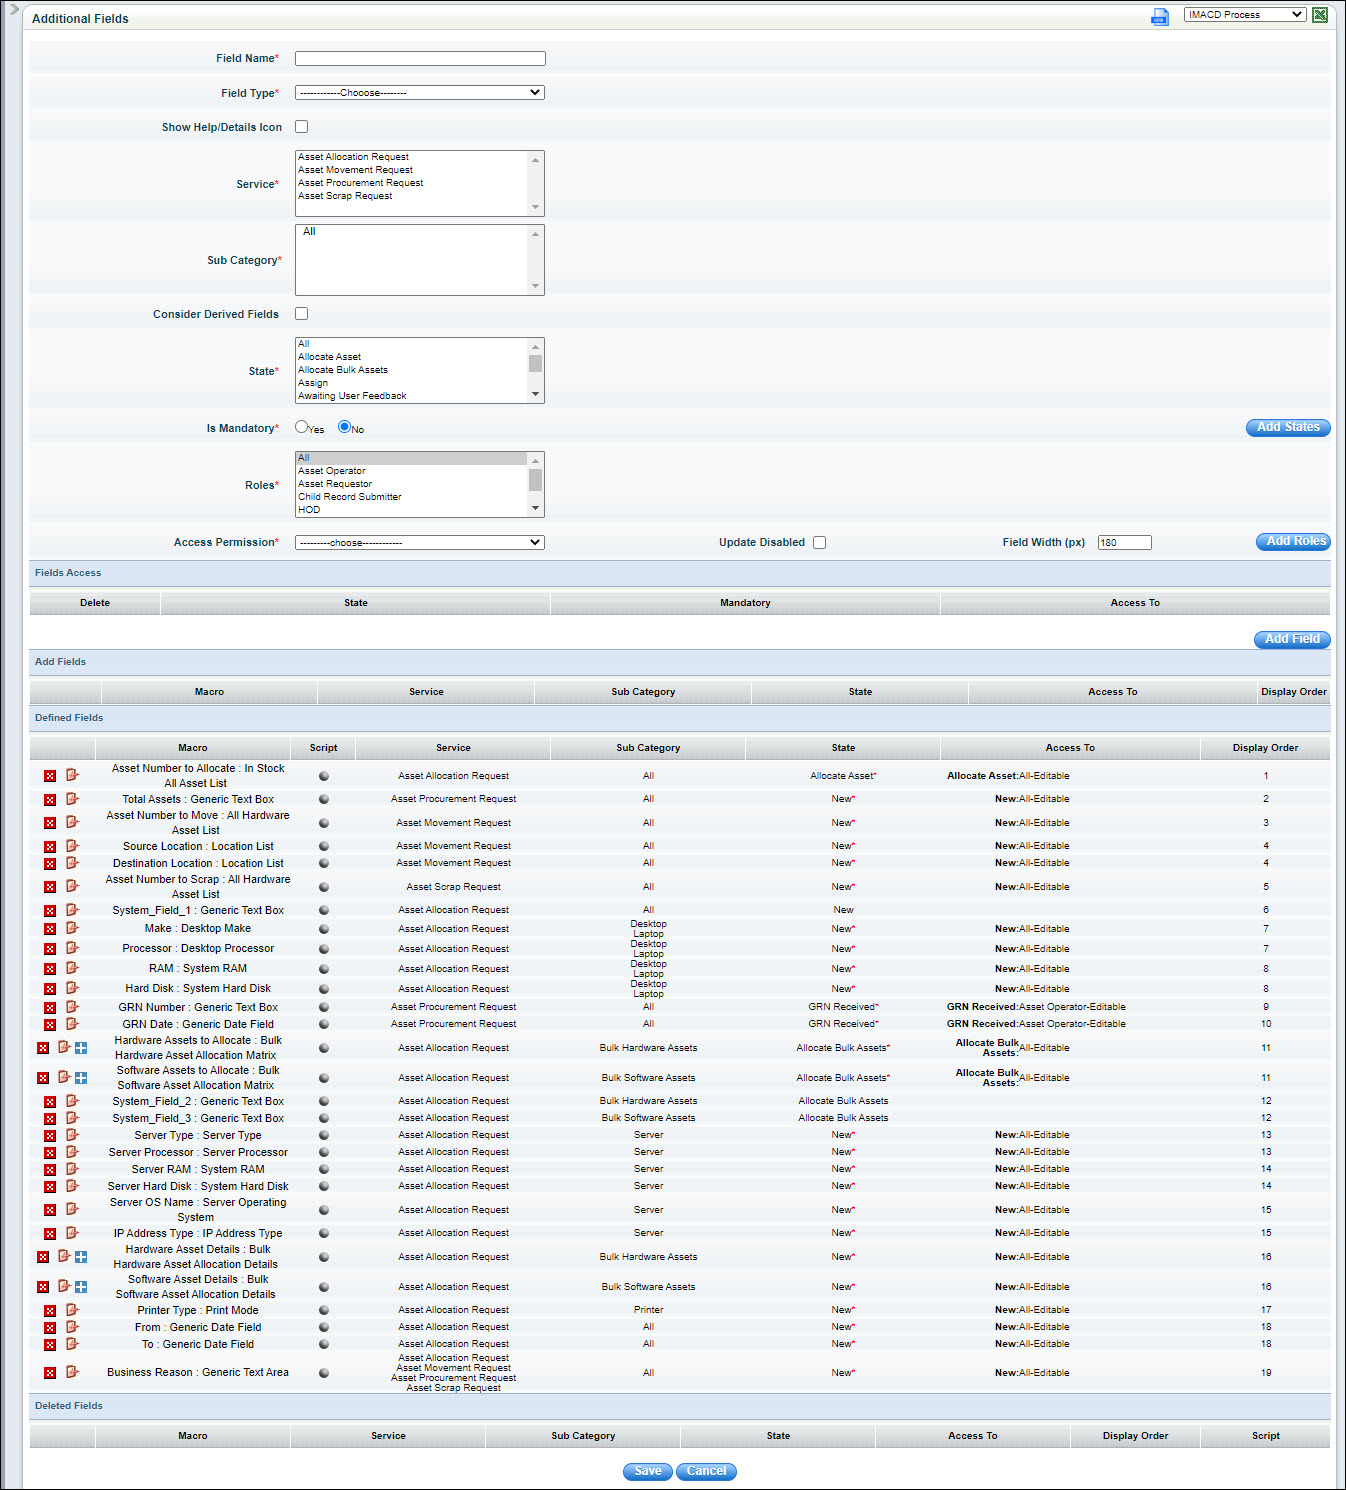
The fields are described below.
|
Notes:
1. Additional fields are presented to the user while submitting a new service desk record based on the roles that are selected at the time of configuration as shown above
2. Click 'Save' to
save additional fields and click the sign '![]() ' in the
delete column to delete the additional field from the list.
' in the
delete column to delete the additional field from the list.
3. To enable the asset search option for additional fields, the 'Field Type' should be either 'Select Box or Searchable Multi Select Box. See Form Fields. This will list the asset numbers from asset management in 'Submit Request' page or 'Edit Request' page.
Asset fields can be selected as service desk additional fields. To select asset field,
1. Enter the asset 'Field Name' and select the asset 'Field Type' from the list.
2. Check 'Is Asset Field' box and select the asset field from the 'Asset Field' drop down.
Though ‘Attachments’ is a fixed field in Sapphire IMS, it can be configured as invisible to users, and defined as an additional field.
1. Click Service desk Settings and click on the '+' sign to expand Fields & Forms. Click Fixed Fields. Clear Attachments ‘visibility’ and ‘child visibility’ check boxes and click Save.
2. Create a new custom field as 'File Upload' as shown below. See Form Fields
3. Define File Upload as an additional field and provide access permissions only for required states and roles.
1. From 'Field Type' drop down, select the desired grid control and click 'Add Field' button after adding the states, roles and access permissions.
2. In the 'Defined Fields' section, click the plus sign next to the grid control. The columns for the grid control are displayed.
3. Click the 'Edit' icon to change the grid column configuration.
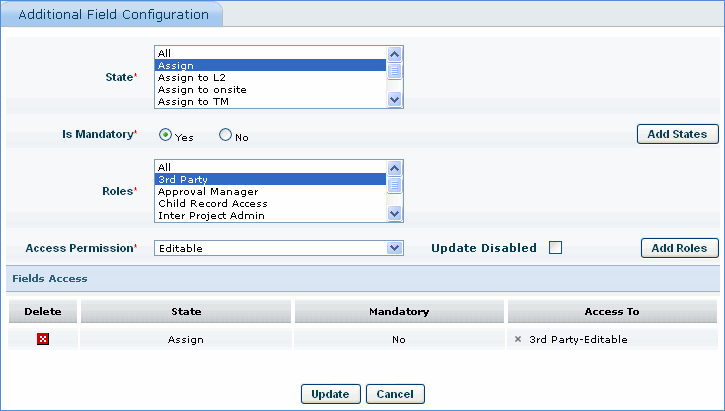
4. Change the state, roles, required property or access permission for the grid control column and click 'Update'. Similarly you can change the properties of the other grid control columns.
 Note:
Note: