![]()
![]()
SapphireIMS supports the use of MeshCentral tool for remote control. MeshCentral is an open source Remote Management software. MeshCentral has been integrated with SapphireIMS so that remote access can be directly taken from within SapphireIMS. This topic details the steps to install MeshCentral and the integration components as well as the configuration needed to make it work with SapphireIMS.
MeshCentral involves the MeshCentral Server to which the end nodes should have connectivity. A Mesh agent is installed in each of the end nodes. The Mesh agent can be deployed on all end nodes using a SapphireIMS script job. A diagram of how MeshCentral works with SapphireIMS is shown below.
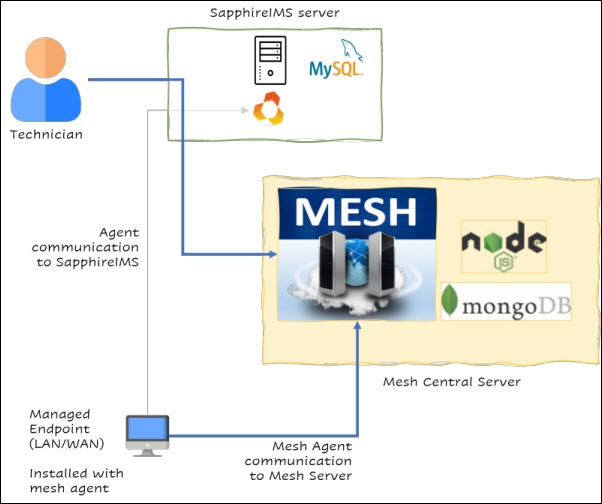
The Technician can use the browser as the viewer. Remote control works with in the local network as well as across the internet.
The MeshCentral server can be installed on a separate server or the same server running SapphireIMS. MeshCentral needs 4Gb RAM and 25Gb disk space at the minimum.
One port needs to be opened for the MeshCentral agent to communicate with the MeshCentral server.
An exception rule may need to be configured in the antivirus software running on the end node to allow the Mesh agent to run.
Download MeshCentral from https://www.sapphireims.com/patches. Depending on the OS version of the server on which MeshCentral will be installed, you may need to download the appropriate zip file.
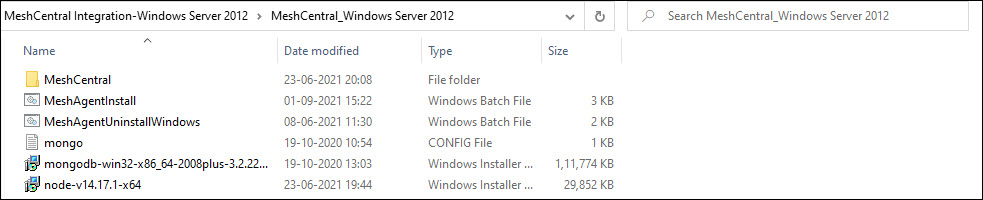
Unzip the file and extract the contents into a folder. For Windows 2012, the contents are as shown below.
For Windows 2016, the contents are as shown below.

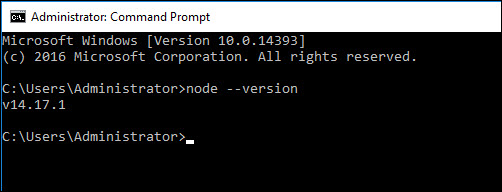
The first step is to install Node.js. Run 'Node-v14.17.1-x64.msi' which is the Node.js installer.
Once the installation is complete, verify that Node.js is running by typing in the command 'node --version'.
Next, install MongoDB. On Windows 2016, run 'mongodb-win32-x86_64-4.4.6-signed.msi' which is the MongoDB installer. On Windows 2012, run 'mongodb-win32-x86_64-2008plus-3.2.22-signed.msi'.
During installation, you are prompted to select the 'Setup Type'. Select 'Complete' and proceed by clicking 'Next'.
If installation is being done on Windows Server OS 2016, a prompt is displayed to enter the 'Service Configuration' option. Select 'Install MongoDB as a Service'. Select 'Run service as Network Service user' and proceed by clicking 'Next'.
If installation is being done on Windows Server OS 2016, an option to 'Install MongoDB Compass' is presented. Uncheck the box and click 'Next'.
Click on 'Install' to complete the installation.
On Windows Server OS 2012, follow the additional steps below.
Navigate to the path where MongoDB is installed which is 'C:\Program Files\MongoDB\Server\3.2'
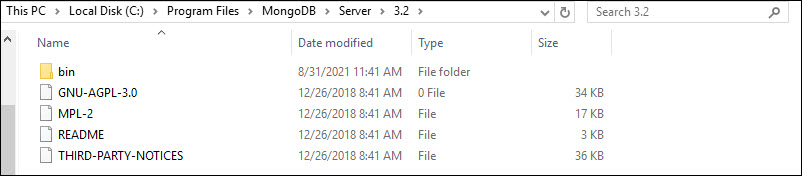
Copy the file 'mongo.conf' from the downloaded zip into this folder. Open the file in a text editor.

Create the folders 'data' and 'log' in the path 'C:\Program Files\MongoDB\Server\3.2'. The folder contents should be as below.

Open a command window in Administrator mode and run the command 'mongod.exe -config "c:\Program Files\MongoDB\Server\3.2\mongo.config" --install'.

Follow the rest of the steps for both Windows Server OS 2012 and 2016.
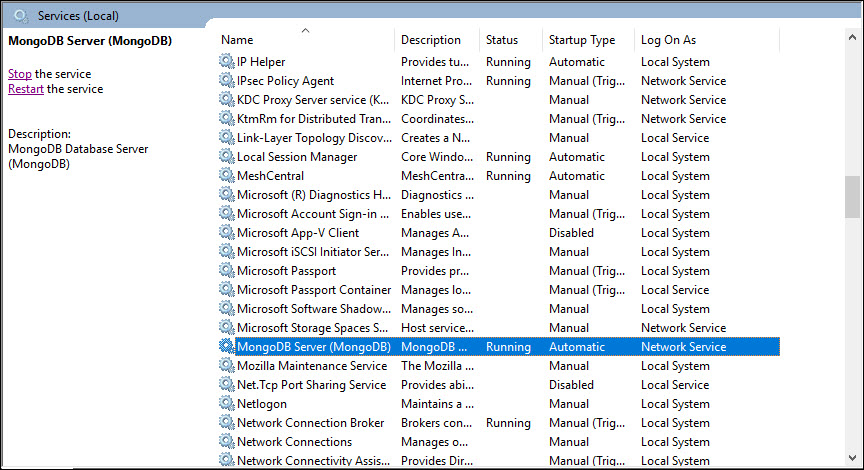
Check that the MongoDB service is running in 'services.msc'. If it is not running, start the service.
Navigate to the 'Plugins' folder in the SapphireIMS installed path and copy the 'MeshCentral' folder. This folder has the contents as shown below.
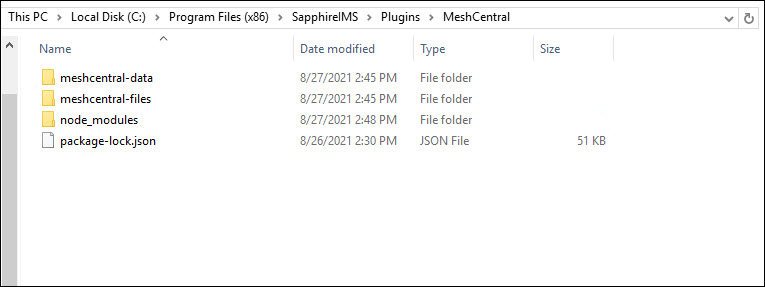
Open the file 'C:\Program Files (x86)\SapphireIMS\Plugins\MeshCentral\meshcentral-data\config.json' in a text editor.
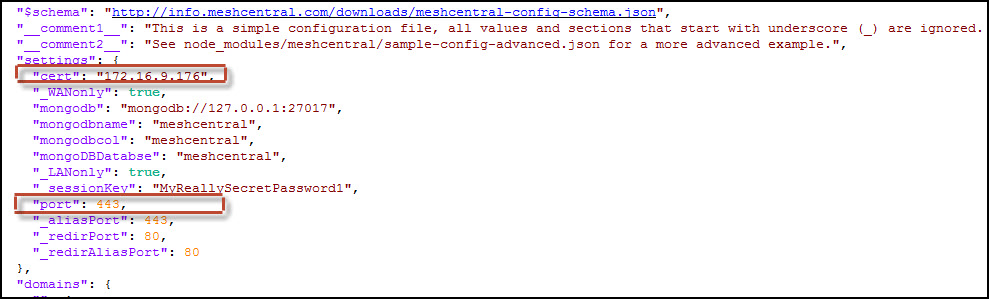
Edit the following properties and update the values
"cert": Enter the FQDN or IP Address of the MeshCentral server
"port": Enter the port number which the mesh agents will use to access the MeshCentral server.
Save the configuration file.
Open a command window in Administrator mode and navigate to the MeshCentral folder. Within that further navigate to 'meshcentral' folder within 'node_modules'. Install the MeshCentral service by running the command 'node meshcentral.js --install'.

Check that MeshCentral is running as a service by opening 'services.msc'.
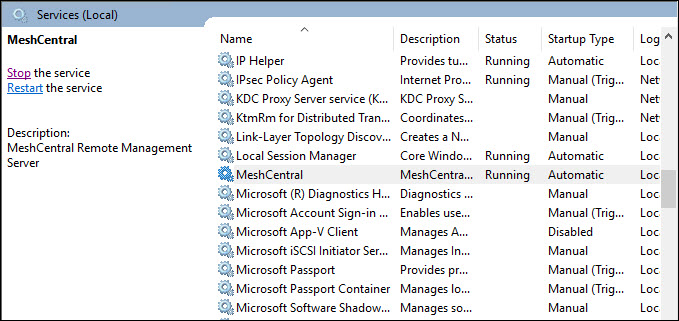
To confirm the service is running, from the browser you can connect to the MeshCentral server and the MeshCentral login screen gets displayed.

This completes MeshCentral installation. Next proceed to the configuration.
In the same folder 'meshcentral', open the file 'getMachinedetails.js' in a text editor. Make the following changes by replacing the '<%PATH%>' variable with the MeshCentral installed path. as highlighted below. Note that forward slashes need to be used as separators in the path. The paths to replace are as follows.
'let rawdata = fs.readFileSync('<%PATH%>/meshcentral-data/config.json');'
'var filename = "<%PATH%>/meshcentral-data/meshcentral.db";'


Save the file and restart the MeshCentral service.
Open the MeshCentral portal in the browser. Create an account by clicking on the option 'Create one'.
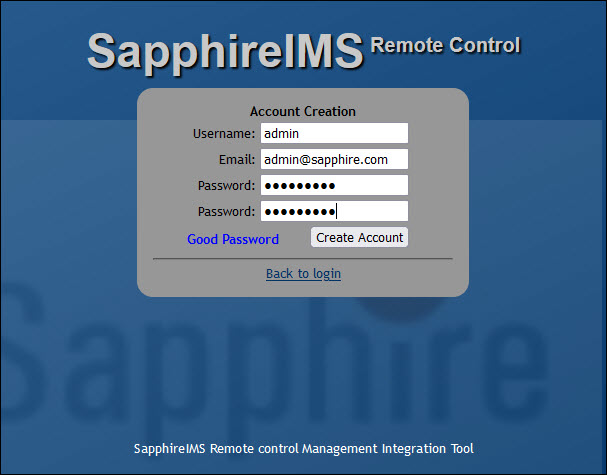
Enter the 'Username' as 'Admin'. Note that any other name will not work.
Enter the 'Email' and 'Password'.
Click on 'Create Account'.
The account is created and you are logged into the portal.
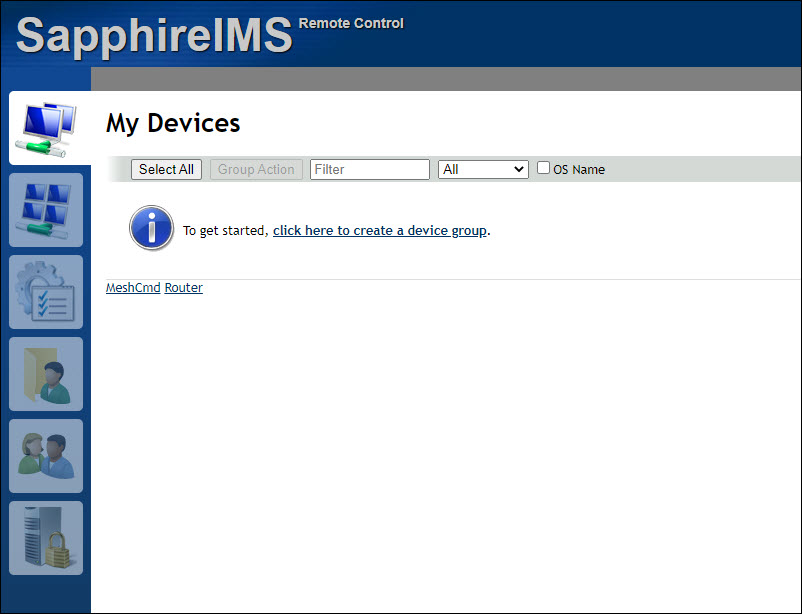
Click on the option “Click here to create a device group”.
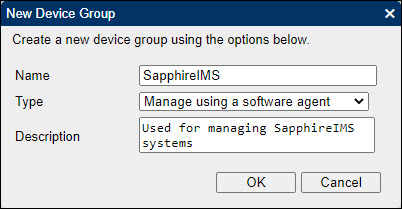
Provide the group 'Name'. Select the type as 'Manage using a software agent'. In case of Enterprise Plus edition, provide the group name as the ‘customer name’. Enter a 'Description'.
Click on 'OK'. A new device group is created.

Click on  on the left
hand side menu panel. The screen to create a new account is displayed.
on the left
hand side menu panel. The screen to create a new account is displayed.
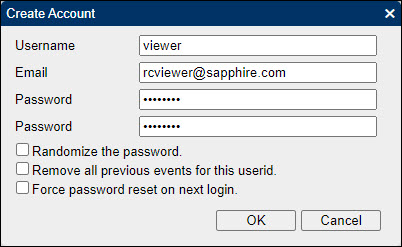
Enter the 'Username' which should be 'viewer'. Any other name will cause the integration to fail.
Enter an 'Email' and 'Password'.
Click on 'OK'. A new user is created.

Click on the user 'viewer' to display the details.

Click on 'Add Device Group' to provide the permissions.
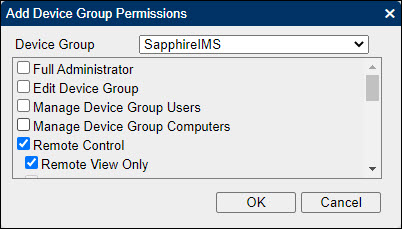
Check the options 'Remote Control' and 'Remote View Only'.
Click 'OK' to save.

This completes the MeshCentral configuration. Next, proceed to the integration section.
To integrate MeshCentral within SapphireIMS, the URL of the MeshCentral server is required. In addition a MeshCentral Token is needed, the steps for which are detailed below.
Open a command window in Administrator mode and navigate to the MeshCentral folder. Within that further navigate to 'meshcentral' folder within 'node_modules'.
Execute the command 'node meshcentral --logintokenkey'.

A MeshCentral Login Key which is a alpha numeric string is generated. Copy the generated key into Notepad.
Login to SapphireIMS as an administrator.
Click the ‘Settings’ tab. In the ‘IT Automation’ section, click ‘Remote Control’. The Remote Control configuration screen is displayed.

Select 'Mesh Central' option. The window expands as below.

Enter the 'Mesh Server URL', the 'Mesh Server Login Key' which was generated earlier and the 'Mesh Server Group Name' which is the Mesh Central Device Group Name.
Click on 'Save'. A confirmation message is displayed.
Next go to the appropriate sections to create and deploy the MeshAgent for Windows, Linux or MAC systems.
Log in to the MeshCentral portal.
Click on 'Add Agent'. The agent download window is displayed.
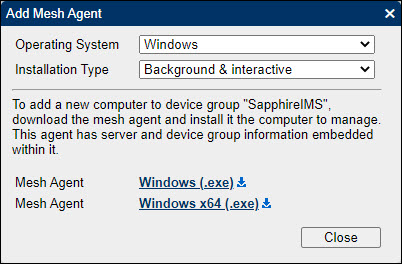
Select the 'Operating System' as 'Windows'.
Select the 'Installation Type' as 'Background & Interactive'.
Click on either the 32 bit or 64 bit options to download the agent. The agent gets downloaded and saved in the 'Downloads' folder as 'meshagent32-SapphireIMS.exe' or 'meshagent64-SapphireIMS.exe'.
Before rolling out the MeshAgent to all the target systems, you can test that the feature is working on one system.
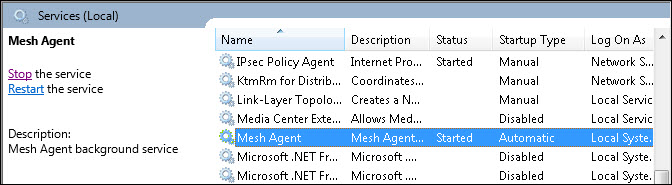
Copy the MeshAgent executable to one target node and run the executable. The MeshAgent folder after installation is shown below.

Check that the MeshAgent service has started and is running.
Open the 'MeshAgent.msh' file in a text editor and verify that the URL for the MeshCentral server is correct.

At this point verify the remote control functionality is working for this system. You can do this by going to the Discovery listing screen and clicking on the remote icon. Click on 'Inventory' tab and under that select 'Discovery' option. The Discovered Nodes list is displayed.

Click on the remote control icon  . A pop-up
appears with options for remote connection.
. A pop-up
appears with options for remote connection.

Select the 'Connection Type' and 'Connection Mode'. Click on 'Connect'. Note that the 'Connect' button does not get displayed until at least one option is selected. A new tab is opened with the MeshCentral screen.

Click on 'Connect' button to connect to the remote system.

For more details on using MeshCentral features you can refer to the MeshCentral website.
Once the feature is found working on one target node, the MeshAgent can be rolled out to all the systems using script package deployment in SapphireIMS.
Copy the following files into a separate folder
'MeshAgent.exe' file which got created after running the MeshAgent installer.
'MeshAgent.msh' file which got created after running the MeshAgent installer.
'MeshAgentInstall.bat' which was shipped in the MeshAgent zip file.
Zip the folder (zip file name and folder name should be the same). The zip file can be used for rolling out to all systems.
For details on deployment of the script package refer Settings->Software Management->Package and Policy Management->Script Package.
Login to MeshCentral portal.
Click on 'Add Agent'. The agent download window is displayed. Select 'Operating System' as 'Linux/BSD'.

Copy the script content by clicking on the 'Copy' button and paste into a text editor. Save the file as 'MeshAgentInstall.sh'.
Manually login as 'root' into the end node and run the script.
Login to MeshCentral portal.
Click on 'Add Agent'. The agent download window is displayed. Select 'Operating System' as 'Apple macOS'.

Download the agent and run 'MeshAgent.mpkg' on the end node manually.
Allow it in 'Security->General'.
Open a terminal. Navigate to '/usr/local/mesh_services/meshagent' folder and run the following commands
'run sudo ./meshagent_osx64'
'run sudo launchctl kickstart -k system/meshagent'
Put a check in 'Security->Privacy->Screen Recording'.
In 'Security->Privacy->Accessibility' click on '+'. Navigate to '/usr/local/mesh_services/meshagent', select 'meshagent_osx64' and add it to the list5.
Copy the file 'MeshAgentUninstallWindows.bat' which is included in the MeshAgent zip file.
Deploy this as a script package to all systems where the MeshAgent has to be uninstalled.
Create an empty bash (.sh) file and save as 'LinuxMeshAgentUninstall.sh'.
Login to the MeshCentral portal.
Click on 'Add Agent'. The agent download window is displayed. Select 'Operating System' as 'Linux/BSD (UnInstall)'.

Copy the script content by clicking on the 'Copy' button and paste into a text editor. Save the file as 'LinuxMeshAgentUnInstall.sh'.
Manually login as 'root' into the end node and run the script.