![]()
![]()
The processes of an organization can be defined by configuring the state movement referred to as workflow. Within each project, for every service, a workflow can be configured.
To configure a workflow, you can follow the steps in this topic to use the editor or use a GUI based workflow builder which had drag and drop capability. To use the workflow builder proceed to Service Desk->Settings->Work Flow Management->Workflow Builder.
A workflow is a series of state transitions from the start to the end states. Each combination of service, sub-category and derived fields can have a variation of the workflow where some paths could be common while others could be unique. The workflow can be viewed in the workflow viewer.
The in-built project types have pre-defined workflows which can be modified.
Click on 'Work Flow Management' option on the right hand side panel.
Click on 'Workflow'. The workflow is displayed.
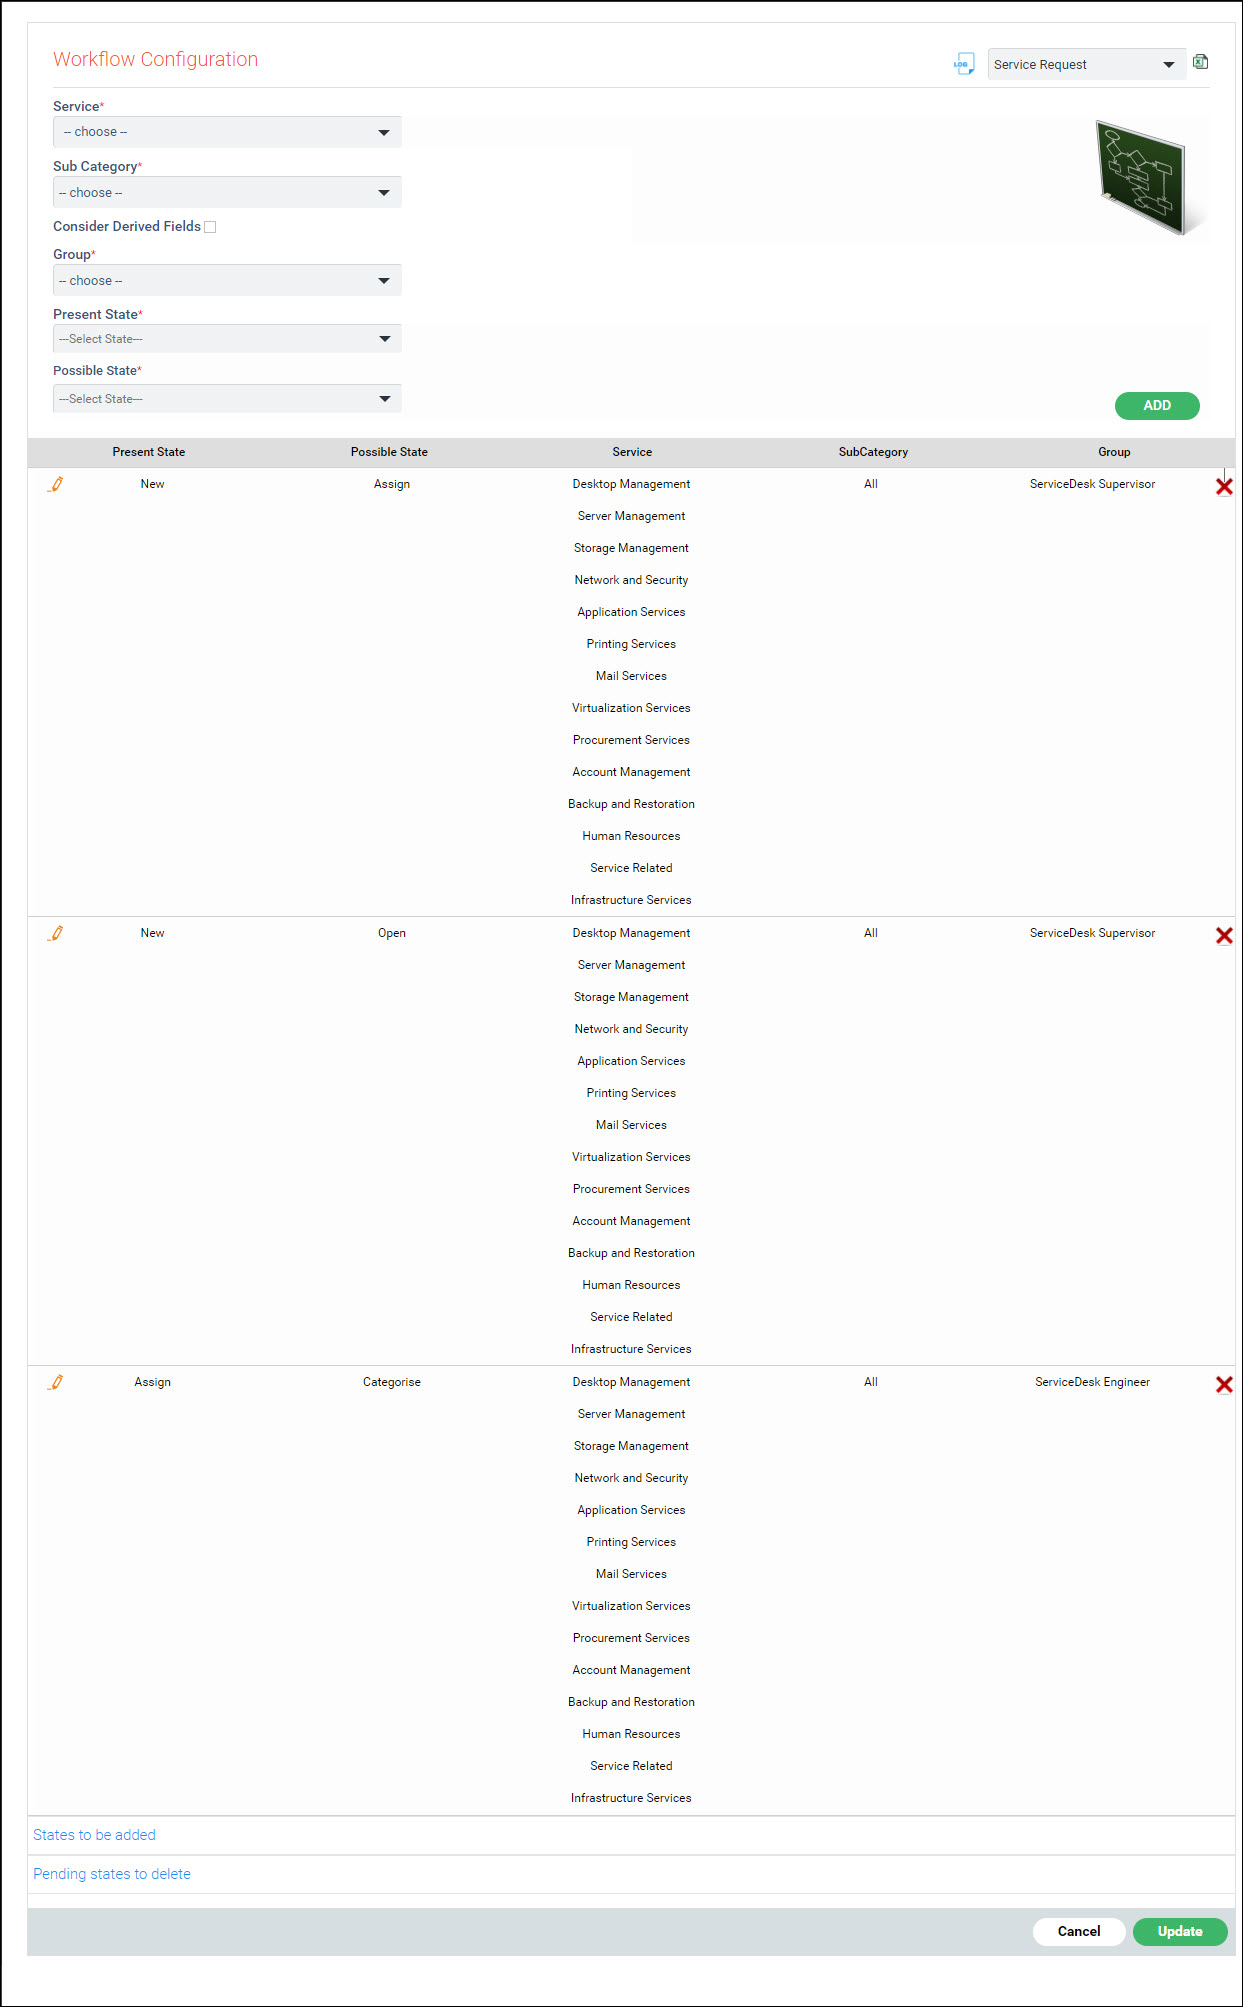
The fields are described below. For each state transition in the workflow, update the following fields.
Serial No |
Field Name |
Description
|
1 |
Service |
This lists all the services that are defined. Select the service to which the workflow has to be applied.
|
2 |
Sub Category |
This lists all the sub categories that are defined. Select the sub categories to which the workflow has to be applied.
|
3 |
Consider Derived Fields |
Select this box to display the ‘Derived Field 1’, ‘Derived Field 2’ and ‘Derived Field 3’ fields. It is not a mandatory field. The derived fields will be displayed based on the sub category chosen. Select among the Derived fields displayed based on which the workflow has to be applied.
|
4 |
Group |
This lists all the roles that are defined in the respective project (For role definitions refer to Service Desk->Settings->User/Role Management->Roles). Select the roles for which the workflow has to be applied.
|
5 |
Present State |
This lists all the states that are defined in the system. Select the state from which the state transition has to happen (the current state of the service desk record). |
6 |
Possible State |
This lists all the states that are defined in the system. Select the state to which the Service Desk record can be moved (from the present state that is selected above). |
Click on 'ADD' to add the state transition. The added state will be displayed under 'States to be added'.
Repeat the steps for all the states in the workflow.
To edit any state transition present, click on  against the state transition.
A pop-up screen with the above fields is displayed. Edit any of the
fields and click on 'Update'.
against the state transition.
A pop-up screen with the above fields is displayed. Edit any of the
fields and click on 'Update'.
To delete any state transition, click on against the state transition. The state will be displayed under 'Pending states to delete'.
Click on 'Update' to save the changes when they are all done.
Click on the Workflow Viewer icon  on
the right hand side. The workflow is displayed.
on
the right hand side. The workflow is displayed.

Click on 'Back' to return to the workflow configuration screen.
 Note:
Note: