![]()
![]()
One of the issues in patch management is if the systems being managed are in a geographically distributed environment in multiple locations which are connected over limited bandwidth connections to the internet, it could cause patch updates to fail as each system would be contacting the server to download the patch and because of limited bandwidth the downloads could fail. Apart from patches, master agents are used for other features which involve file downloads.
To overcome this issue, SapphireIMS supports a 'Master' agent which is on the same network as the 'Slave' agents which are the rest of the systems in the same location. The patch files get downloaded centrally into the Master agent system which acts as a local file server and from which the slave agents can pull the patch files.
The slave agents are mapped to a master agent. When the agent package is created (Refer Settings->IT Automation->Agent Installer->Agent Installer Package), the address of the SapphireIMS server to which the agent would communicate is bound and this is the reporting server. Hence the files are downloaded from the reporting server into the master agent system and then distributed to the slave agent systems which are associated with the master agent.
On the other hand, 'Standalone Agents' which are not associated with any master agent continue to download files from the reporting server.
Mapping of slaves to master can be done using rules as it may be tedious to manually map all the agent systems to a master.
Mapping rules can be over-ridden by manually mapping an agent to a master or removing the mapping using Association and Dis-association functionality.
Mapping of slaves to master can be done for both Windows and Linux systems. It is possible to have master and agents both as Windows or Linux or a mix where a Linux system could act as a Master for Windows systems or vice versa.
Click the ‘Settings’ tab. In the ‘Asset and Inventory’ section, click ‘Node Rules Engine’
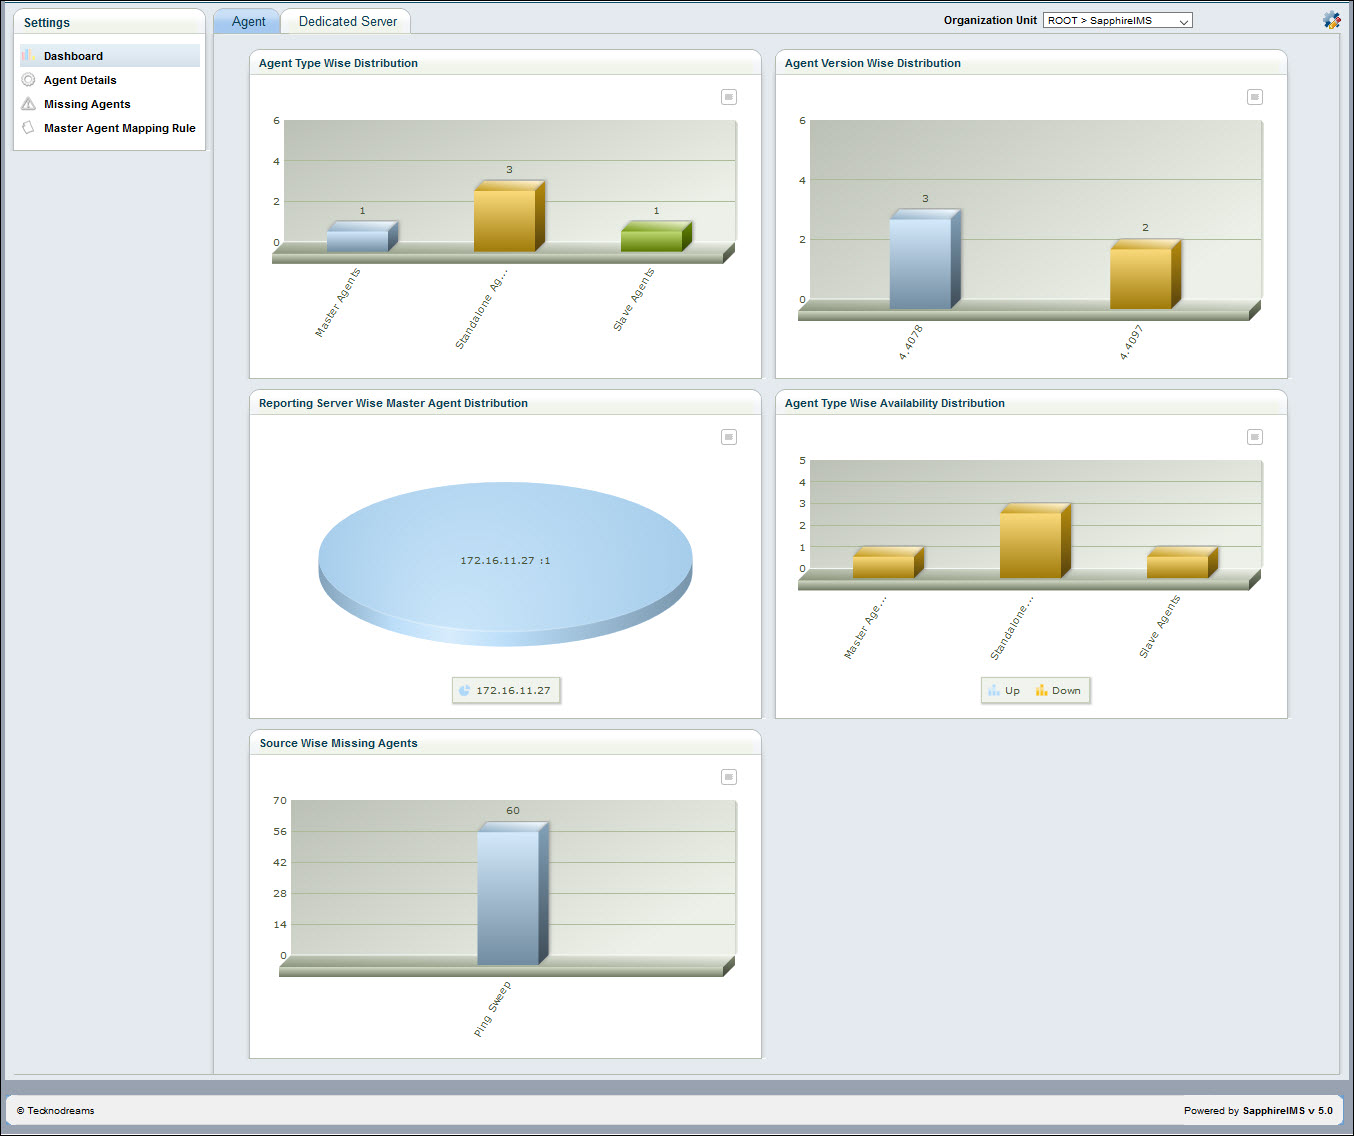
Agent Type Wise Distribution
This dashboard displays the number of different kinds of agents. Click the desired Agents bar to display the desired Agents listing page.
Agent Version Wise Distribution
This dashboard displays the number of agents installed in each version
Agent Type wise Availability Distribution
This dashboard displays the number of agents of each type based on the availability status
Source Wise Missing Agents
This dashboard displays the number of missing agents detected through different sources
Reporting Server Wise Master Agent Distribution
This dashboard displays a pie chart of the percentage of master agents for each reporting server.
Note: Click ‘![]() ' icon to enable or disable
the individual dashboards.
' icon to enable or disable
the individual dashboards.
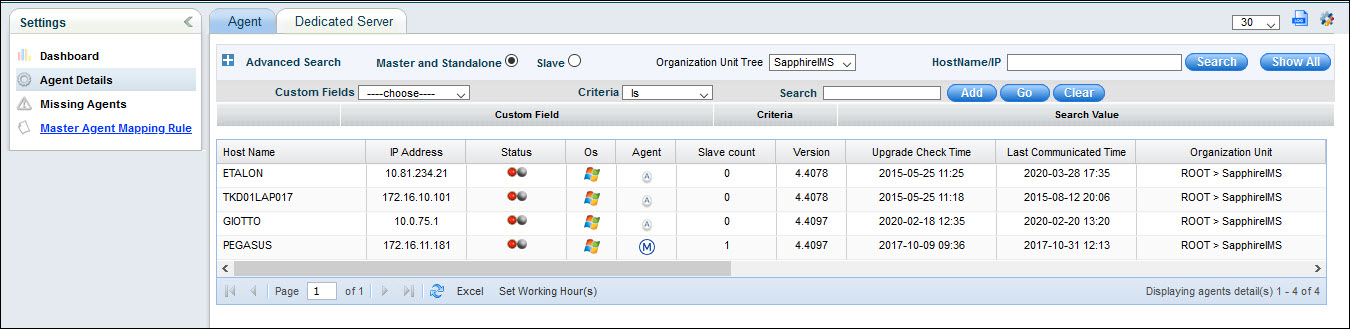
Click the ‘Agent Details’ option on the left hand menu to view the agent details. Select 'Master and Standalone' (default) to view the master and standalone agents.
In the ‘Agent’ column,  icon
is displayed for the master agents and
icon
is displayed for the master agents and  icon
is displayed for the standalone agents.
icon
is displayed for the standalone agents.
If the device is down, the first status indicator is displayed as red.
If XMPP is not enabled for the device, the second status is displayed as grey. To enable XMPP for the agent, see Agent Global Settings
Click on any cell in the following columns to edit their values
‘Organization Unit’ to change the organization unit for the particular host.
'Asset Tag' to change the asset tag for the particular host.
'Bandwidth' to change the bandwidth values.
Click on
the Customize View icon  to customize the listing view.
To associate agents with a master or standalone agent, click on the master agent or the standalone agent in the Agent Details listing page.
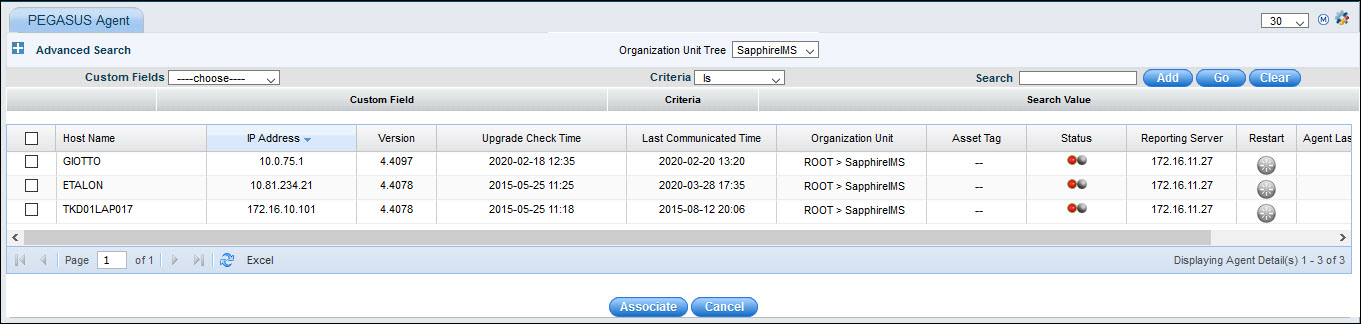
Check the host name and click ‘Associate’ to associate the host to the master agent.
The agent gets associated with the master agent.
In the Agent Details listing page, select ‘Slave’ option to view the slave agent details

In the ‘Agent’ column,  icon is displayed for the slave agent
systems. You can disassociate the slave from master or associate
with a different master agent.
icon is displayed for the slave agent
systems. You can disassociate the slave from master or associate
with a different master agent.
Click the Host name to de-associate the slave agent from the master agent and select 'De-Associate'.
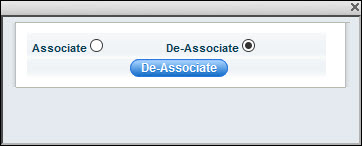
Click on 'De-Associate' button. Once the slave is disassociated, it shows as a stand-alone agent.
To associate the slave to a different host, select 'Associate'.
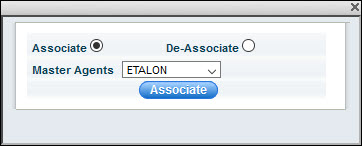
Select the master agent from the list and click on 'Associate'.
Different bandwidth allocation for working as well as non-working hours can be used to define a download speed for each of the file server.
To define the download speed for a host, click the ‘Bandwidth (kbps) column’ for the respective host. Similarly, to define the non-working hours download speed, click Non Working Hour (s) Bandwidth (kbps). This will display a window of ‘Update Bandwidth’.
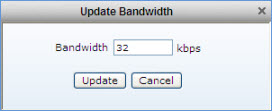
Enter the bandwidth in kbps and click ‘Update’.
You can set the working hours by clicking on the 'Set Working Hours' button on the agent list screen.

A pop-up is displayed.

Update the 'From' and 'To' times and click 'Update'.
 Note:
1. You can configure the agent download time out interval by defining
the global settings key 'Downloader Timeout for Agent' value. The default
value is 30 seconds after which the agent retries for download.
Note:
1. You can configure the agent download time out interval by defining
the global settings key 'Downloader Timeout for Agent' value. The default
value is 30 seconds after which the agent retries for download.
2. The default value of the global settings key 'Maximum bandwidth usage to download files from server' is 100000 kbps which can be configured.