![]()
![]()
This topic describes Configuration Items (CI) Management. This is a generic module to allow creation of any type of CI which is not specifically an asset or contract.
To view the CI, click ‘CI’. The list of CI is displayed.
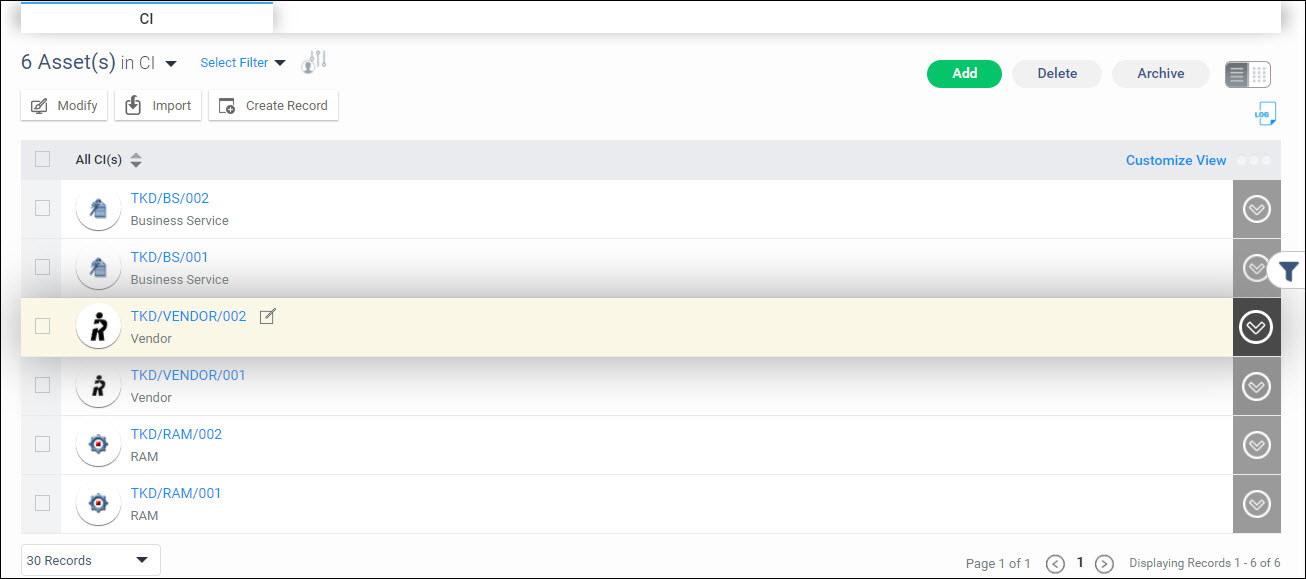
To expand and view any the details
of any CI, click on  against the CI.
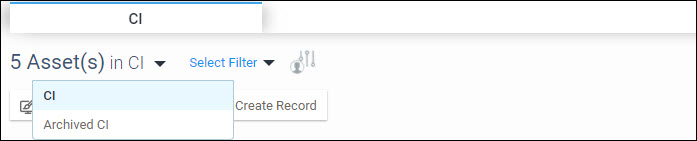
Select between the listing of current CI or archived CI by selecting from the drop down as shown.
You
can filter the CI to display only those records which meet the filter
criteria. In order to open the Filters, click on  icon on the right hand side. This expands the Filter menu shown below.
Refer to the section Creating
Filters for
more information.
icon on the right hand side. This expands the Filter menu shown below.
Refer to the section Creating
Filters for
more information.
The 'Select Filter' drop down allows you to select a profile and apply it.

Click on the tabs 'Public' or 'Private' to select among the profiles. Public profiles are available for all users while Private profiles are available only for the user who created it.
Click on  to clear the applied filter.
Click
on  to set the selected filter as default for this
project.
to set the selected filter as default for this
project.
The individual options of the listing page are described in detail under CI Management Options.
To customize the list view, click
on  . The customization screen pops-up.
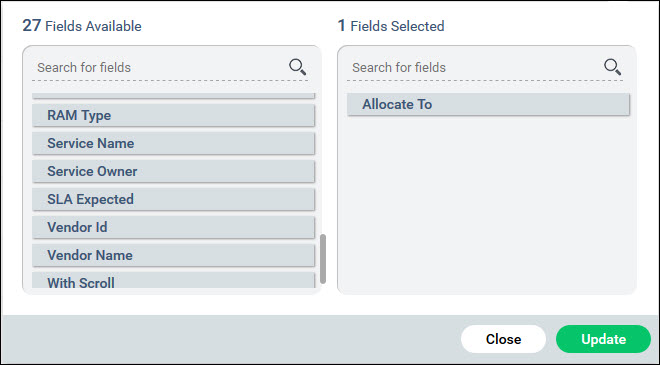
Drag and drop fields from the left hand to the right side to display in the view. Move the fields up or down to select the order of display.
Click on 'Update'.
There are a number of actions which can be taken on CI and these are shown below

The options and the other buttons are described in the table below.
|
In the CI listing view, in each of the groupings, you can set search profiles which act like filters and allow you to view only those records which satisfy the filter criteria. Follow the steps below to set filters.
Click on on the right hand side to open the
filter options.
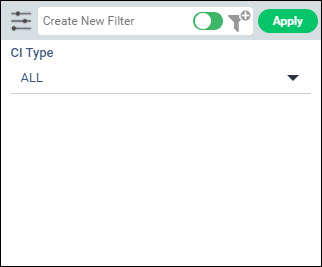
Select the filters values for each of the parameters. The values in the drop-down appear alphabetically.
Click on
 to expand the custom filter options and allows
you to choose among the custom fields also.
to expand the custom filter options and allows
you to choose among the custom fields also.
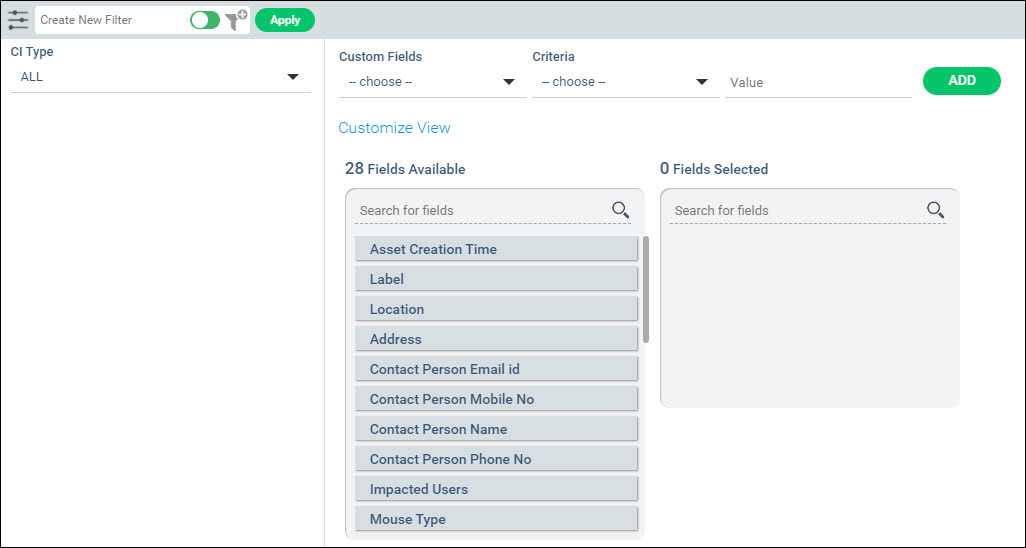
Select any custom field, the criteria and value. Click on 'ADD' to add the filter.
Once the filter values are selected, if you want to apply it temporarily click on 'Apply'.
To save and create the filter, enter a filter name.
Use the slider to select between 'Public' and 'Private' filters while saving. Private filters can be created by you for your use only.
Click on
 .
.
A confirmation message is displayed. The filter appears in the 'Select Filter' drop down list in the listing view.
To modify
a filter, apply the filter by clicking on 'Select
Filter'. Next click on the filter button
to expand the filter screen. Update the filter settings and click
on  .
.
To add a new asset, click on the  button.
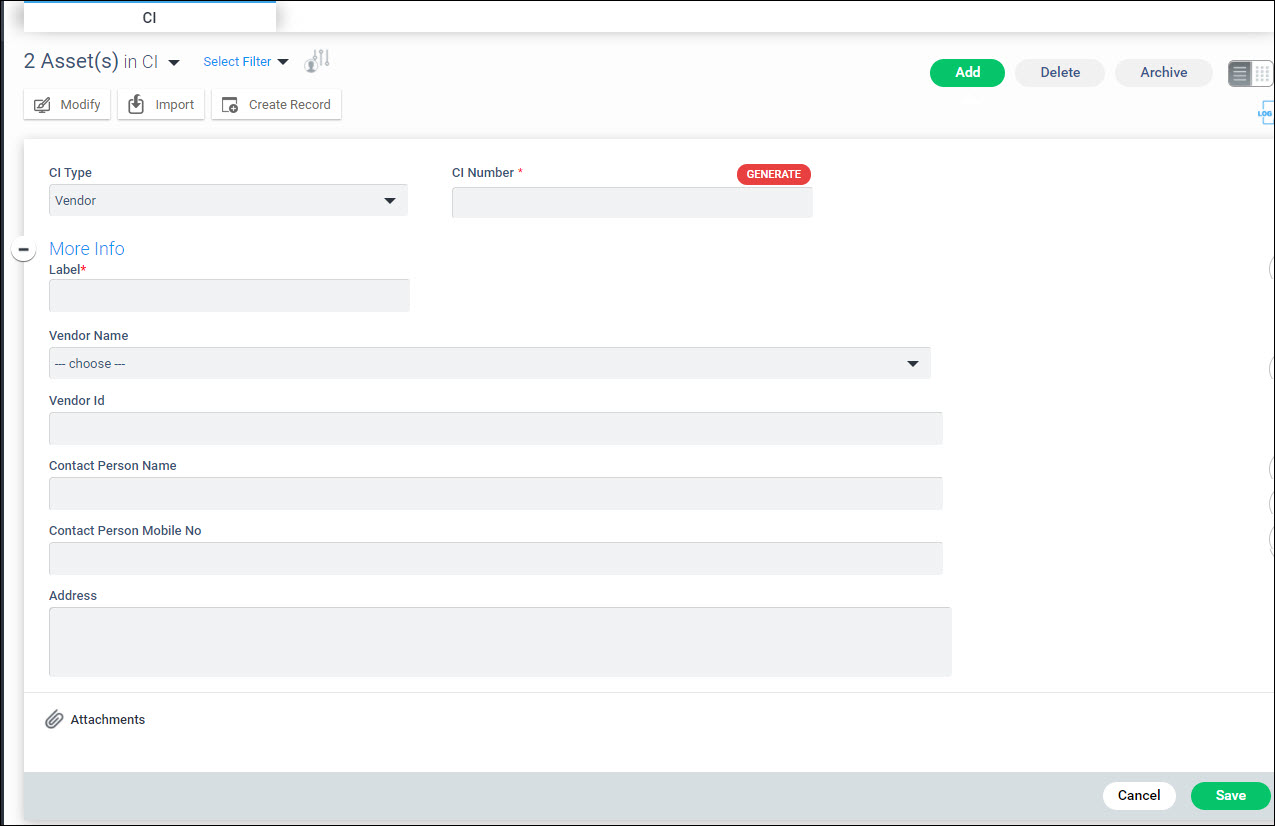
The attributes are described in the table below.
|
Click on 'Save' to add the CI.
To delete CI, select one or more CI and click on 'Delete'.
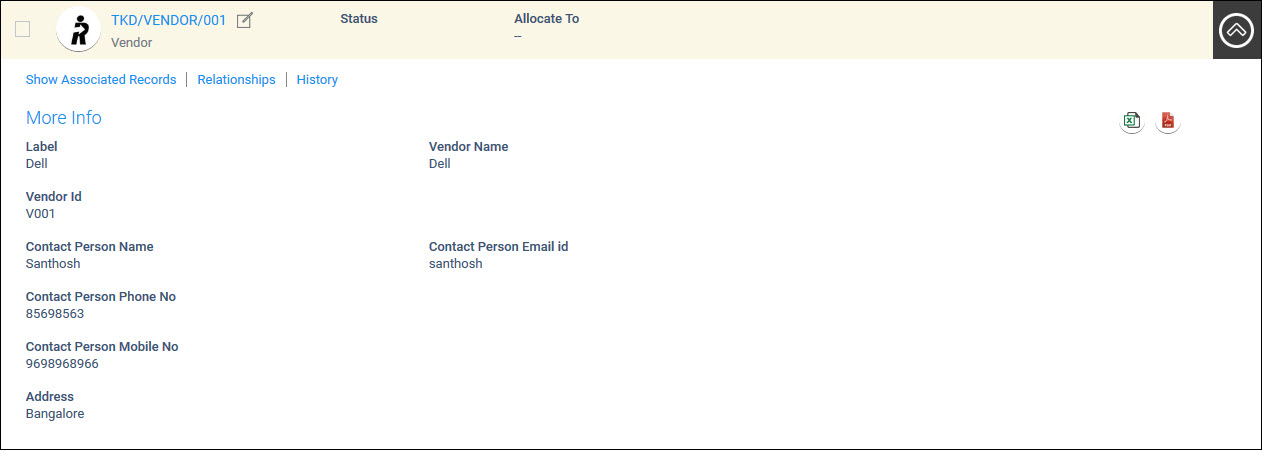
Click on the CI. The CI details are displayed.
To edit the CI details, click on  . Modify
the fields and click on 'Update'.
. Modify
the fields and click on 'Update'.
Click on  to export the asset details into
a PDF file.
to export the asset details into
a PDF file.
Click on ![]() to export the asset details into an Excel file.
to export the asset details into an Excel file.
Note: CI number cannot be modified
Click on 'Show Associated Records' on the CI details screen, to display the Service Desk records pertaining to the CI.

You can filter to view records for a particular period.
A CI can be mapped to an asset/contract/user.
Click on 'Relationships' option.
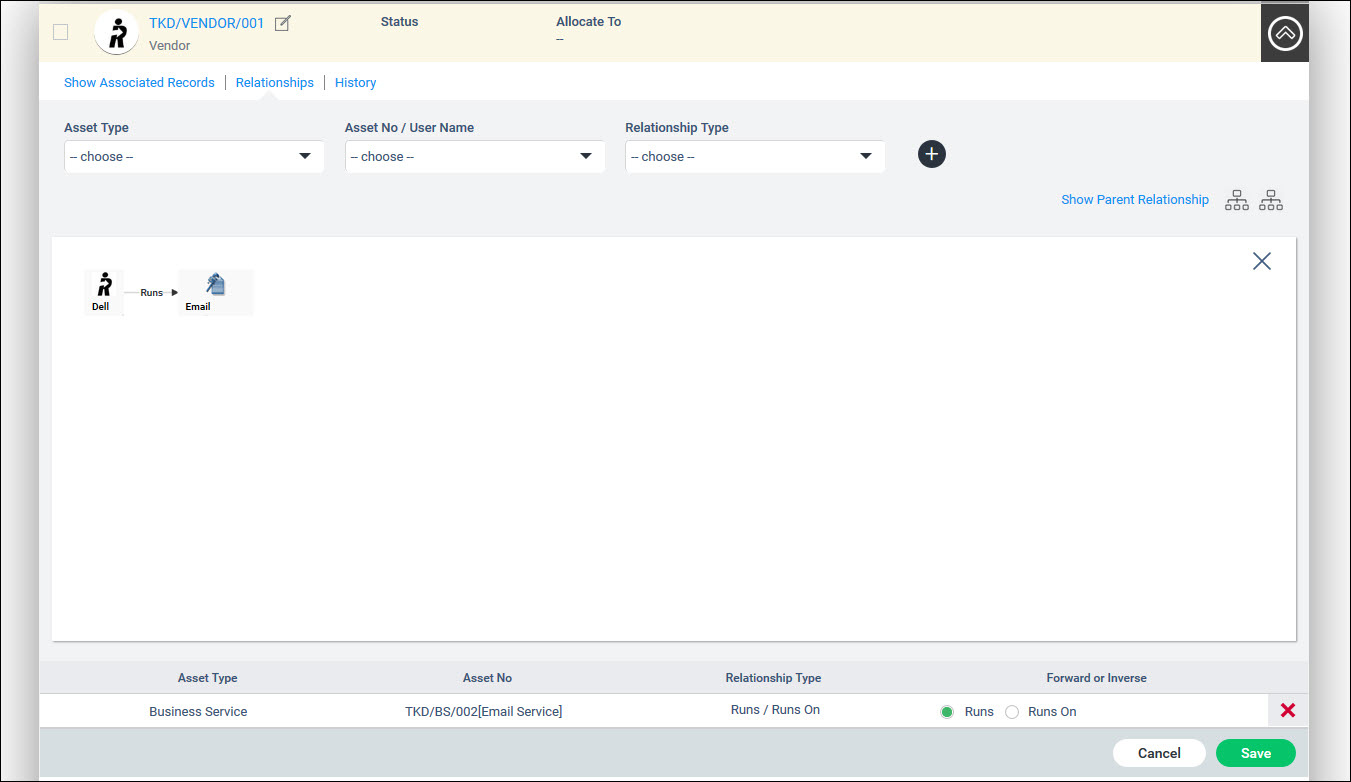
For a detailed explanation on creating relationships, refer CMDB->CMDB->Asset Management->Relationships.
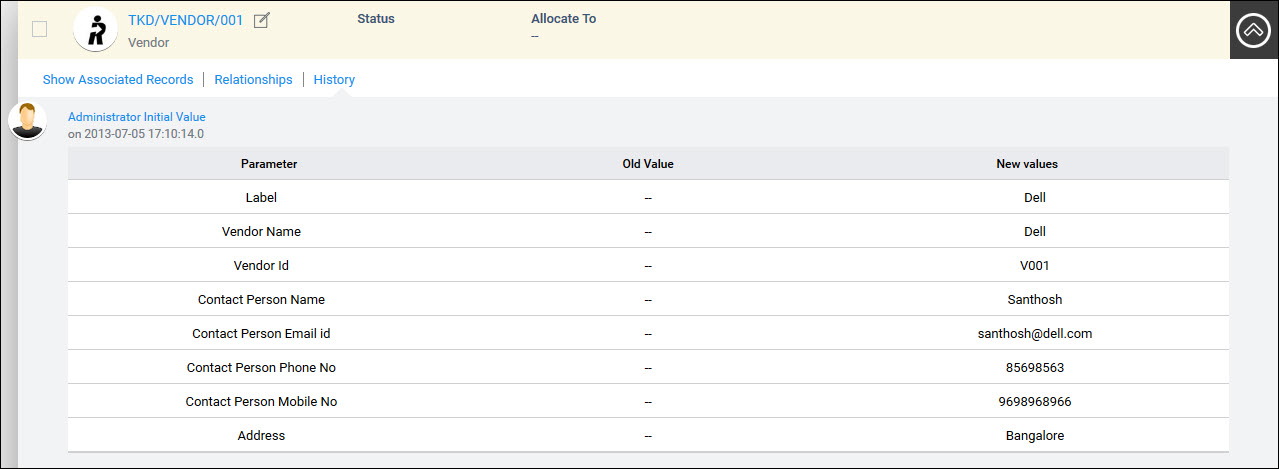
Any modifications made to a CI are recorded in this tab. You can view the details of the changes made to the CI.
Click on 'History'. The History of the CI is displayed.


 Note
Note