![]()
![]()
SapphireIMS can be configured to be used with Google Workspace (formerly GSuite) as the Identity Provider. In this case SAML is used as the standard.
![]() Important: It is necessary for SapphireIMS portal to be https enabled
in order to use SAML based authentication. Refer to the section Appendix->Enable
HTTPS and SSL.
Important: It is necessary for SapphireIMS portal to be https enabled
in order to use SAML based authentication. Refer to the section Appendix->Enable
HTTPS and SSL.
As a pre-requisite, all Google users using SapphireIMS need to be imported into SapphireIMS. Refer to Settings->User Management->Excel User Import for doing this.
Once configured, the app can be accessed through Google where the app will appear along with other Apps when the user logs in to Google. Alternatively the app can be accessed from the login screen, by selecting 'Google Workspace' option. If the user is logged in to Google workspace, SapphireIMS home screen is displayed.
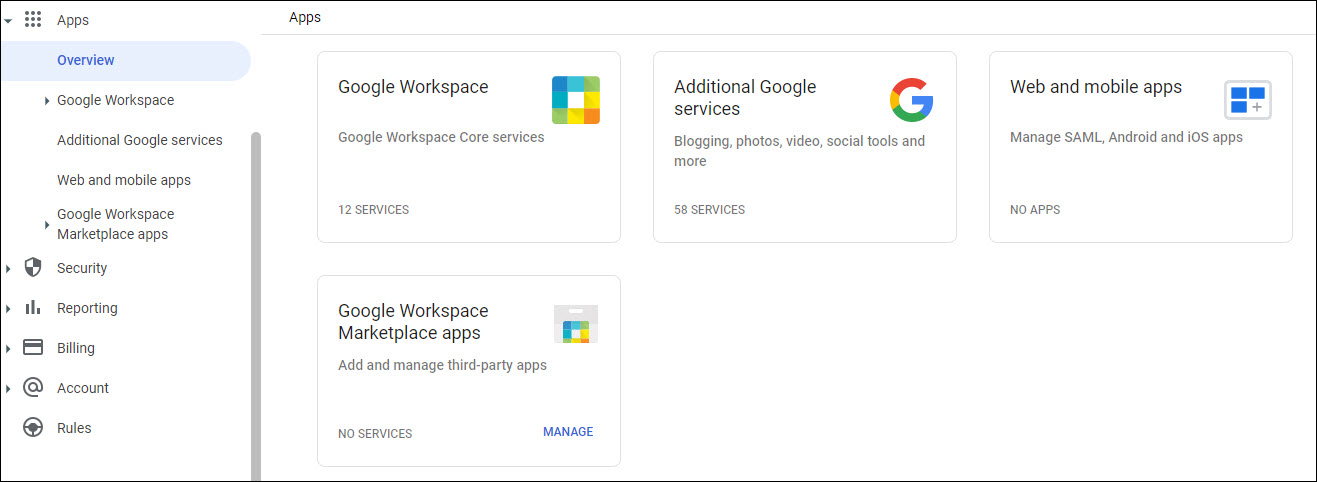
To add the SapphireIMS application, login to the Google Admin account. The home page is displayed. On the dashboard click on 'Apps' and 'Overview'.
Select the option 'Web and mobile apps'. The application addition screen is displayed.
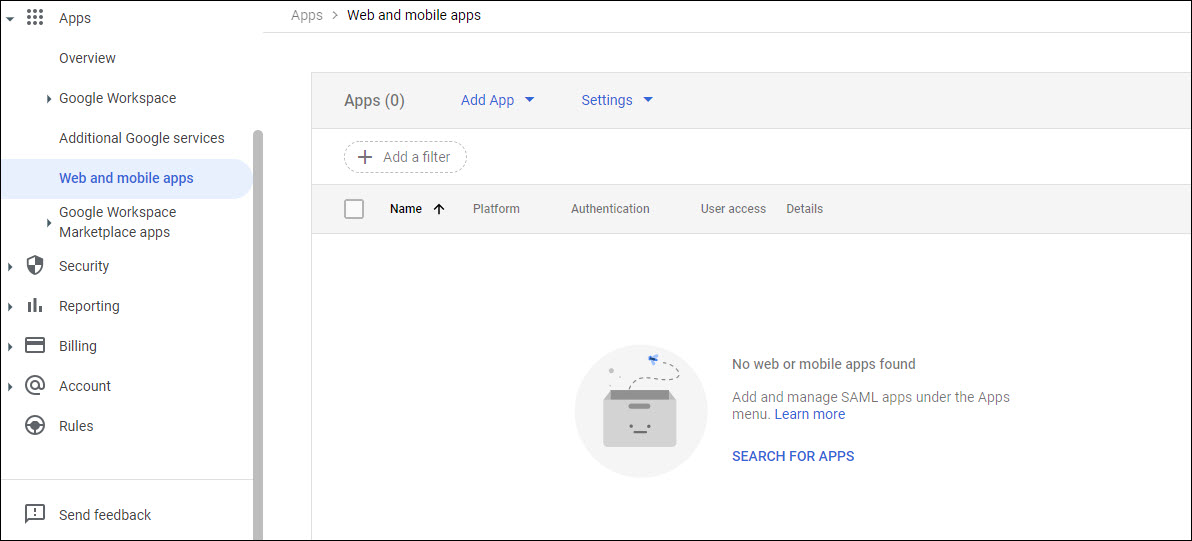
Select 'Add App' and a drop down menu appears.
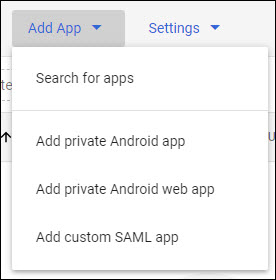
Select the option 'Add custom SAML app'.
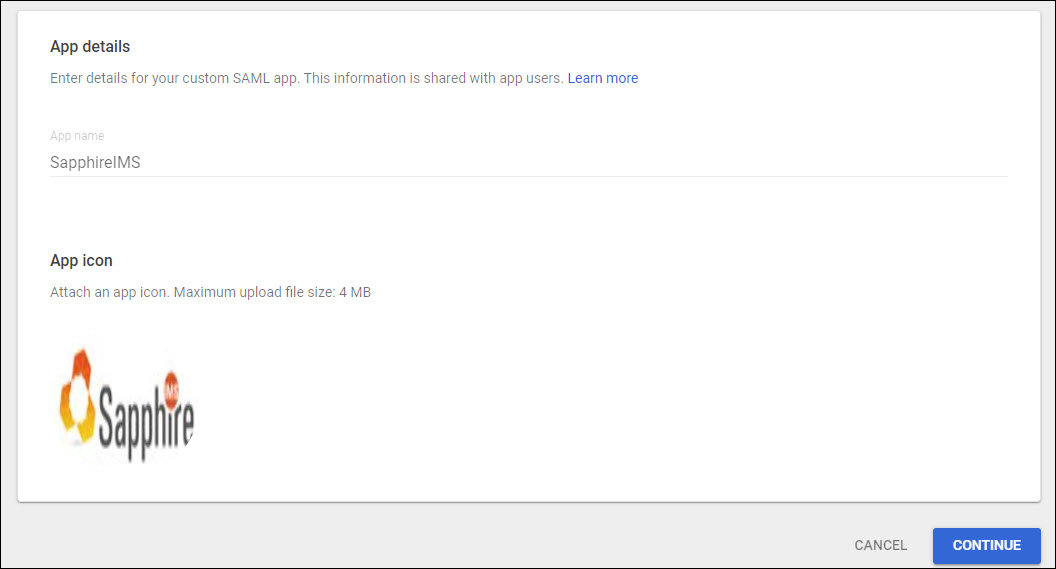
Enter the 'App Name' as 'SapphireIMS'.
Upload the 'App Icon' which appears on the Google Apps screen.
Click on 'CONTINUE'.

Select 'Option 1- Download IdP metadata'. When prompted save the metadata file which is saved as 'GoogleIDPMetadata.xml'.
Click on 'CONTINUE'.

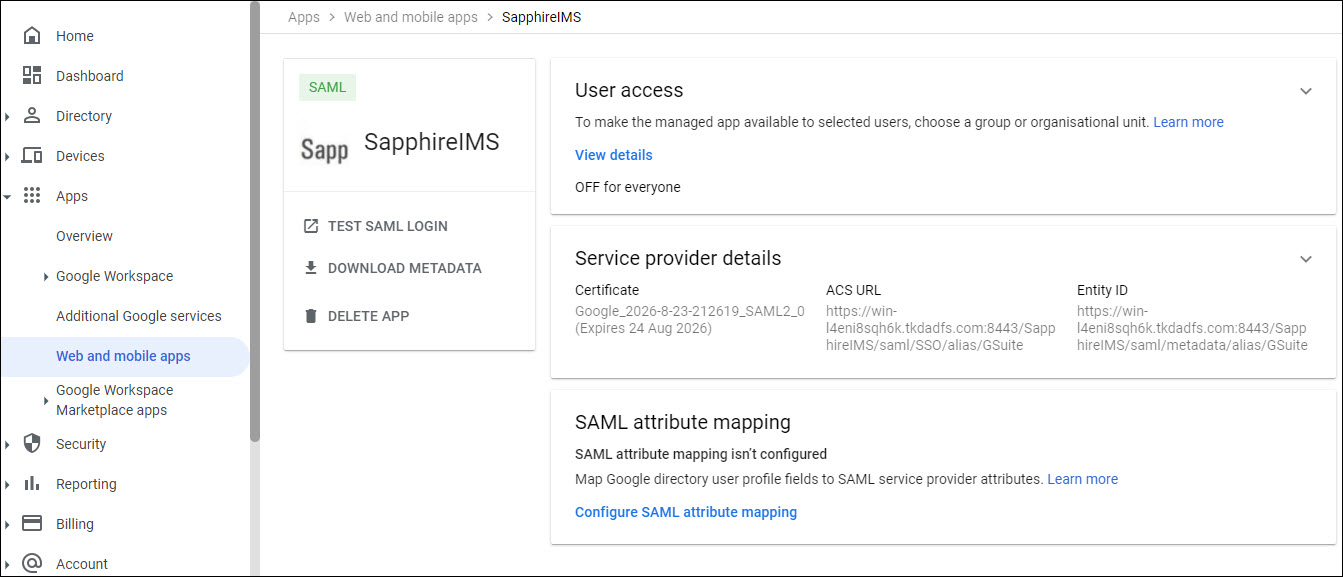
At this point you need to configure the GSuite IdP in SapphireIMS. This needs to be done to get the 'ACS URL' and 'Entity ID' field values. Complete the steps in the section Configuring Google Workspace IdP in SapphireIMS and return to complete the rest of the configuration in the Google console.
Update the 'ACS URL' and 'Entity ID' field values from the 'metadata.xml' file.
Select 'EMAIL' as the 'Name ID format'.
Click on 'CONTINUE'. The attribute mapping screen is displayed. Click on 'FINISH'. The application is listed under the Apps page.
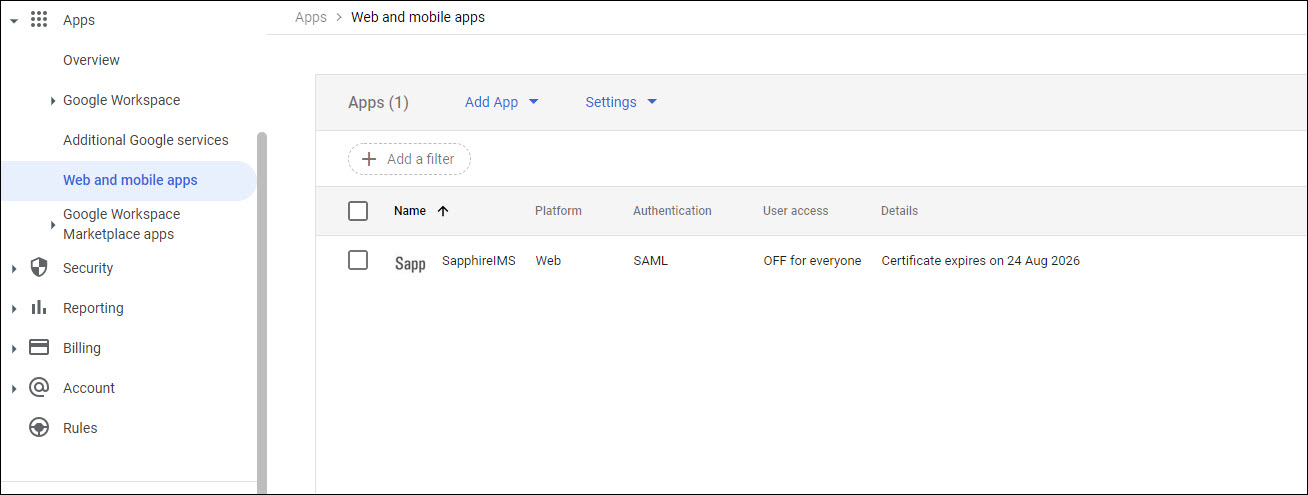
The next step is to enable the access for everyone. Click on the application entry to display the details.
Click on 'User Access' tab.
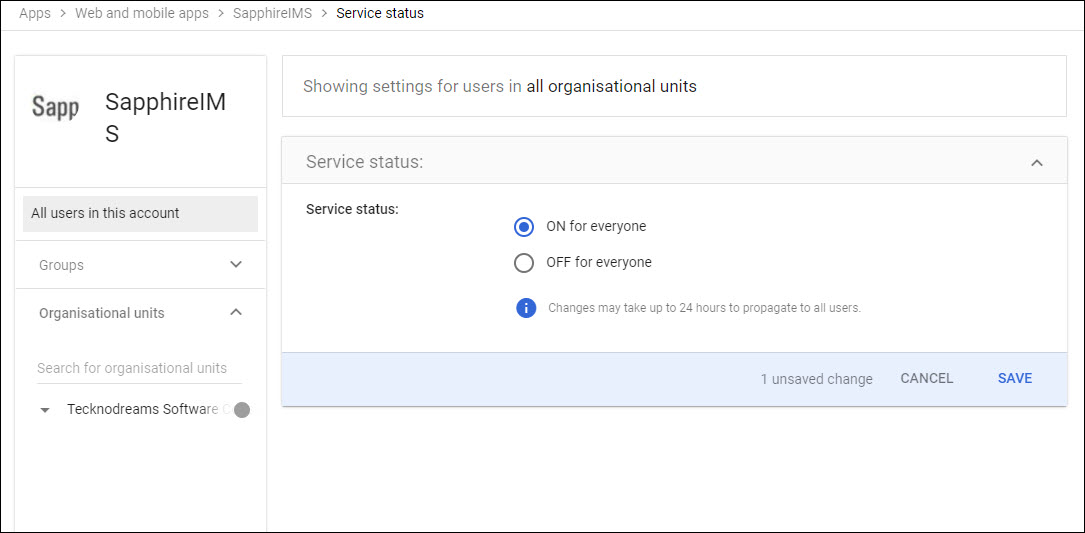
You can selectively enable the application either for all users or specific groups or organization units. To enable for all click on 'ON for everyone' and click 'SAVE'.
 Note: You can register multiple
applications including one for the Mobile by repeating the process.
Note: You can register multiple
applications including one for the Mobile by repeating the process.
The steps for configuring Google Workspace as the IdP is given here. For more details refer Settings->User Management->Using Identity Providers (IdP)->Configuring SAML.
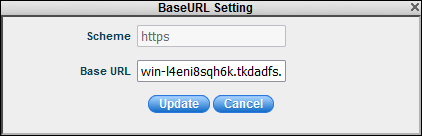
Click
on the '![]() ' icon to change the base URL setting
as shown below if needed. Enter
the base URL used to access the portal and click 'Update'.
' icon to change the base URL setting
as shown below if needed. Enter
the base URL used to access the portal and click 'Update'.
Note: For the mobile application
use 'MobileApp' instead of 'SapphireIMS' in the base URL.
On the Identity Providers listing page, click on 'Add' to add Google Workspace as the IdP. The IdP selection screen is displayed.

Select 'SAML' as the 'Provider'. The following screen is displayed.
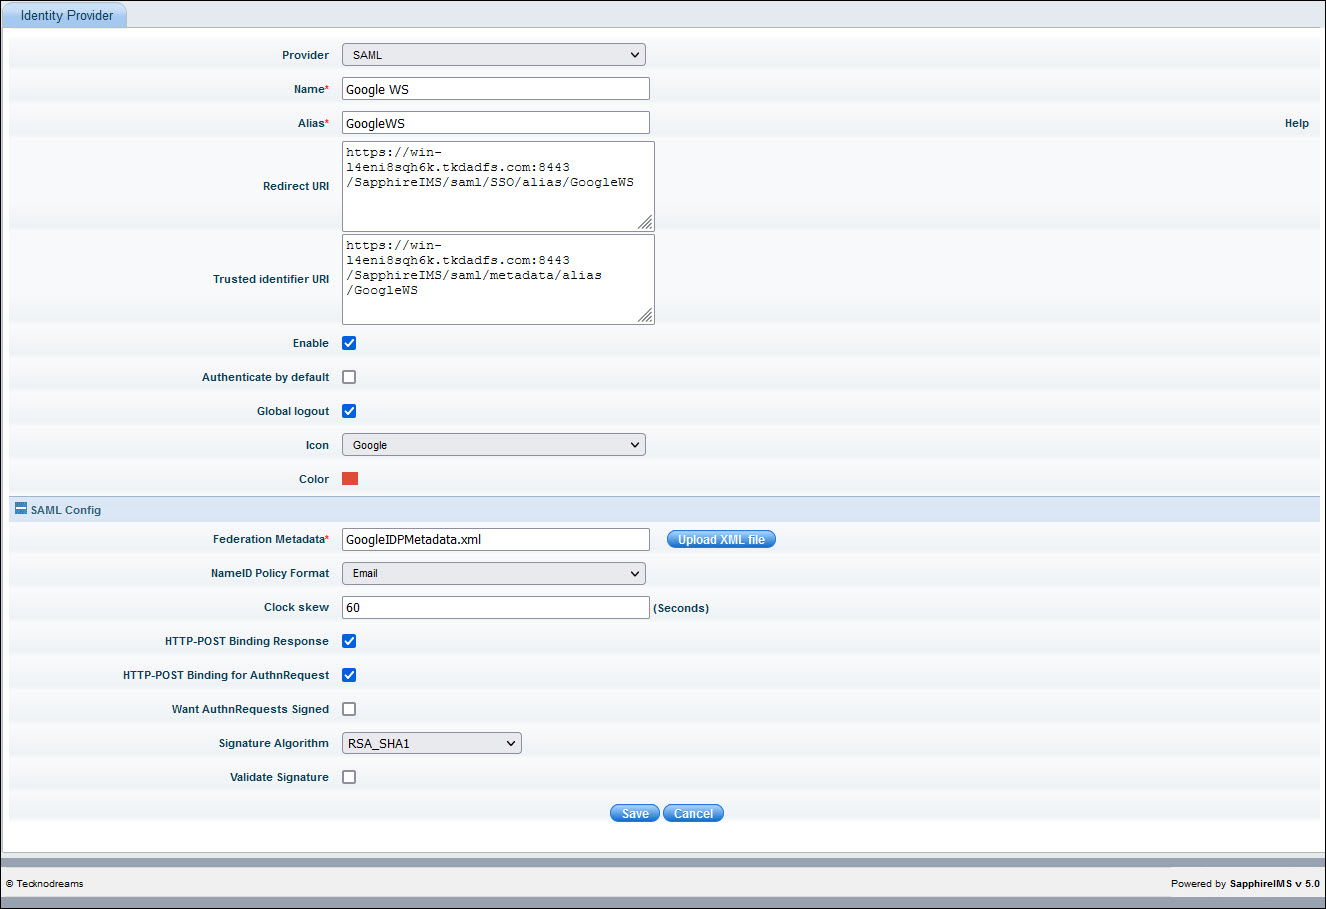
Enable the fields 'HTTP-POST Binding Response' and 'HTTP-POST Binding for AuthnRequest'.
Enter all the fields and click on 'Save'.
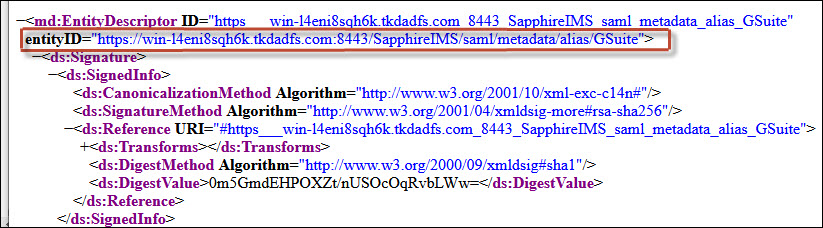
On the IdP listing screen, click on the 'Click here' option in the 'Download Metadata' column. When prompted, click on the option to save the file. The 'metadata.xml' file is created in the 'Downloads' folder.
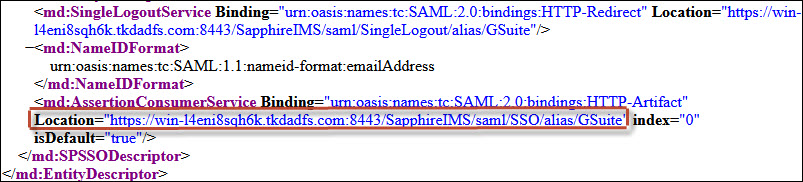
Copy the value against 'entityID' and 'Location' in 'AssertionConsumerService' into a text editor since this will be required while configuring Google Workspace. These are shown below in the snippets from the file.