![]()
![]()
Identity Providers (IdP) are systems that manage identity information and provide authentication services to relying applications within a federation or distributed network. Relying party applications such as web applications outsource the user authentication step to a trusted identity provider. Single sign-on to all applications using the same identity provider is possible.
SapphireIMS supports Microsoft Active Directory Federation Service (ADFS) as an identity provider. SAML 2.0 is the protocol used to communicate with ADFS.
Also, in the case of applications on the cloud or outside the organization's network, access to the AD will be restricted from outside the firewall. Using ADFS with SAML, users can be authenticated. Using SAML, web based SSO can be implemented.
In this topic, the steps for configuring SSO using ADFS with SAML is given.
![]() Important: It is necessary for SapphireIMS portal to be https enabled
in order to use SAML based authentication. Refer to the section Appendix->Enable
HTTPS and SSL.
Important: It is necessary for SapphireIMS portal to be https enabled
in order to use SAML based authentication. Refer to the section Appendix->Enable
HTTPS and SSL.
Fully configured ADFS and AD setup. Refer to the topic Appendix->Configuring ADFS for more information.
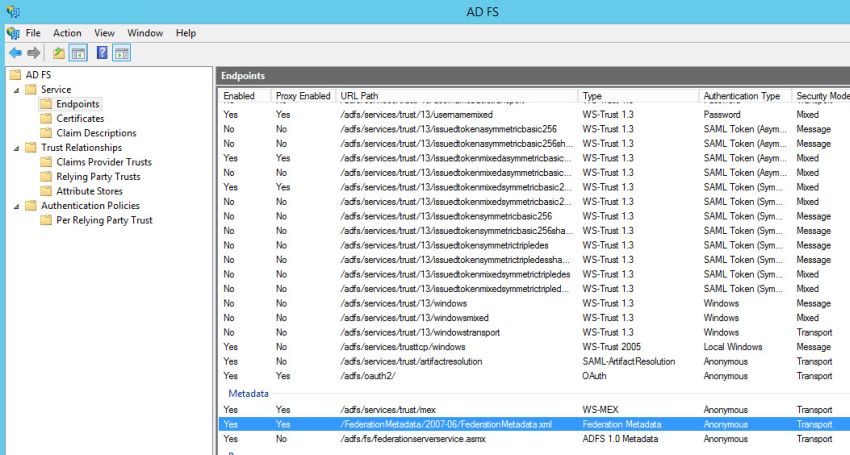
The Federation Metadata file from ADFS from the following location
https://<ADFS Server>/FederationMetadata/2007-06/FederationMetadata.xml
The URL is available in the ADFS server by navigating to 'Services' and clicking on 'Endpoints'. Replace <ADFS Server> with the FQDN of the ADFS server.
The Outgoing NameID Format which specifies URI reference corresponding to a name identifier format. The currently supported NameID formats include Email address and Windows Domain Qualified Name. By default, 'Email' is the NameID format. If an alternative format is chosen, the same has to be specified in the claim rules in ADFS.
The users in AD need to be imported into SapphireIMS. Refer to the topic Settings->User Management->AD and LDAP Integration->LDAP/AD Server Synchronization Configuration for the steps to import AD users.
For using SAML, it is mandatory that https is enabled for SapphireIMS. Refer to the topic Appendix->Enable HTTPS and SSL for the steps for the same.
Enable 'https' for SapphireIMS application. Refer to the topic Appendix->Enable HTTPS and SSL to enable the same.
Enable the global settings key 'Single sign on setting for portal login' by doing the following. Enable the single sign-on setting clicking on 'Settings' and under 'Advanced System Settings', click on 'Global Settings'. Search for the key 'Single sign on setting for portal login' and set the value as '1'.
Click the 'Settings' tab. In the 'User Management' section, click on 'AD &LDAP Integration'.
Click on 'Identity Providers'. The listing screen is displayed.

Click on
the '![]() '
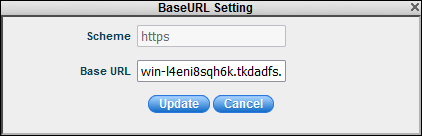
icon to change the base URL setting as shown below. Enter the
base URL used to access the portal and click 'Update'.
'
icon to change the base URL setting as shown below. Enter the
base URL used to access the portal and click 'Update'.
 Note: For the mobile application
use 'MobileApp' instead of 'SapphireIMS' in the base URL.
Note: For the mobile application
use 'MobileApp' instead of 'SapphireIMS' in the base URL.
Click 'Add' to add an entry for a new Identity Provider. The IdP selection screen is displayed.

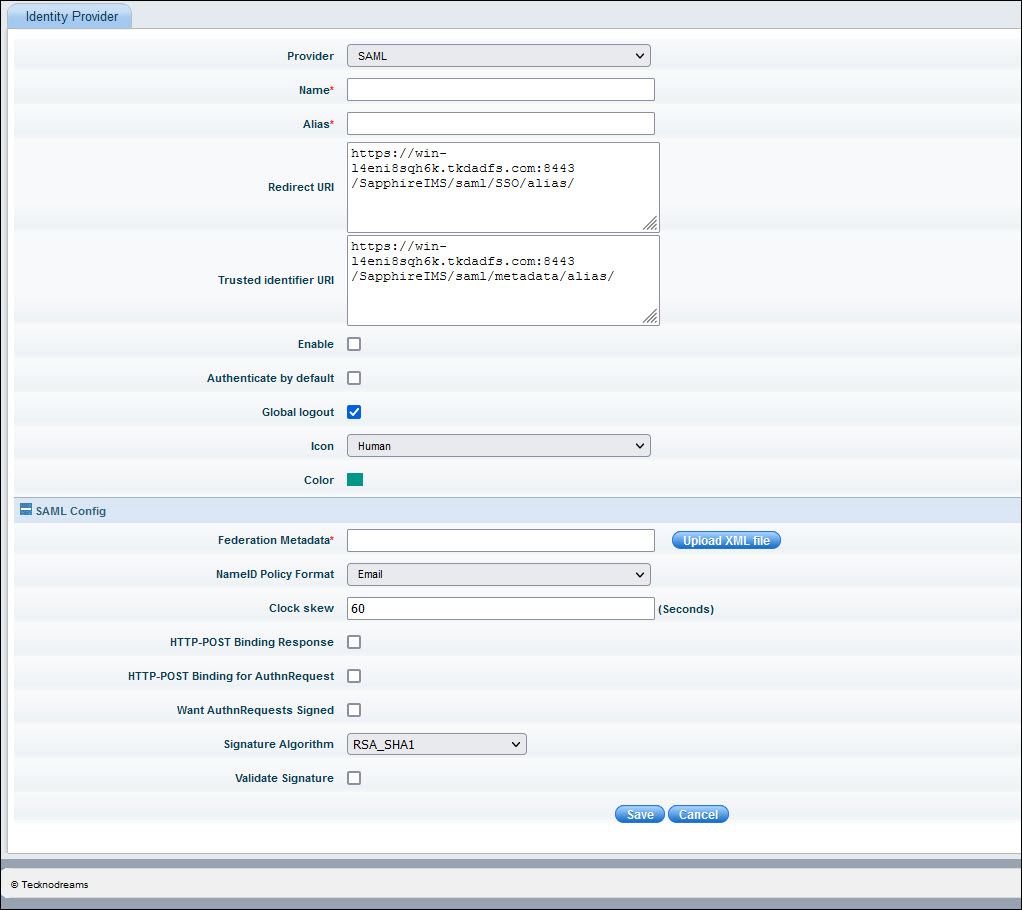
Select 'SAML' as the 'Provider'. The following screen is displayed.
Sr. No. |
Field Name | Description |
1 |
Identity Provider |
Select the name of the identity provider as 'SAML'. |
2 |
Name |
Enter a name for the IdP. |
3 |
Alias |
The alias uniquely identifies an identity provider and it is also used to build the redirect URI
|
4 |
Redirect URI and Trusted identifier URI |
The Redirect URI (SAML Assertion Consumer Endpoint) and Trusted Identifier URI (Relying Party Trusted Identifier) are used when configuring ADFS. These are display-only fields. Note the values if the ADFS is being configured manually.
|
5 |
Enable |
Enable/Disable this identity provider
|
6 |
Authenticate by Default |
This setting needs to be enabled when the organization has its own customized login portal which is used centrally and the SapphireIMS login screen needs to be hidden. If enabled, on entering the SapphireIMS URL, it directly takes the user to the custom login screen or if the user is logged in already, to the SapphireIMS home page. By default, this is disabled. |
7 |
Global Logout |
By default this option is enabled which on logout results in all applications being logged out. |
8 |
Icon |
Select the icon to click on the SapphireIMS login screen which will allow logging in via ADFS authentication. Currently the icons can be selected from 'Human' (Default), 'Google' and 'Microsoft'. |
9 |
Color |
Select the color of the icon. |
10 |
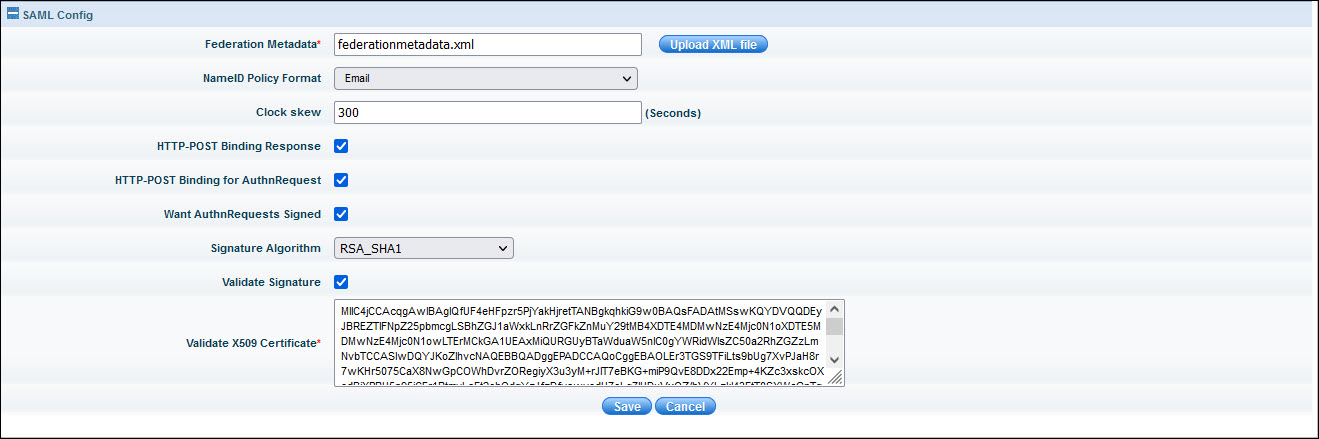
Federation Metadata |
Federation Metadata xml file from IdP which has the details from ADFS including the Single Sign-On Service URL and Single Logout Service URL. These URL are used to send authentication requests and logout requests.
|
11 |
NameID Policy Format |
Specifies the NameID identifier forma. Default selection is 'Email' |
12 |
Clock Skew |
The IdP system time and SapphireIMS system time should be the same. Any variations could cause the assertion expire by the time SapphireIMS processes it. This can be avoided by setting an allowable clock skew, in seconds. Default value is 60 seconds. |
13 |
HTTP Post Binding Response |
Indicates whether to respond to requests using HTTP-POST binding. If false, HTTP-REDIRECT binding will be used. Enable this by default. |
14 |
HTTP Post Binding for Authn Request |
Indicates whether the AuthnRequest must be sent using HTTP-POST binding. If false, Artifact binding will be used. Enable this by default. |
15 |
Want AuthnRequests Signed |
Indicates whether the identity provider expects a signed AuthnRequest. Enable this by default. |
16 |
Signature Algorithm |
The signature algorithm to use to sign documents. This option is presented only if 'Validate Signature' is enabled. Select 'SHA-1' as the default. |
17 |
Validate Signature |
Enable/Disable signature validation of SAML responses. Refer to Enable Signature Validation for the steps. |
18 |
Validate X509 Certificate |
The certificate in PEM format that must be used to check for signatures. This option is presented only if 'Validate Signature' is enabled. Refer to the section Enable Signature Validation to generate the content for this field. |
Note: If Artifact binding
is used for authentication requests, CA certified certificate is required.
It will not work with self-signed certificate.
Update the fields and click on 'Save'. This saves the IdP information and returns you to the listing page.
Once the SAML related configuration is done in SapphireIMS, a link is provided in the list view to download 'metadata.xml' file which is subsequently needed to configure the Relying Party Trust in ADFS.

Click on the 'Click here' option in the 'Download Metadata' column. When prompted, click on the option to save the file. The 'metadata.xml' file is created in the 'Downloads' folder.
This section details the step to be followed if signature validation is enabled for the identity provider to generate the certificate content which has to be entered into the corresponding field while creating the identity provider (Field # 14).
Open the file 'federationmetadata.xml' in the browser. Open a text editor like Notepad.
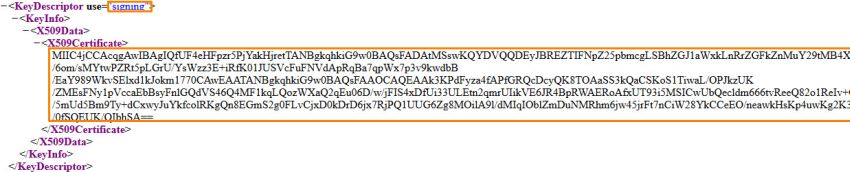
Search for the string 'SPSSODescriptor' and under that block for the string '<KeyDescriptor use="signing">'. Copy the string under '<X509 Certificate>' into Notepad and save the file as 'signingkey.cer'.
Open the file created in the previous step by double clicking on it. The certificate details are displayed.
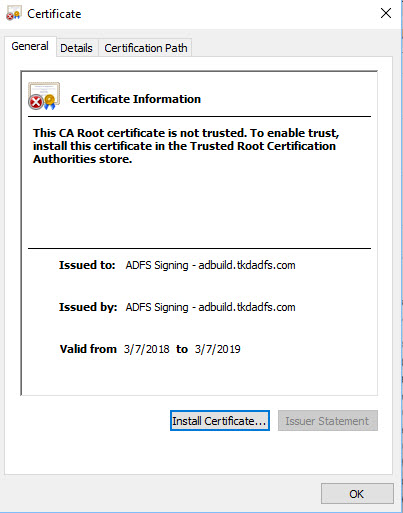
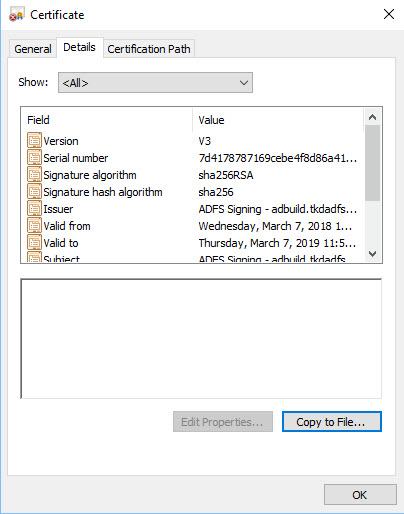
Navigate to 'Details' and click on 'Copy to File'.
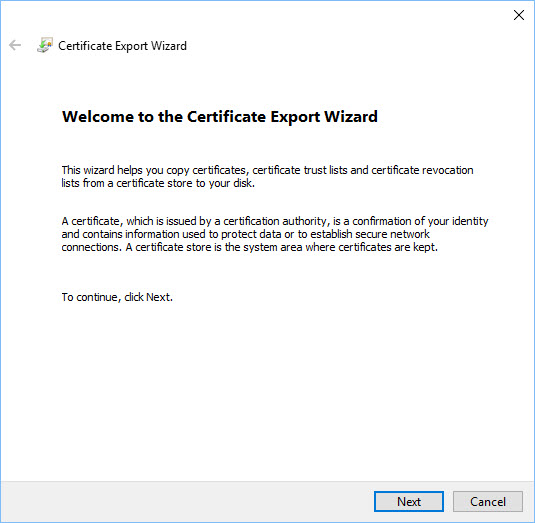
The Certificate Export Wizard is displayed. Click 'Next'.
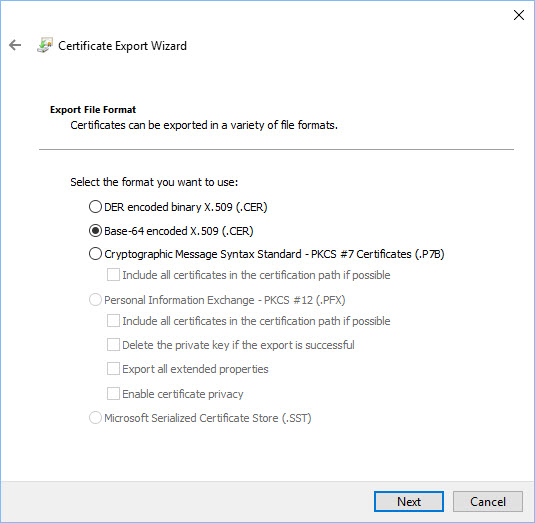
The certificate format has to be selected. Select 'Base-64 encoded X.509 (.CER)' and click on 'Next'.
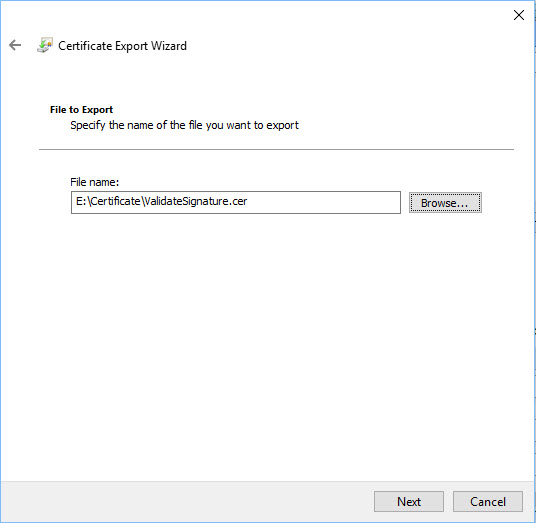
Enter the filename where the certificate has to be exported and click on 'Next'.
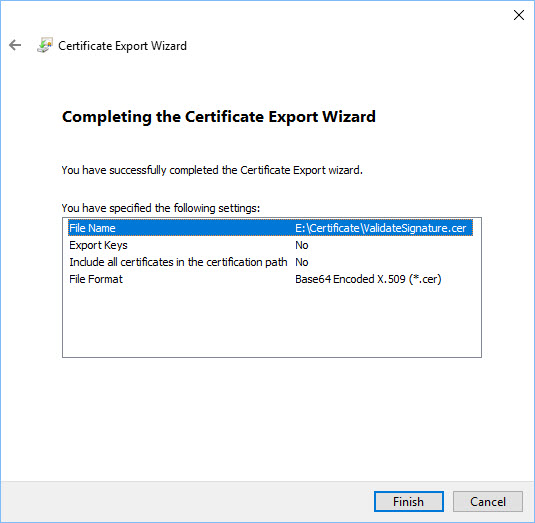
Review the information and click on 'Finish'.
Open the saved certificate file in a text editor.
Copy the content and paste it in the identity provider configuration as shown below.
Depending on the edition you are using, follow the steps under one of the sections below.
Configuring SAML for the Mobile App is similar to the steps for configuring SAML for the desktop with one slight difference. Once the IdP configuration is added into SapphireIMS carry out the following additional step.
Download the 'metadata.xml' file from SapphireIMS portal and rename it as 'MobileAppmetadata.xml'.
Open the 'MobileAppmetadata.xml' file with a text editor, and change 'SapphireIMS' to 'MobileApp' in all the places it occurs.


While setting up the Relying Party Trust in ADFS use 'MobileAppmetadata.xml' for the configuration.
Download the 'metadata.xml' file from SapphireIMS portal and rename it as '<CustomerAliasName>MobileAppmetadata.xml'.
Open the file '<CustomerAliasName>MobileAppmetadata.xml' in a text editor. Locate the 'EntityDescriptor' entry and replace the customer name (XYZ in the Figure 1 below) with 'MobileApp'. So also prefix the last entry in the path with the customer name. Refer Figure 2 for the modifications.

Figure 1: Original Entries

Figure 2: Modified Entries
This needs to be repeated for 'md:SingleLogoutService' entry which is located at the end of the file as shown in Figures 3 and 4 below.

Figure 3: Original Entries

Figure 4: Modified Entries
Note: In
the above examples XYZ is the customer alias name and MAP_SAML is the
alias name of the Identity provider