![]()
![]()
Patch Management module helps to scan and assess the patches that are deployed / missing in the Linux systems in the network. This helps to make sure that all the Linux systems on the network are up to date with the critical or recent patches that are released and there are no security vulnerabilities in the network.
The Global Settings for Patch Management 'Enable/Disable Patch management' should be set to 1 to enable Patch Management. You can either do this in the Global Settings screen (Settings->Advanced System Settings->Global Settings)or in the Patch Management Wizard (Settings->Software Management->Patch Management Wizard->Linux Patch Scanning and Deployment Settings).
The configuration involves setting up the profile to include/exclude systems for patch management, setting up schedules for scanning and deployment and marking critical systems for prioritization. These settings can be done from the Patch Management Wizard. Refer to Settings->Software Management->Patch Management Wizard->Linux Patch Scanning and Deployment Settings for more details.
If there is a Proxy Server being used in the organization, create a Proxy Settings Profile (Refer Creating Proxy Settings Profile). If a commercial distribution of Linux is being used (RHEL, SUSE Enterprise), then the Subscription Account credentials need to be configured (Refer Linux Subscription Account).
After creating the profiles, these can be mapped to a set of systems (Refer Map Profile)
SapphireIMS also supports offline patch management for Linux derivatives of Debian including Ubuntu. This is detailed in Linux Offline Patch Management.
Click on 'Settings' and in the 'Software Management' section, select 'Profile Manager'.
In the 'Rule Type' drop down menu, select 'Proxy Setting'. Click 'Add'. The screen below is displayed.
Enter the 'Proxy Profile Name' for the proxy settings.
Enter the 'HTTP Proxy Server' name or IP Address.
Enter the 'HTTP Proxy Port'.
Enter the login credentials ('User Name', 'Password') for the HTTP Proxy Server.
Click 'Add' to save the profile.
The Linux Subscription Account must be configured for commercial Linux distributions like RHEL and SUSE Enterprise
Click the 'Settings' tab. In the 'Software Management' section, click 'Patch Management Settings'
In the 'Rule Type' drop down menu, select 'Linux Subscription Account'. Click 'Add'. The screen below is displayed.
Enter the 'Subscription Profile Name' of the Linux Subscription Account.
Enter the login credentials ('User Name', 'Password') of the Linux Subscription Account as provided by the vendor.
Enter the vendor registered 'Email' address for the Linux Subscription Account.
Click 'Add' to save the profile.
This step is required to map any profiles created to a set of hosts.
Click the 'Settings' tab. In the 'Software Management' section, click 'Patch Management Settings' Click on the 'Linux Patch Management Settings' tab. The following screen is displayed.

Select the Host and click 'Map Profiles'.
Select the appropriate 'Proxy Profile' or 'Subscription Profile' from the drop down and click 'OK'.
To unmap profiles, select the Host and click 'Unmap Proxy Profile' to unmap the proxy profile from the host.
Notes: Click "Advanced Search" to search for the host names based on Category, Organization Unit and Operating System.
SapphireIMS has support for offline patch management for Debian, Ubuntu and other Linux flavors derived from Debian. In the case of offline patch management, the package repository is downloaded and stored on the SapphireIMS server. Further on, the patch scans and deployment are done using the local repository and there is no need for an Internet connection. If the patch repository is not found locally and Internet connectivity is available, then SapphireIMS attempts to access the package from the online sources.
To configure the offline patch scan, a task needs to be configured to automatically download the package. The rest of the patch management configuration is similar to how it is done for online patch management.
Click on 'Settings' and in the 'IT Automation' section, click on 'Automation Tasks'.
Select 'Patch Management'.

Click on 'Ubuntu Cab File Creation'.
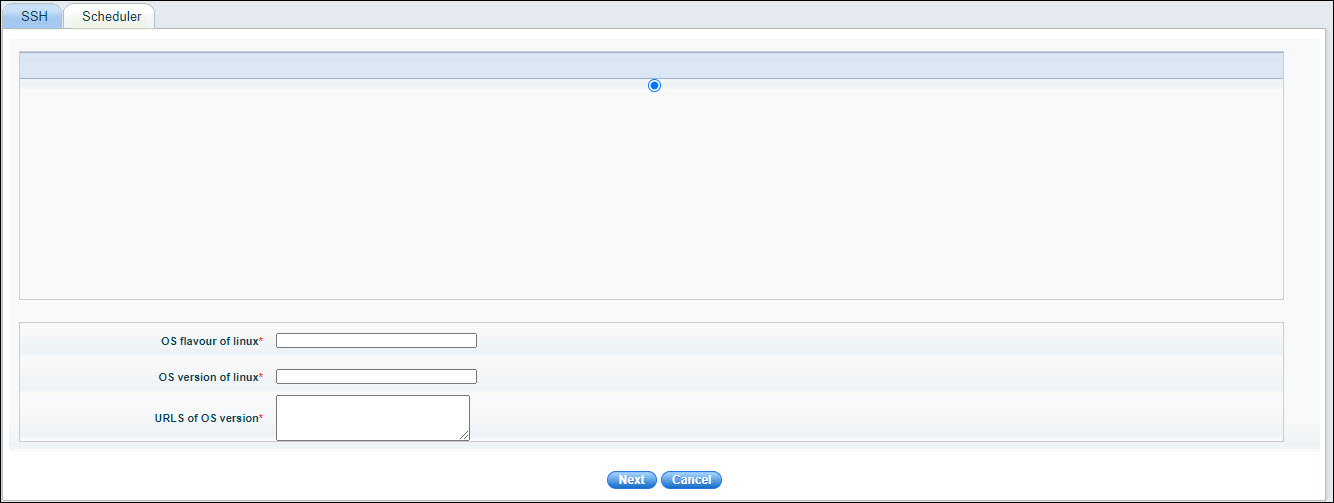
Enter the 'OS flavor of Linux' and the 'OS version of Linux'. The packages to be downloaded vary based on the flavors and versions.
Enter the 'URLS of OS version' which are the URL for hardware specific packages if needed. Note that the URL for the standard packages are in-built. If there are no other packages, enter 'none'.
Click 'Next'.
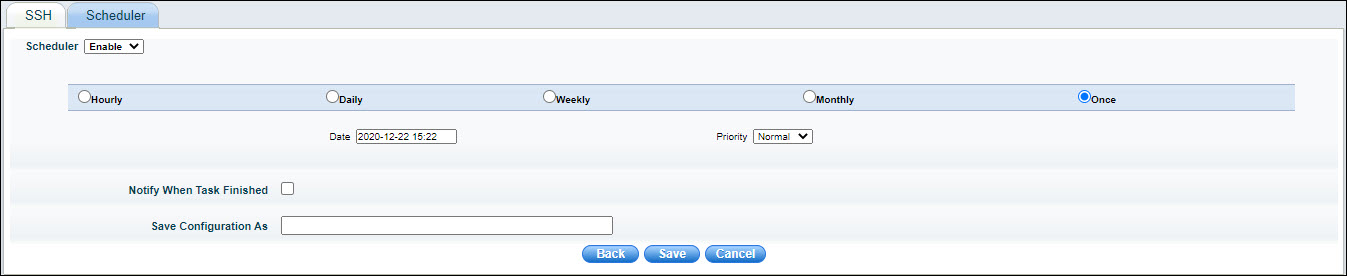
Select 'Enable' to enable the Scheduler.
Select the frequency at which the packages are to be downloaded. This could be on Hourly, Daily, Weekly, Monthly basis or just once.
Depending on the frequency, specify the interval.
If a notification is needed on task completion, check on 'Notification When Task Finished'.
Enter a name in 'Save Configuration As' to save the configuration.
Click 'Save'.
For the rest of the patch scanning and deployment configuration refer to Settings->Software Management->Patch Management Wizard->Linux Patch Scanning and Deployment Settings and the rest of this topic.