![]()
![]()
SapphireIMS has a number of built-in security features for users. This includes the support for self-service to reset the password or unlock the account, set inactivity timeout for the session, enable single sign-on, set a secret pin, set a limit on unsuccessful attempts to login beyond which the account gets locked and limit the number of concurrent sessions for a user. Apart from this you can configure Two Factor Authentication (2FA) for Login, Forgot/Change Password, Unlock Account which causes a One-Time Password (OTP) to be sent via e-mail or SMS and which needs to be entered for performing the operation.
This topic describes the configuration of the security features.
Click on the option 'Security Settings' under Settings > User Management. The Security Settings configuration screen is displayed.
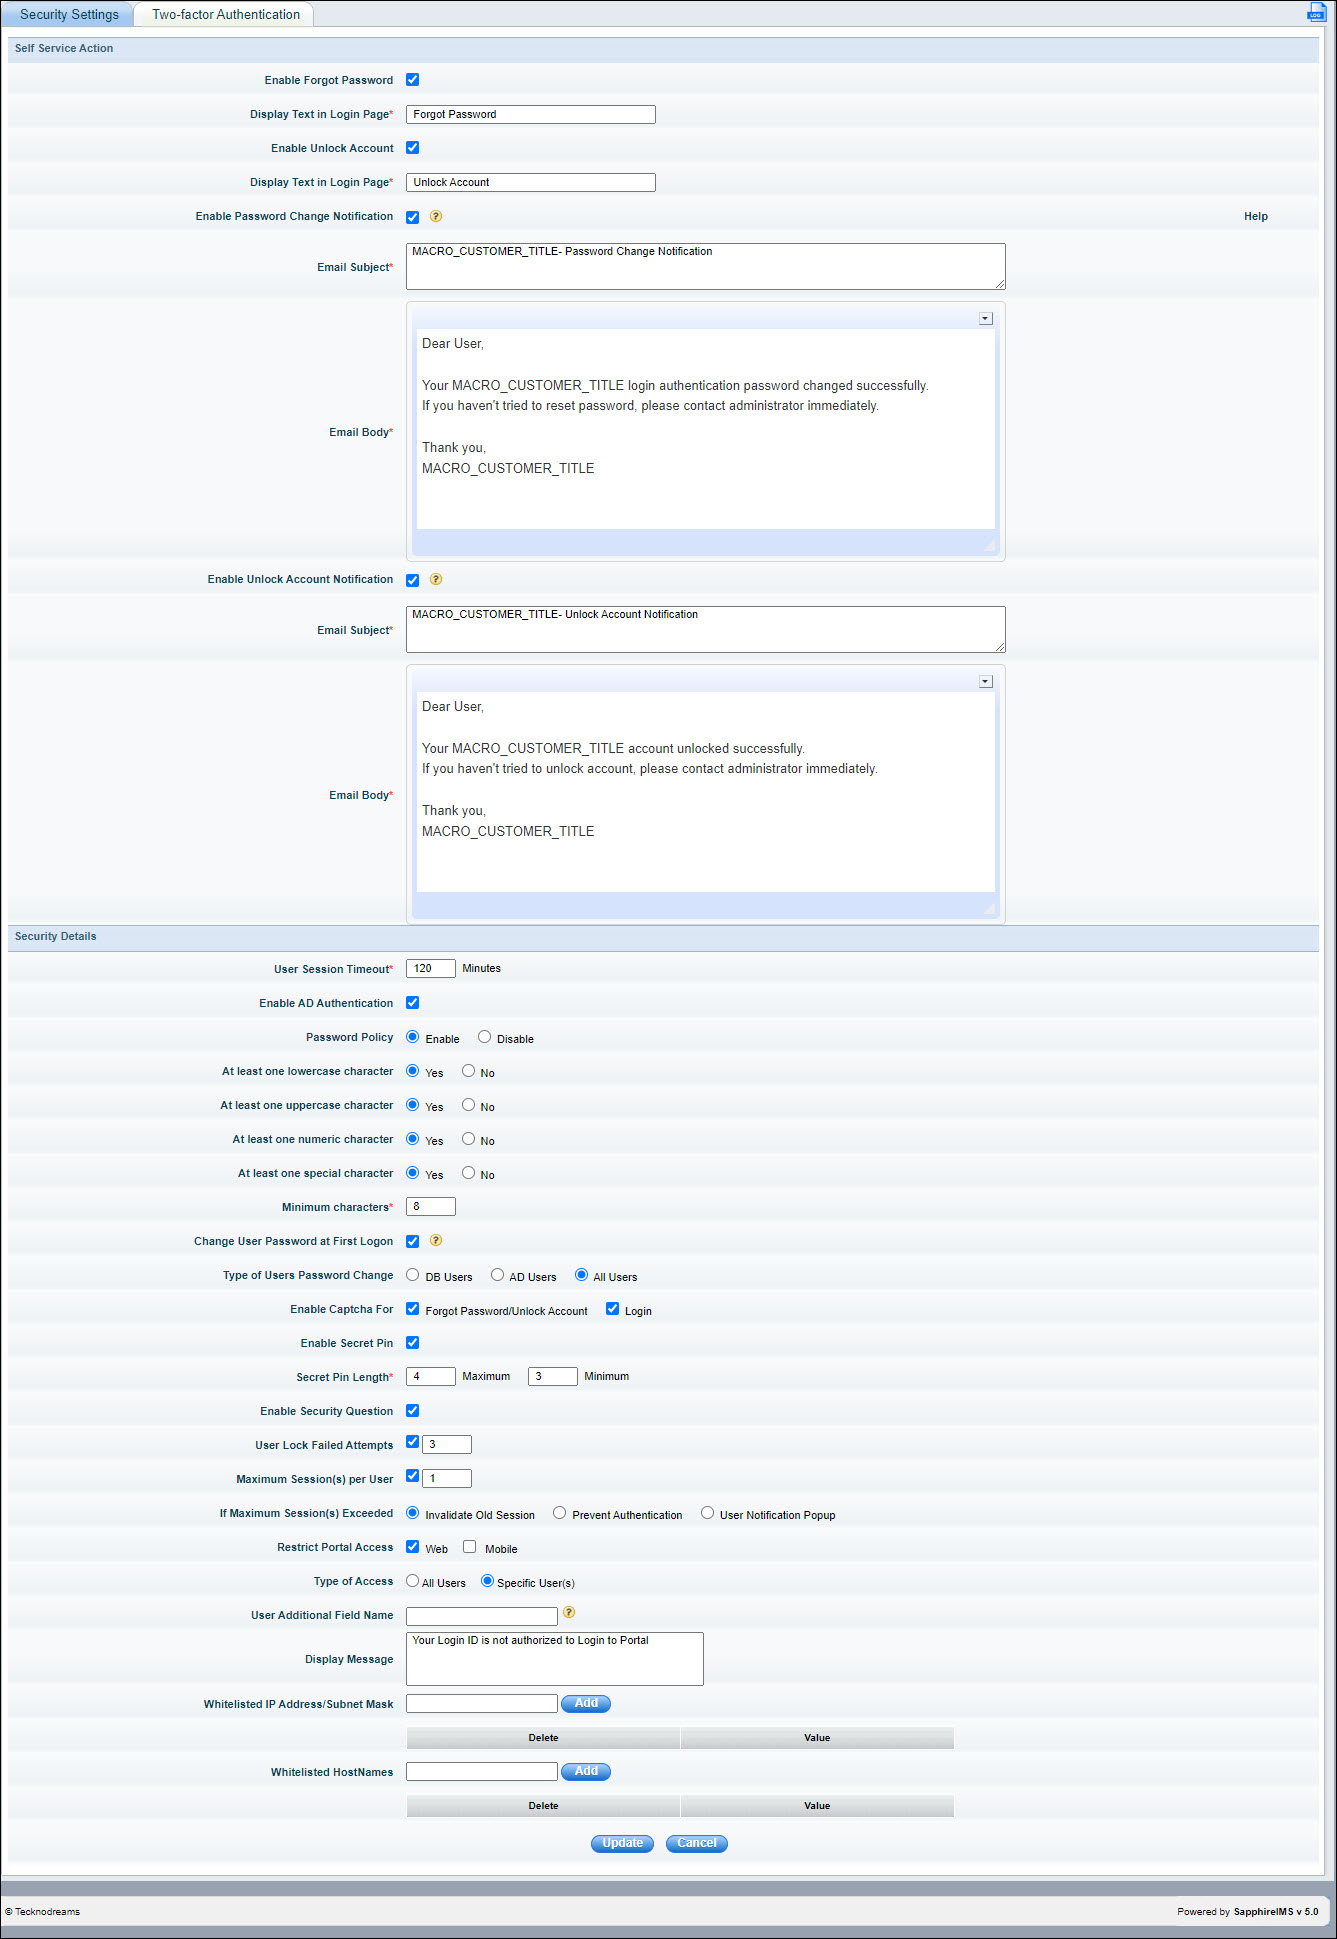
The fields are described below.
|
Click on 'Update'. Proceed to the next section for setting the parameters for 2 Factor Authentication.
 Note: 2 Factor Authentication
can be enabled either with E-mail or SMS only or with both. If you want
to enable 2 Factor Authentication via Email proceed to the section Two
Factor Authentication via Email. If you want to enable 2 Factor Authentication
via SMS proceed to the section Two Factor
Authentication via SMS. If you want to enable both Email and SMS,
then go through both sections.
Note: 2 Factor Authentication
can be enabled either with E-mail or SMS only or with both. If you want
to enable 2 Factor Authentication via Email proceed to the section Two
Factor Authentication via Email. If you want to enable 2 Factor Authentication
via SMS proceed to the section Two Factor
Authentication via SMS. If you want to enable both Email and SMS,
then go through both sections.
Click on the option 'Security Settings' under Settings > User Management. Select the 'Two Factor Authentication' tab. The Two Factor Authentication configuration screen is displayed.
Select 'OTP Mode' as 'Email' or 'Both'.
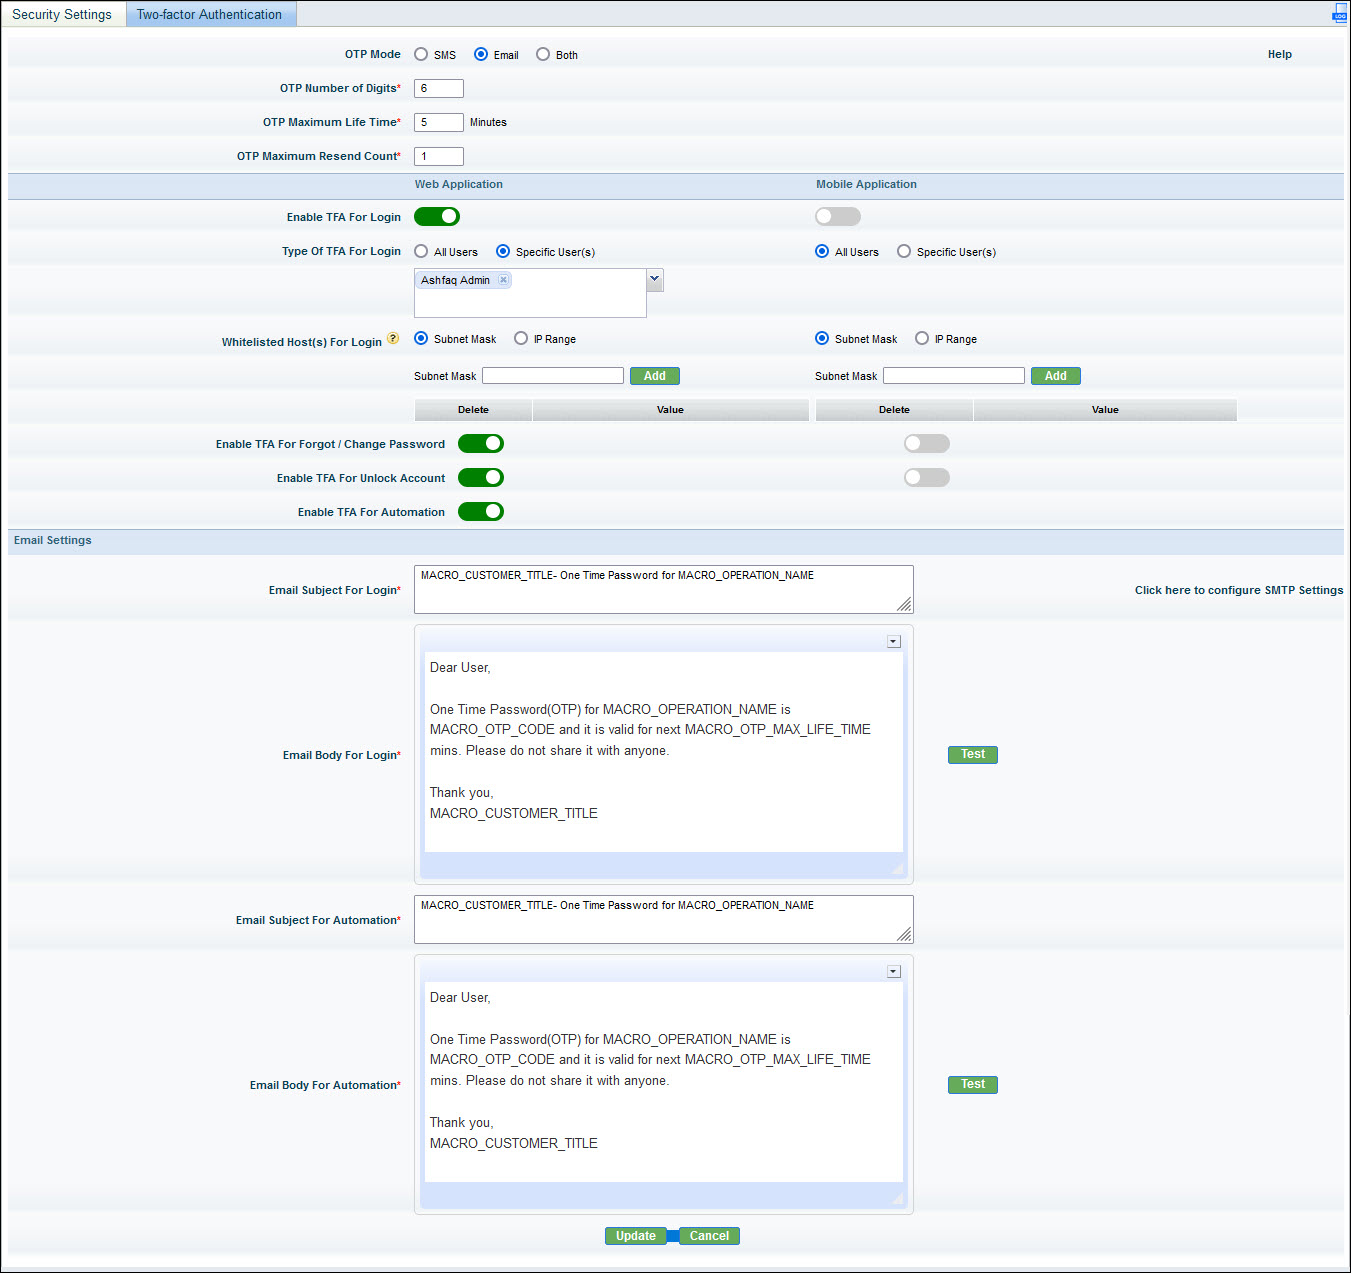
The fields are described in the table below. The settings can be individually decided for Web and Mobile access.
|
Click on 'Update' to save the settings. If the 'OTP Mode' is selected as 'Both' refer to the section Two Factor Authentication via SMS to configure the parameters for SMS.
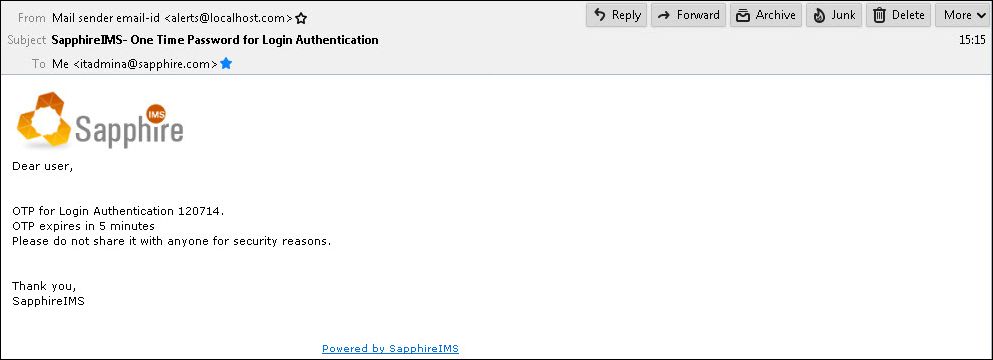
A sample OTP email is shown below.
Click on the option 'Security Settings' under Settings > User Management. Select the 'Two Factor Authentication' tab. The Two Factor Authentication configuration screen is displayed.
Select 'OTP Mode' as 'SMS' or 'Both'.
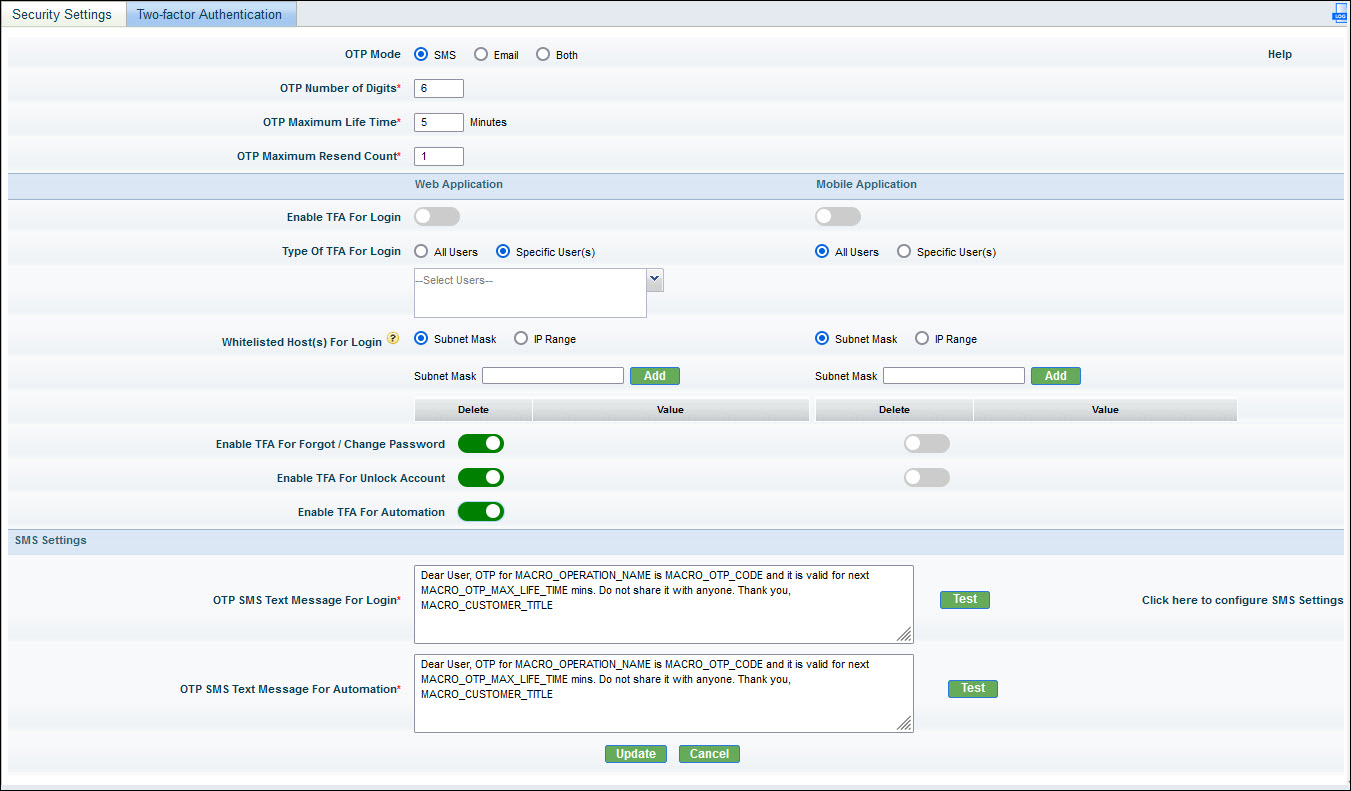
The fields are described in the table below. The settings can be individually decided for Web and Mobile access.
|
Click on 'Update' to save the settings. If the 'OTP Mode' is selected as 'Both' refer to the section Two Factor Authentication via Email to configure the parameters for Email.
This section applies to installations where the Enterprise+ Edition has been installed.
Two Factor Authentication is supported only for the SapphireMSP login. The settings are available under MSP Settings ->Manage System Variables settings screen. The TFA email subject, email body, SMS text message and SMS gateway URL configuration is available in 'OneTimePassword_Email_SMS_Template.properties'. This property file is available in the following specified path:
<Sapphire Installed Path>/ WebManagement/standalone/deployments/SapphireMSP.war/WEB-INF/classes/sapphire/msp/OneTimePassword_Email_SMS_Template.properties
Server restart is not required when any changes are done in the property file.
To enable Two Factor Authentication for Login, set the setting key 'TWO_FACTOR_AUTHENTICATION_LOGIN' as 1. During login the user is prompted for the OTP.
'Forgot Password' and 'Unlock Account' self-service is not supported.