![]()
![]()
Configuration Items (CI) is used to model and capture information about any type of element including service components, infrastructure or any other item which needs to be managed. Similar to Assets and Contracts, CI management is used to hold the information and configure dependencies.
A CI can be
A service
Asset related information or
The fields and attributes of asset/contract
Click on 'CI' under the CMDB menu. The CI dashboard is displayed.
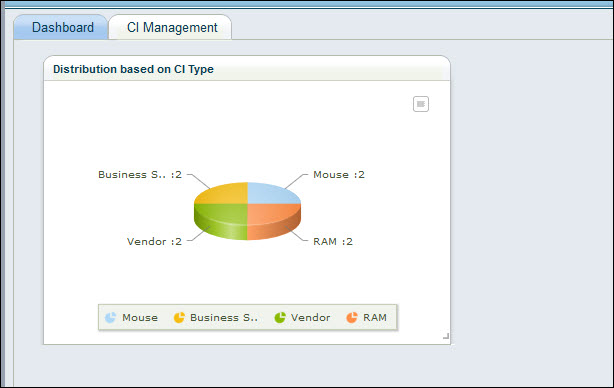
Click on 'CI Management' to view the list of CI.
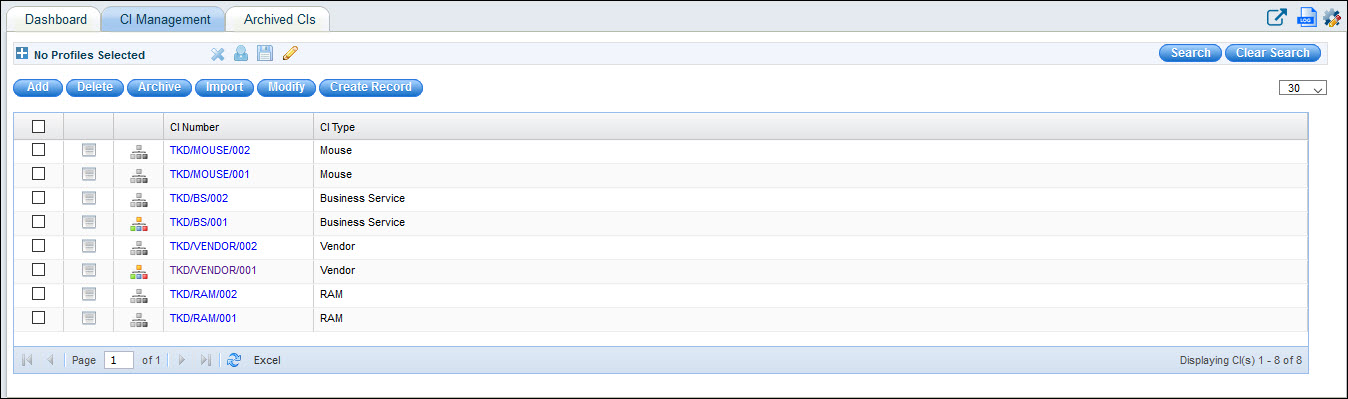
Click on the  button against the CI record to view any associated service desk records.
If there are no records associated this button is greyed.
button against the CI record to view any associated service desk records.
If there are no records associated this button is greyed.
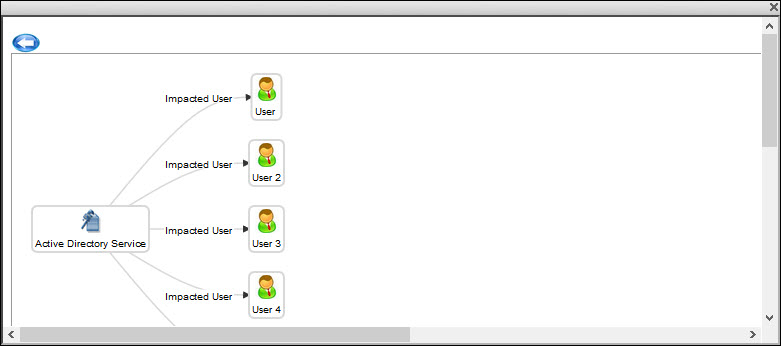
Click on  to view
the relationship with other assets.
to view
the relationship with other assets.
Click on '![]() ' to
customize the CI management listing view. Any custom fields added
under the 'Field Definitions' section of CI Types and Attributes is
listed here as shown below. For more information on adding custom
fields, Refer CI
Types and Attributes.
' to
customize the CI management listing view. Any custom fields added
under the 'Field Definitions' section of CI Types and Attributes is
listed here as shown below. For more information on adding custom
fields, Refer CI
Types and Attributes.
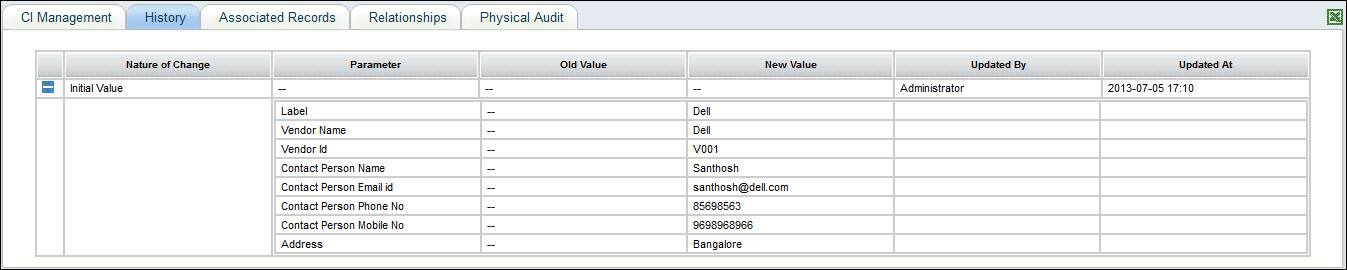
To view the history of changes to
CI, click on![]() . The history is displayed. The history
can be exported into an Excel.
. The history is displayed. The history
can be exported into an Excel.
You can create and save Search Profiles. This is similar to Search Profiles under Assets.
Click on 'Add' to create a new CI. A CI entry screen is displayed.

The fields are described below.
|
Click on 'Save' after entering all the fields.
To delete a CI, select one or more CI and click on 'Delete'.
Once the CI is no longer active, it can be archived. Select one or more CI and click on 'Archive'.
Instead of entering the entire details of the CI while creating manually especially when there is a large quantity of similar CI, a template can be created where much of the common information can be pre-filled. Once the CI is created, it can be updated to modify fields specific to the CI. Refer Settings->Asset and Inventory Management->Assets->Import Templates for details on Import Templates.
Click on 'Import'. The CI import screen is displayed.

Select the 'CI Type'. Click on 'Generate' to generate the CI number or key in the CI Number.
Select the 'Template Name' to select the template to use.
Click on 'Save' to create a new asset or 'Save and Edit' which displays the CI for editing details before saving.
If one or more attributes has to be changed for multiple CI, then a modify CI template can be created and used. Refer Settings->Asset and Inventory Management->Assets->Import Templates for details on CI Import Templates.
Select one or more CI and click on 'Modify'.
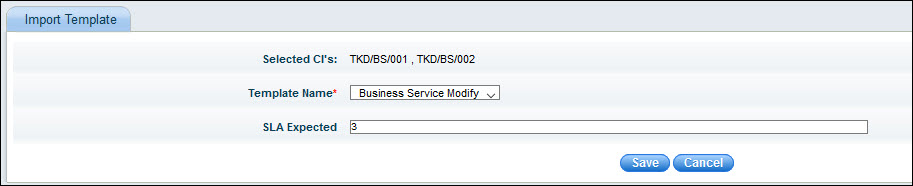
The CI are listed. Select the 'Template Name' to be used.
The attributes which have to be updated are displayed. Update the fields with the new values.
Click on 'Save'.
 Note: The Global Settings
key 'Enable Service Desk Ticket Submission for Asset' must be set to 1
to enable this feature.
Note: The Global Settings
key 'Enable Service Desk Ticket Submission for Asset' must be set to 1
to enable this feature.
SapphireIMS provides a facility to create a Service Desk record for a CI and link it.
Click on 'Create Record' tab. The project selection screen is displayed

Select a 'Project' from the list and click on 'New Record'.
The Service Desk Record submission screen is displayed. Enter the fields and click on 'Save'. A record is created with the CI number linked to it.
In the ‘CI Management’ tab click on an existing CI to modify its details.
.gif)
Click on 'Update' to save the changes.
Note: CI number cannot be modified
Any modifications made to a CI are recorded in this tab. You can view the details of the changes made to the CI.
Click on 'History'. The History of the CI is displayed.
Click on 'Associated Records' to view the Service Desk records created for this CI.

You can filter the time period for which the Service Desk records are to be displayed.
A CI can be mapped to an asset/contract/user.
Click on 'Relationships' option.
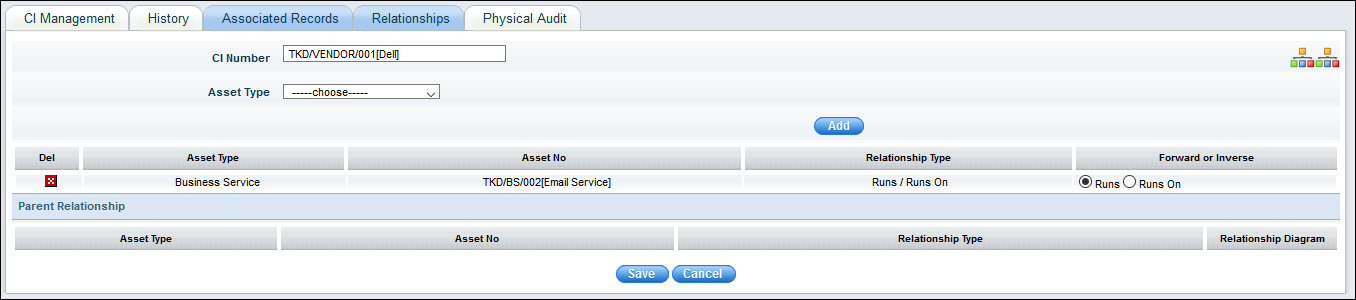
For a detailed explanation on creating relationships, refer CMDB->CMDB->Asset Management->Relationships..