![]()
![]()
SapphireIMS can detect and discover computer systems, routers, printers, switches and other devices in your organization's network to enable collection of inventory information and management of the infrastructure.
Discovering devices requires creation of discovery profiles. Discovery profiles specify the type of protocol used, IP ranges etc. This profile can be configured to perform discovery across domains, within an IP range using CIDR methodology and by configuring DHCP scope details which uses a subnet mask.
The discovery is performed by means of various data collection types that are specified in the credential profiles. The following data collection types and protocols are supported:
SNMP v1, v2c and v3
WMI
WBEM
SSH
VM
LDAP
CLI
Dell Wyse
Cloud Discovery
Cloud Native Discovery
For each of these, there is a configuration to be done and this is explained in the next topic.
Successful discovery results in detection of all the devices and applications in your network. This is referred as ‘Inventory’ in SapphireIMS which gives detailed device information when drilled down. The following sections provide complete details of configuring the discovery process and also on managing the discovered systems.
To discover your network you need to write a discovery rule first. The system provides a detailed discovery wizard to accomplish this. Listed below are the steps to be followed in order to complete the wizard configuration.
Click the 'Settings' tab. In the 'Asset and Inventory Management' section, click on 'Discovery Profiles and Wizard' option. This will list the discovery rules that are currently defined.
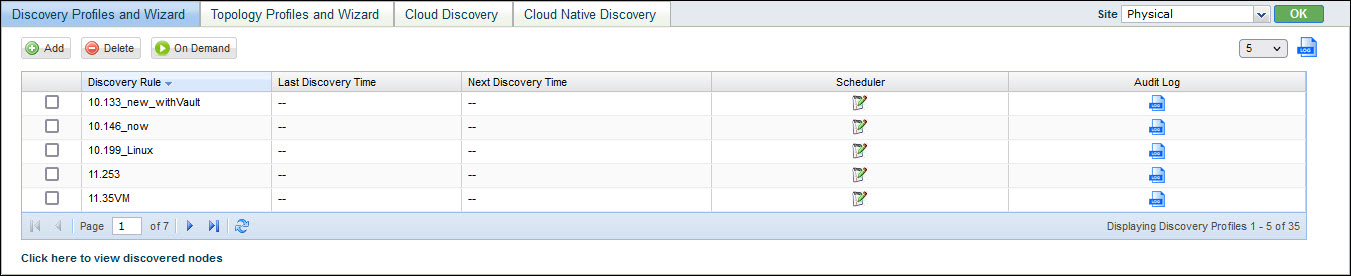
You can view the audit log to get
the list of changes. Click on  to
view the log.
to
view the log.
Select a discovery profile and click 'On Demand' to post an on demand discovery job of discovering the devices using the data collection profile specified. The discovery process is immediately initiated. To track the status of the activity, on the SapphireIMS menu bar, click the ‘Inventory' tab and 'Discovery'. Click the 'Discovery Status’ tab.
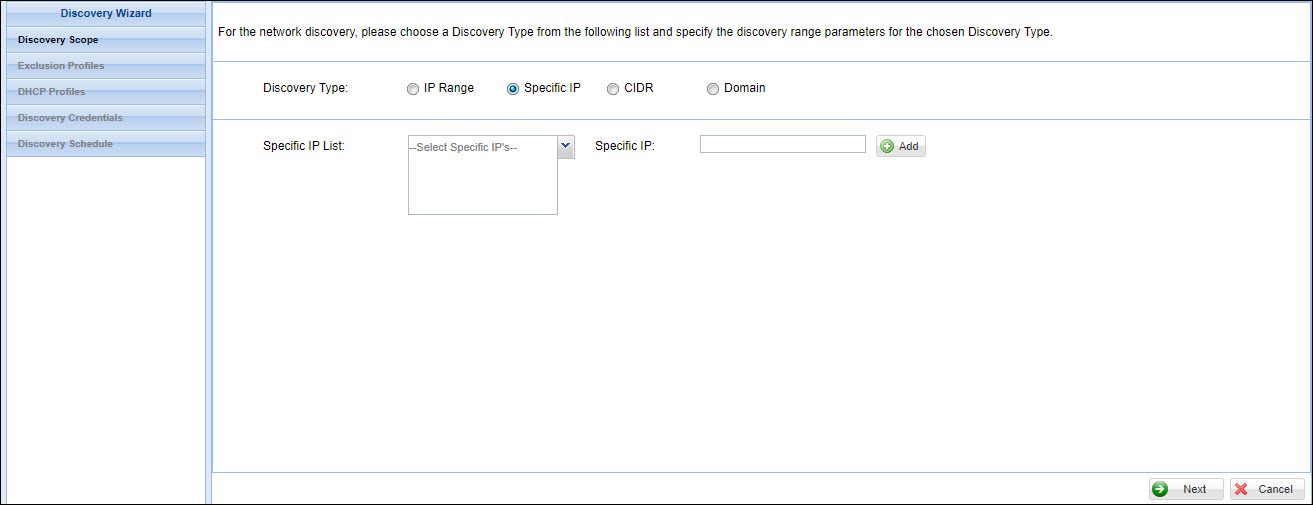
To add a new discovery rule, click 'Add'. 'Discovery Wizard' will be displayed as shown below.
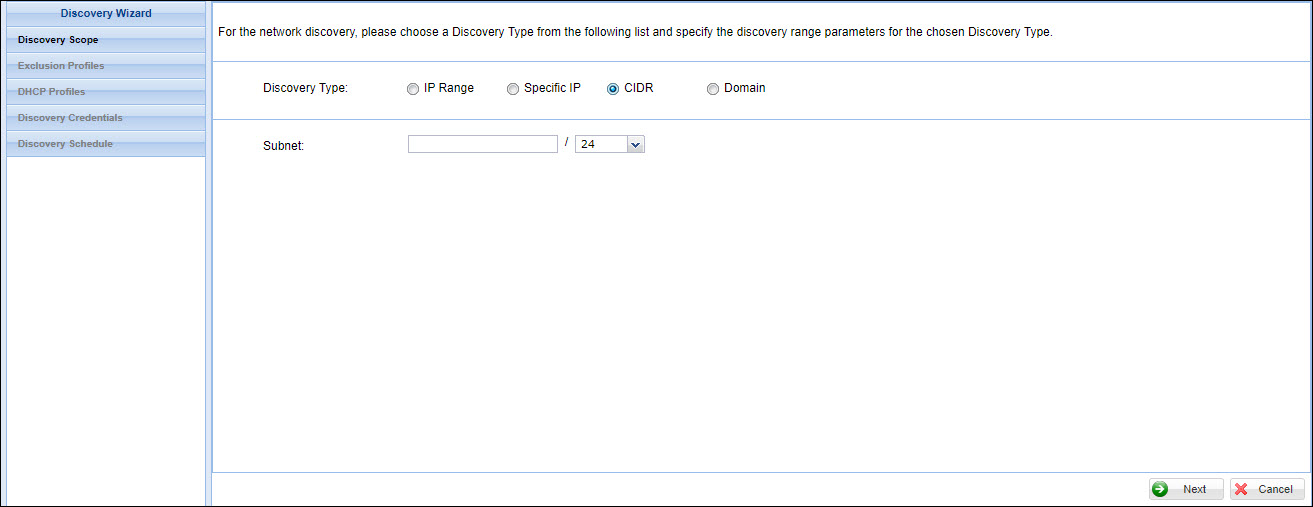
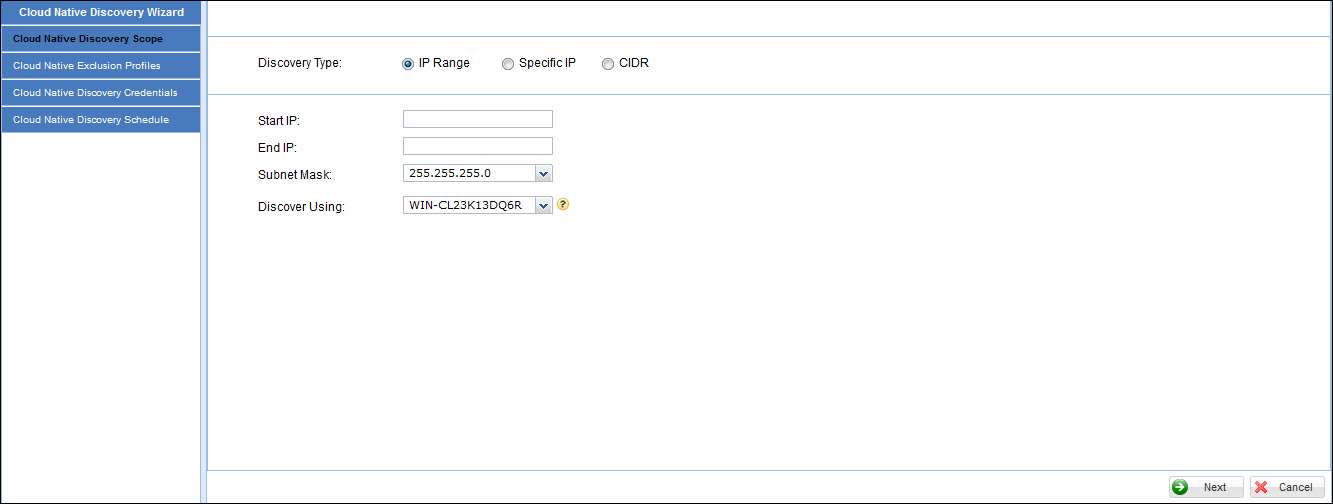
The scope for the discovery can be selected by selecting the 'Discovery Type'. This can be an 'IP Range', 'Specific IP', 'CIDR' pattern or a 'Domain'.
If you select 'IP Range', a screen pops-up to enter the 'Start IP', 'End IP', 'Subnet Mask'.
If you select 'Specific IP', you will be prompted to add an IP address. Enter the IP address in the box on the right and click on 'Add'. The IP address is displayed in the box on the left hand side. You can repeat this to add multiple IP addresses.
If you select 'CIDR' then enter the network prefix in 'Subnet' and select the bits for the host identifier.
Finally if you select 'Domain', select 'Local Network Neighborhood' to discover from among local domains which you can select or select 'AD Discovery' and specify the IP address of the domain controller.

In case you are using SapphireIMS Enterprise or SapphireIMS Enterprise Plus editions, there will be more than one data collector. Therefore, you need to select the appropriate data collector which will be responsible for discovery of the systems associated with this discovery profile. Once the system is mapped to the data collector, all future data collections, jobs, processing etc. for a system happens with respect to the associated data collector only. In the case of Enterprise and Enterprise Plus editions select the data collector in the 'Discover Using' field which is the data collector to be used for collection of data and relevant for Enterprise and Enterprise Plus editions of SapphireIMS. The screen is as shown below.
Click 'Next' to view the following options. Click each option below to see the detailed explanation.
The discovery process is immediately initiated if the scheduler is enabled and ‘Once’ option is selected in the 'Discovery Schedule' screen. Once initiated you will be presented with the 'Discovery Status' screen where you can track the devices that are being discovered as per the rule configuration.
In the ‘Discovery Status’ screen, the discovery can be stopped or paused at anytime before completion.
The graphical representation of the physical connection between the nodes is called Network Topology. This graph does not necessarily correspond to the actual physical layout of the nodes in the computer network.
SapphireIMS presents this mapping of one or more nodes in the network in ‘Topology View’ by configuring the Seed device/devices which will be the starting point from where the topology discovery starts. The Seed device typically should be core Switch/Switches. Router can also be configured as seed device but it will give minimal information.
SapphireIMS uses SNMP protocol to collect the topology information by querying the seed devices and also devices (switches and routers) directly connected to it. This contributes to the physical topology recursively, provided the devices are SNMP enabled and uses the cache stored by at least one of the discovery protocols listed below.
CDP – Cisco discovery protocol
LLDP – Link layer protocols
NDP/SONMP – Nortel discovery protocol/ SynOptics network management protocol
FDP – Foundry discovery protocols
EDP – Extreme discovery protocol
If the system is unable to collect data using the above mentioned discovery protocols, it uses STP (Spanning Tree Protocol) information. STP needs to be configured properly in the switches to collect topology information.
The nodes connected to each physical topology contributing device will be located using ARP tables (Address Resolution Tables) and Layer-2 Switch MAC forwarding tables that detects the nodes by IP address and tells the port used for that node.
Once the seed device of a switch/router is added, the devices directly connected to it are detected and shown in the graph. These devices must be compliant with any one of the discovery protocols for the device and its neighbors to be detected in the topology view. Also topology view gives information of port-node mapping once you drill down each of the detected devices.
To view the network topology you need to configure the seed device in ‘Topology Profiles and Wizard’.
Click ‘Settings’ > ‘Asset and Inventory Management' section > click ‘Discovery Profiles and Wizard’.
Click ‘Topology Profiles and Wizard’ tab and click ‘Add’ to display the ‘Seed Info’ window. Refer to the section below.
This section describes the steps to configure Cloud Discovery.
Click ‘Settings’ > ‘Inventory Management'. Next click on ‘Discovery Profiles and Wizard’. Click on the tab 'Cloud Discovery'.
The list of cloud discovery rules is displayed.

Click on 'Add' to add a new rule or click on a rule to edit. The rule configuration screen is displayed.
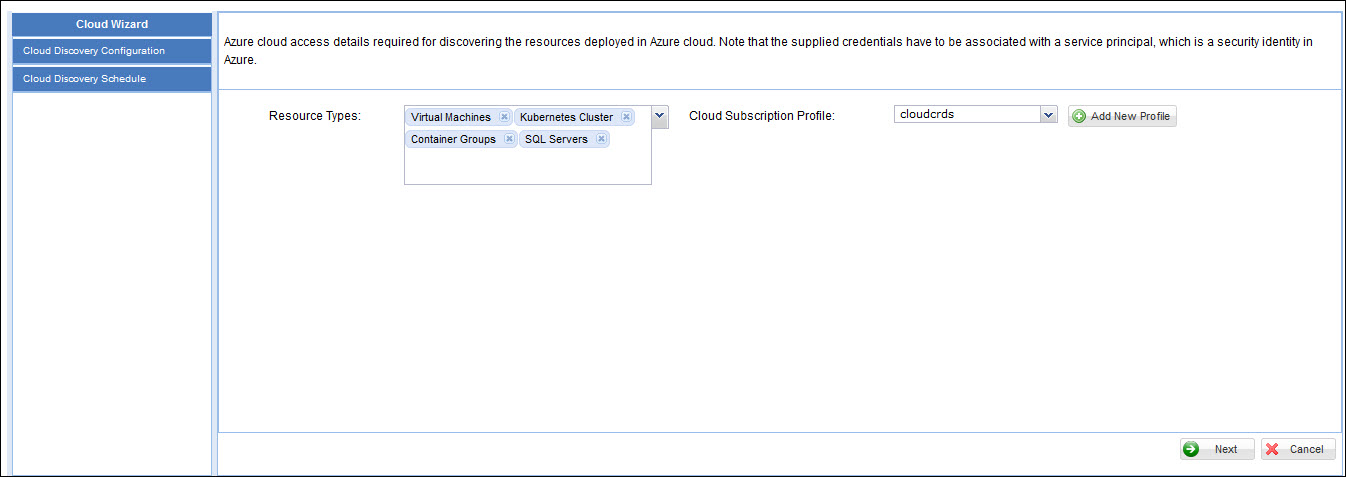
Select the 'Resource Types' from 'Virtual Machines', 'Kubernetes Cluster', 'Container Groups', 'SQL Servers'.
Select a 'Cloud Subscription Profile' 'from among the list in the drop down or click on 'Add New Profile' to add a new profile. The screen to add a new profile is displayed.
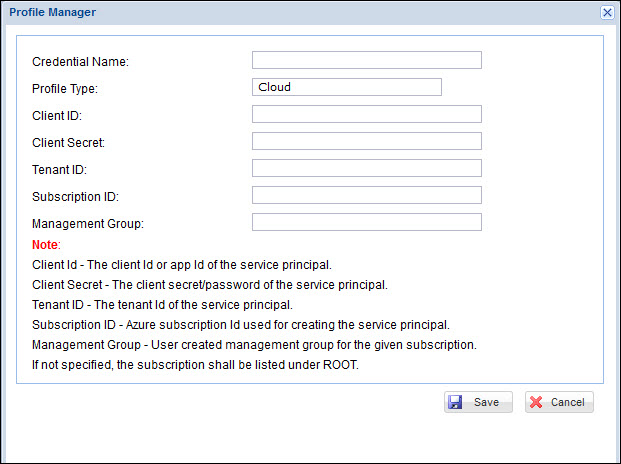
Provide a 'Credential Name'. The 'Profile Type' is 'Cloud'.
Enter the 'Client ID' which is the application ID of the service principal.
Enter the 'Client Secret' which is the client secret/password of the service principal.
Enter the 'Tenant ID' of the service principal.
Enter the 'Subscription ID' used for creating the service principal.
Enter the 'Management Group' for the subscription. If not specified, the subscription is listed under 'ROOT'.
Click on 'Save' to return to the main configuration screen.
The profile is saved and available for selection in the 'Cloud Subscription Profile' field.
Click on 'Next' to go to the scheduler screen.

Select 'Enable' in the 'Scheduler' field to enable scheduling of the cloud discovery.
Select the frequency at which the discovery should run which can be from among 'Hourly', 'Daily', 'Weekly', 'Monthly' or only 'Once' which is to run on demand.
Select the 'Start Time' and enter the interval fields based on the frequency selected.
Click on 'Save' to save the profile. The profile is listed in the profile list screen.
To delete a rule in the listing, select the rule and click on 'Delete'.
To run a rule on demand, select the rule and click on 'On Demand'.
The section details the step to configure cloud native discovery where some of the resources which are deployed in a local network can be discovered. SapphireIMS supports discovery of orchestration platforms like Kubernetes and OpenShift. It also can discover Docker containers.
Click ‘Settings’ > ‘Inventory Management'. Next click on ‘Discovery Profiles and Wizard’. Click on the tab 'Cloud Native Discovery'.
The list of cloud native discovery rules is displayed.

To add a new rule click on 'Add'. The discovery rule addition screen is displayed.
Refer to the section Defining Discovery Rules for details as the steps are similar to discovery rules for devices. The steps for adding a new profile in is given in Settings-> Asset and Inventory Management->Profile Manager->Cloud Native Discovery Profile.
To delete a rule in the listing, select the rule and click on 'Delete'.
To run a rule on demand, select the rule and click on 'On Demand'.