SLA
SapphireIMS Service Desk can monitor the actual Service Delivery Time
against the committed Service Delivery Time through the Service Level
Agreement (SLA) monitoring feature. This can be used to measure the Service
Delivery compliance. Any number of SLA rules can be defined in a project
based on combination of criteria such as the service, category, priority
etc. Each SLA measures the time for the transition of the record
between two states. For example, a typical SLA used is a Resolution SLA
which is the time between when the record is submitted and till the last
state where the record is closed.
Further there may be some states which need to be excluded from SLA
measurement such as when an incident is awaiting information from the
submitter. Such blocked states can be specified in the SLA rule. So also,
there may be requirement to measure the SLA during business hours or business
days only and to exclude holidays etc.
SapphireIMS allows configuration of two levels of pre-notification in
each rule. A pre-notification is an alert sent prior to an SLA breach
and prompting the engineers to take action. By configuring different roles/users,
it could also be used as an escalation mechanism.
Similarly on SLA breach, escalations can be configured such that as
the record ages and if no action has been taken, an escalation is sent.
There can be up to 3 levels of such escalations configured.
Configuring SLA Rules
Serial
No |
Field
Name |
Description |
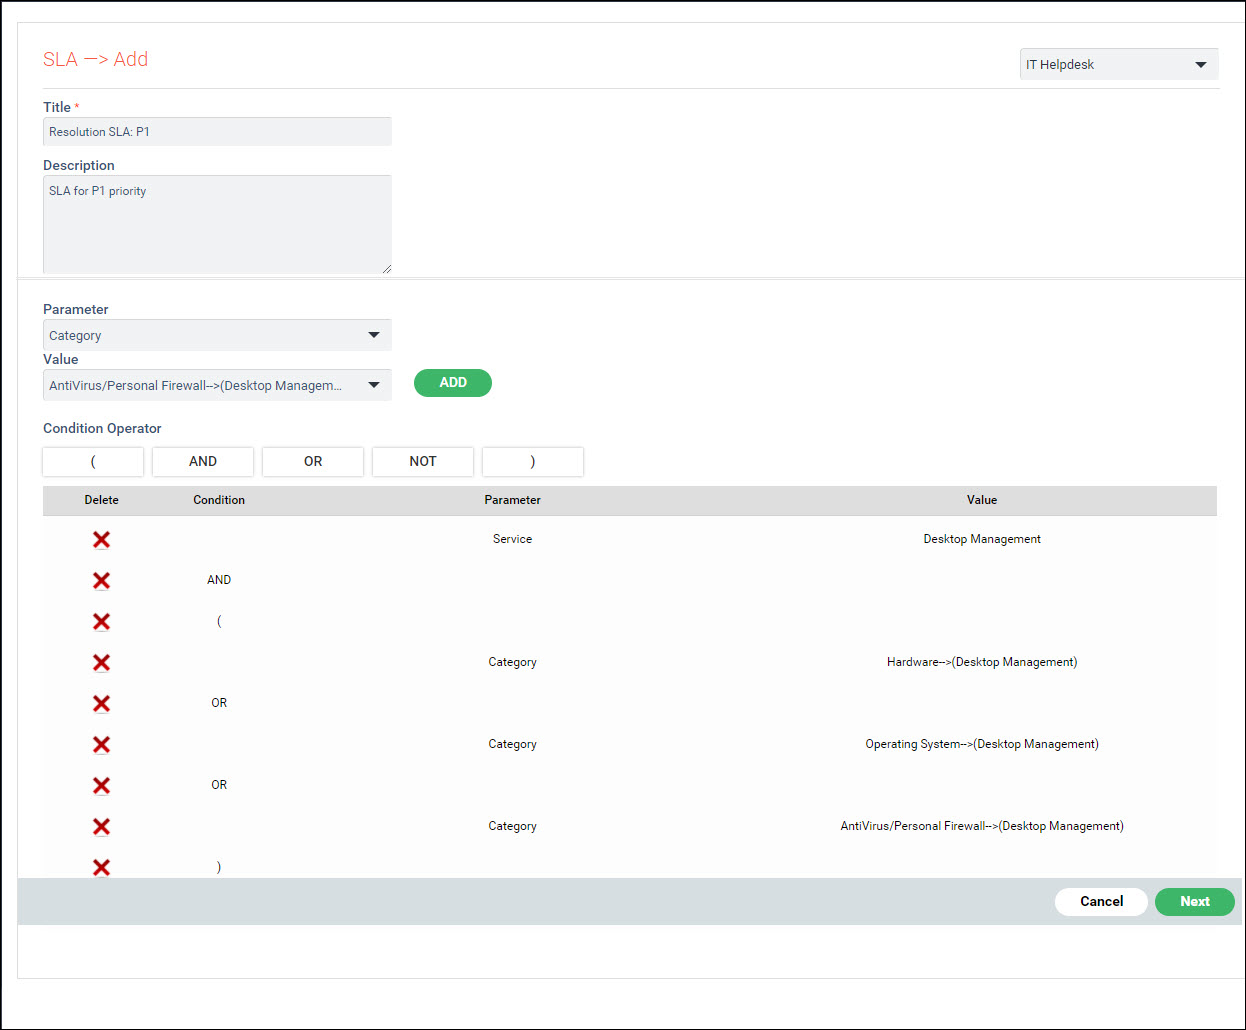
1 |
Title |
Provide
a title to identify the SLA
|
2 |
Description |
A
brief description of the SLA
|
3 |
Parameter |
Parameters
can be one of the following
Service, Category ,Sub Category, Location, Department,
Users, Roles, Urgency, Impact, Priority Custom fields (any custom
field that is used in service desk and CMDB) Asset Fields
Select the parameter for which the
SLA rule is to be defined.
|
4 |
Value |
This
gets listed based on the parameter that is selected. Select the
Value for which the SLA rule is to be defined. Click on
'ADD' to add the condition.
|
5 |
Condition Operator |
Multiple
sets of Parameter/Value can be selected and added. In such an
event select the condition with which the rule is to be defined.
This will be linear, for instance if a rule is defined with a
sub-category – Hardware and Priority- High with an 'And' condition
it will be arithmetically treated as
(Sub Category – Hardware Related)
AND (Priority – High).
In this case the rule will be applied
on any service record that matches the above criteria
Use NOT operator to exclude certain
parameter values from the SLA rule. E.g. 'NOT Location = Default'
You can add as many parameters or
conditions as desired.
Click on  to delete
a condition. to delete
a condition. |
|
Serial
No |
Field
Name |
Description |
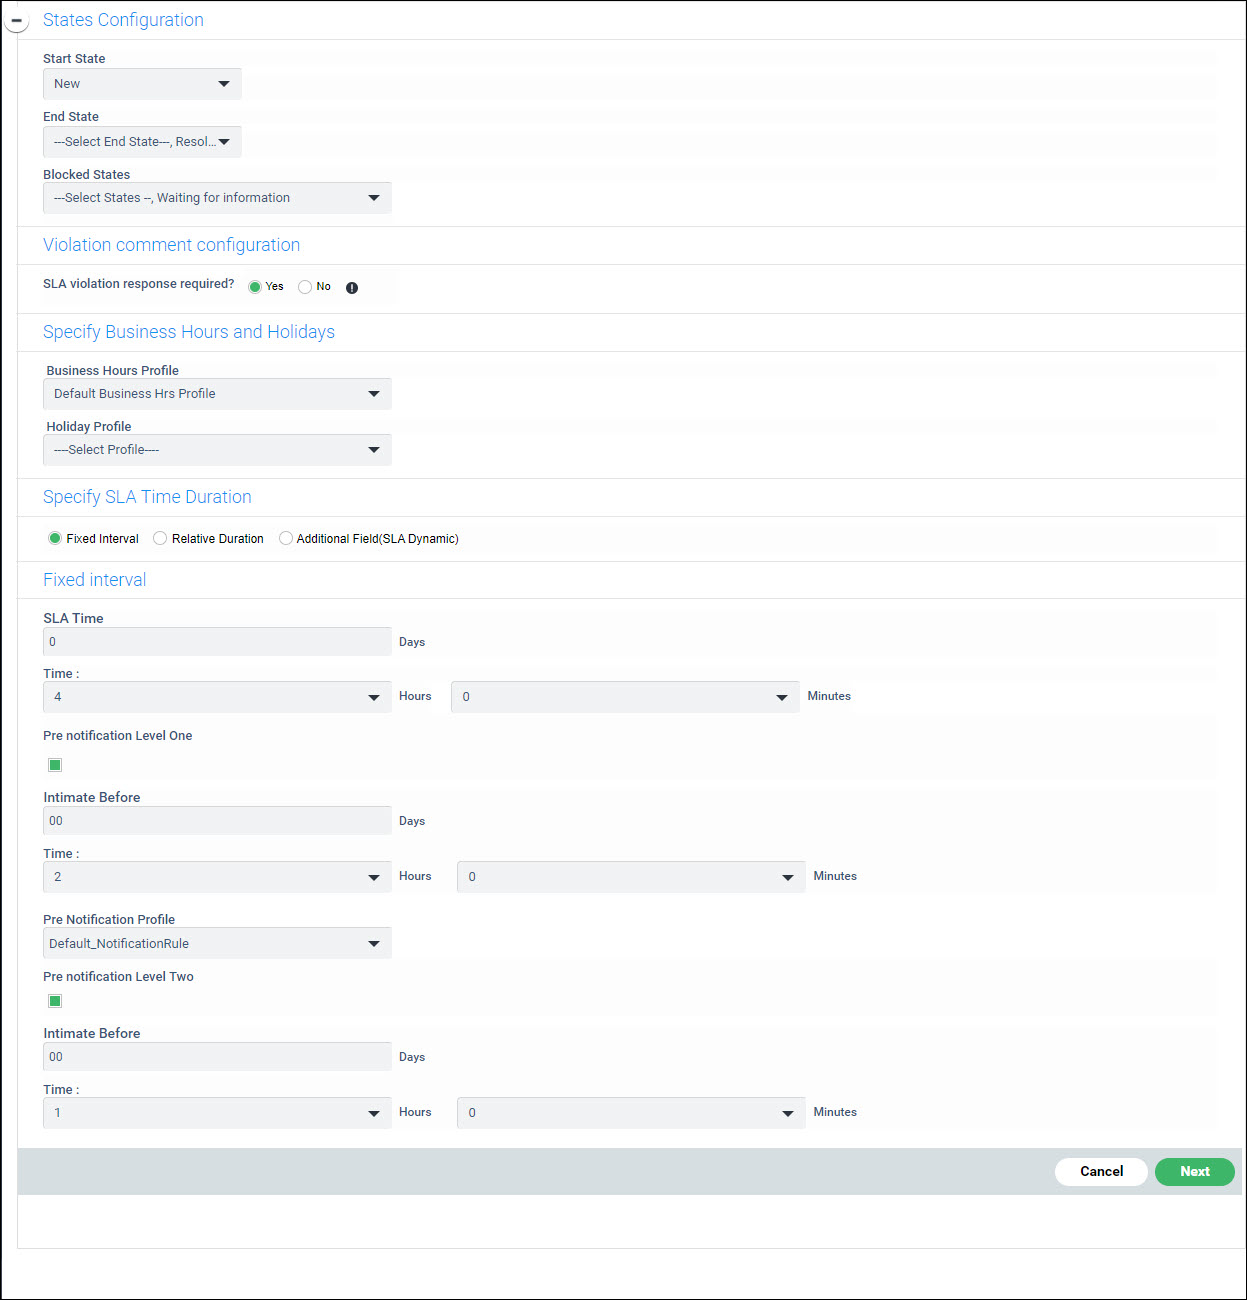
1 |
Start State |
Select
the start state, SLA calculation starts when the service record
reaches this state
|
2 |
End State |
Select
the end state, SLA calculation ends when the service record reaches
this state
|
3 |
Blocked States |
Select
the states that should not be considered for SLA calculation.
The SLA timer will be turned off whenever these states are encountered
as part of the record life cycle
This will be useful whenever you
want to exclude states that are not in the user control ex: ‘Waiting
for Vendor’
|
4 |
SLA
Violation Response Required? |
Select 'Yes' if a comment is mandatorily
required to be entered on SLA breach or 'No'
if it is not required. |
5 |
Business Hours |
Select
the business hours profile that need to be used for this SLA (To
define the Business Hours profile navigate to the 'Settings –
Service Desk Configuration – Business Hours and Holidays'
|
6 |
Holiday Profile |
Select
the holiday profile that need to be used for this SLA (To define
the Holiday profile navigate to the 'Settings – Service Desk Configuration
– Business Hours and Holidays'
|
7 |
Specify
SLA Time Duration |
The
SLA interval can be based on one of the following options
Fixed
Interval: A fixed value has to be provided and on expiry
of the interval, the SLA for the record is considered violated
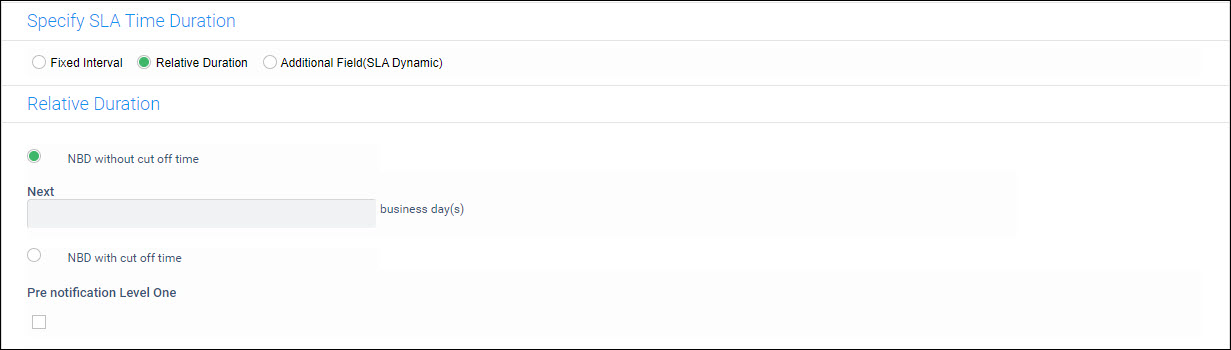
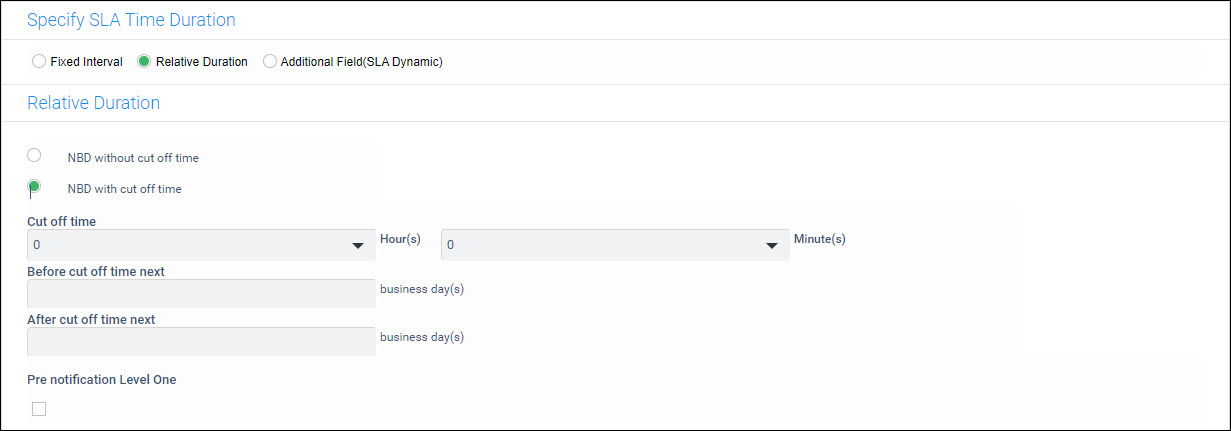
Relative
Duration: In this option the Business Hours and Holidays
are considered and the interval is based on business days with
the time of SLA violation being at the end of the business day.
In addition a cut off time can be specified for record submission
and the interval can be different for records submitted before
and after the cut-off time. Refer the section Specifying Relative Duration
for details.
Additional
Field (Dynamic): This option provides for defining an additional
field (of date type) and using that for computing the SLA violation.
Once the date/time is reached, then the SLA is considered violated.
Refer the section Specifying
Additional Field (Dynamic) for details. |
8 |
Pre-Notification |
There
are 2 levels of pre-notification. Select either one or 2 levels
if you need to get pre-notified before a SLA breach. Select
the pre- notification profile (which contains the list of
users to be notified) and select the time in hours or minutes.
If SLA Time is specified in days, enter the 'Intimate Before'
value in days for the pre-notification
Note:
Pre-notification level one is sent 20 minutes before the lapse
of SLA Time and pre-notification level two is sent 10 minutes
before the lapse of SLA Time.
|
|

Serial
No |
Field
Name |
Description |
1 |
Escalation Level 1 |
Enable
this by selecting 'Yes'
if you need the first level of escalation
|
2 |
SLA Time |
Specify
the time after lapse of the SLA for escalation to be performed
in the form of notification. You can have up to 3 levels of escalation.
|
3 |
Notification Profile |
Select
the notification profile which contains the list of users to whom
the escalation operation is to be performed.
|
4 |
Generate SD Record |
If
you need to submit a service desk record when an SLA is
breached, then set the 'Generate
Ticket' option as ‘Yes’
and select the generate ticket profile. The service desk record
would be generated in the service desk project as per the parameters
defined in the Integration Profile (for more information on generate
ticket profiles refer to the section Service
Request Integration in Fault Management chapter
|
|
If you need to have a second level escalation then enable the
second level escalation, specify SLA Time and select the notification
profile. Similarly you can have a third level of escalation. This
means that if the state of the record is not changed from 'Assign'
state to 'Close' state in 30 minutes (SLA Time) after the record is
moved to 'Assign' state, then 20 minutes after the lapse of SLA Time,
the first escalation is performed. The second escalation is performed
15 minutes after the lapse of first escalation Time and the third
escalation is performed 10 minutes after the lapse of second escalation
Time.
Click on 'Save' to save
the rule.
 Note
1. Notification Profiles can be defined using the option 'Settings ->
Fault and Notifications ->Notification Profiles. For more details refer
to the section Settings->Faults
and Notifications->Notification Profiles.
Note
1. Notification Profiles can be defined using the option 'Settings ->
Fault and Notifications ->Notification Profiles. For more details refer
to the section Settings->Faults
and Notifications->Notification Profiles.
Note
2. Business Hours and Holidays can be defined using the option 'Settings
->Service Desk Configuration' -> 'Business Hours and Holidays' For
more details refer to the section Settings->Service Desk Configuration->Business
Hours Profile.
Note
3. Service Desk does not provide an option to edit all the values in the
SLA. This is because there could be active service desk records which
would match the SLA that is being edited. The only option is to define
a new SLA (if needed the original SLA can be de-activated using the SLA
listing screen)
Serial
No |
Field
Name |
Description |
1 |
NBD without cut off time |
Select
this option if there is no cut off time for submission of the
record. All records submitted during business hours on that day
will violate the SLA at the end of business day(s) entered |
2 |
Next business day(s) |
Enter
the number of business days at the end of which the record will
violate the SLA. For example if 2 business days is entered here
and Business hours are defined as Monday to Friday between 9AM
and 6PM, then a record submitted on Friday before 6PM will violate
the SLA on Tuesday at 6PM if the end state for SLA is not reached.
|
3 |
NBD with cut off time |
Select
this option if there is a cut off time for submission of records
and the SLA is different for both. |
4 |
Cut off time |
Enter
the cut off time (hours and minutes) |
5 |
Before cut off time next business
day(s) |
Enter
the number of business days at the end of which the record will
violate the SLA in case the record has been submitted before the
cut off time |
6 |
After
cut off time next business day(s) |
Enter
the number of business days at the end of which the record will
violate the SLA in case the record has been submitted after the
cut off time |
|
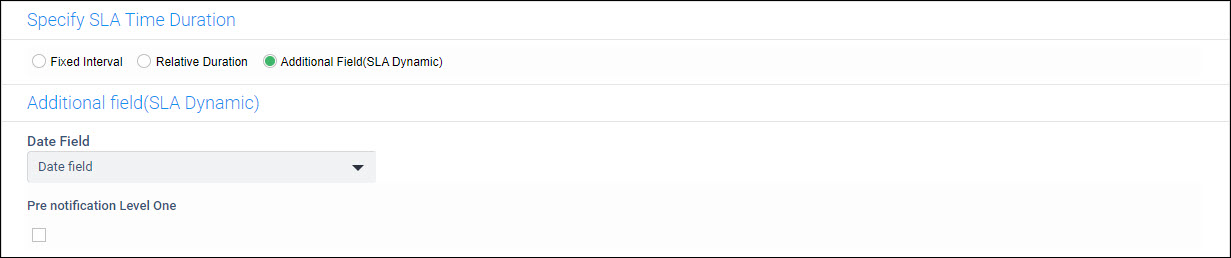
Select the Date Field from the list of additional fields which
will be used to measure the SLA interval. Note that the type of the
field should be a date field.
Proceed to enter the Pre-notification information.
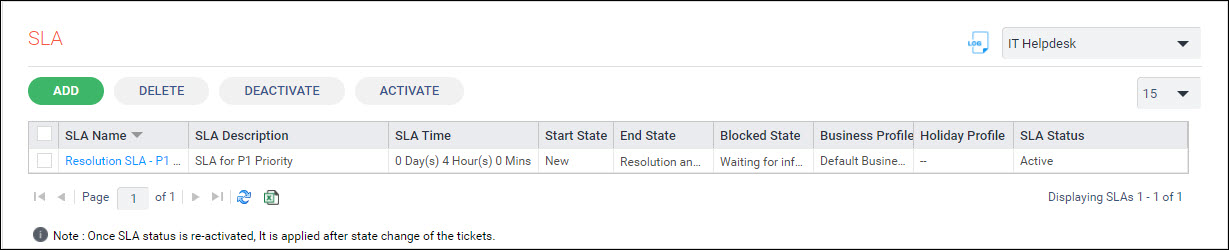
SLA Activation and Deactivation
In the 'SLA listing page', select the SLA and click 'DEACTIVATE'
to deactivate the SLA. Select 'ACTIVATE'
to activate the SLA. Once an SLA is re-activated, it is applied only
after the state change of the ticket.
Editing the SLA
Once the SLA profile has been created, some of the parameters like ‘States
Configuration’, ‘Business Hours and Holidays’, ‘Pre-Notification Time’
and Profile and ‘Escalation level’ in the existing SLA can be modified.