![]()
![]()
Software Control Policy feature allows you to create and enforce policies where only specific software can be allowed to be installed or blocked on endpoints.
If a policy is created to allow specific software, then any software not part of the list will be prevented from getting installed or executed.
On the other hand, software which is blocked, will be restricted from being used within an organization. In addition blocked software can be automatically uninstalled using software or script packages or an uninstallation string which can be run on the command line can be specified.
Enable the Software Control Policy as the first step.
For software which has to be allowed, refer to the section Creating an Allowed Software List to configure the allowed software.
For each software which has to be blocked, the Policy and the Profile has to be configured. Refer to the section Creating a Software Block Control Policy. The Blacklisting Policy specifies the installer or executable which is monitored and prevented from being installed. The profile is used to specify the hosts on which the software has to be blacklisted. Once the profile is setup, as part of the software inventory collection, SapphireIMS will detect any Blacklisted Software which is already installed. Such software is listed as type 'Blacklisted' under Installed Software and an action button is provided to configure the uninstallation options.
 Note: Currently, blacklisting
and automatic uninstallation of blacklisted software is not supported
in the MSP edition of SapphireIMS.
Note: Currently, blacklisting
and automatic uninstallation of blacklisted software is not supported
in the MSP edition of SapphireIMS.
By default Software Control Policy
is disabled and needs to be enabled. Click on 'Settings'
and under 'IT Automation' click on ![]() upon which the Software Control Policy screen is displayed.
upon which the Software Control Policy screen is displayed.

As a first step, you need to enable the software control feature.
Click on 'Software Control Settings' in the left hand menu panel. The Software Control Settings screen is displayed.
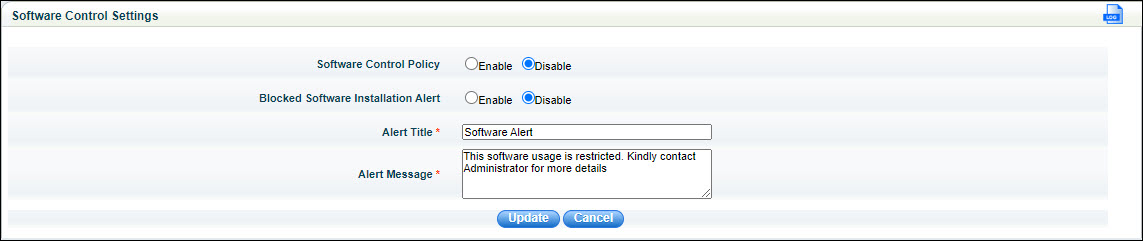
The fields are described below.
Serial No |
Field Name |
Description |
1 |
Software Control Policy |
Enable or Disable the software Control Policy feature. By default this feature is disabled. |
2 |
Blocked Software Installation Alert |
Enabling Blocked Software Installation Alert will cause a pop-up message to appear on the end user system when attempt is made to install a blacklisted software. |
3 |
Alert Title |
Title of the pop-up message |
4 |
Alert Message |
Message which will be displayed |
Enter the fields and click on 'Update'.
A software control policy needs to be created for each software which has to be allowed or blacklisted. The policy specifies the installer or executable which should be blocked to prevent the Blacklisted Software from being installed.
Select the 'Software Control Policy' option in the menu. The Software Control Policy listing screen is displayed.
Click on 'Add' to create a new policy.
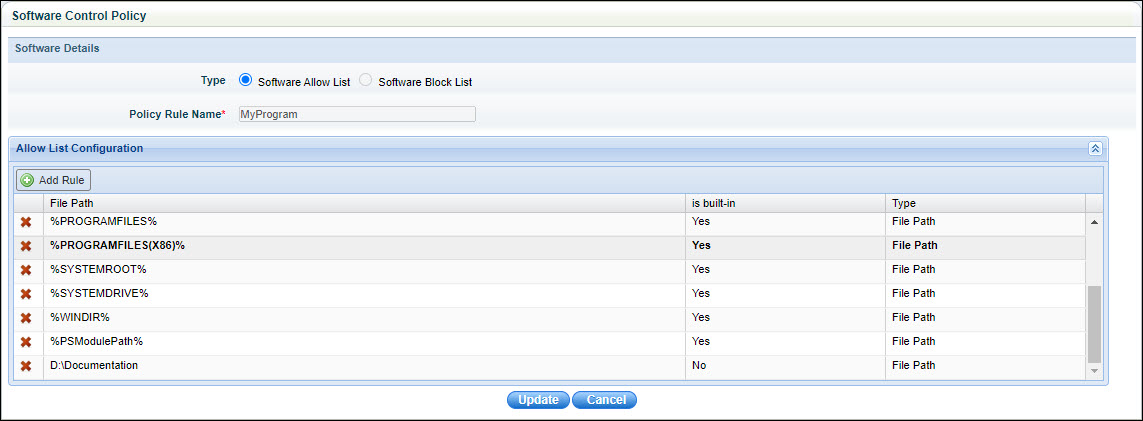
There are some in-built file paths which are pre-shipped. All executables in the file paths displayed in the 'Allow List' will be allowed to get executed. Any other software outside of these paths will be blocked.
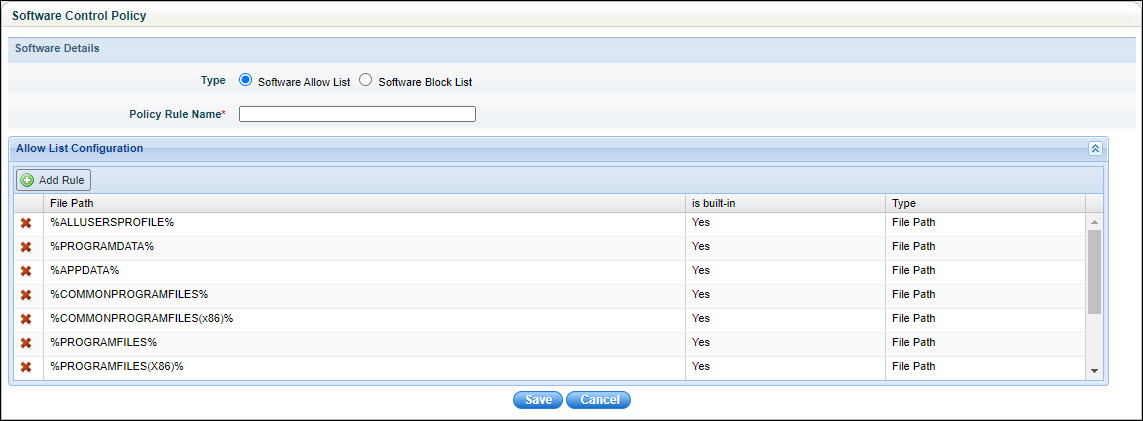
Select between 'Software Allow List' which is for allowing software or 'Software Block List' which is for blocking software. Refer to the section Creating a Software Block Control Policy for creating a list of blocked software.
For creating a list of allowed software paths, enter the 'Policy Rule Name'.
Click on 'Add Rule' to add a file path. The following screen is displayed.
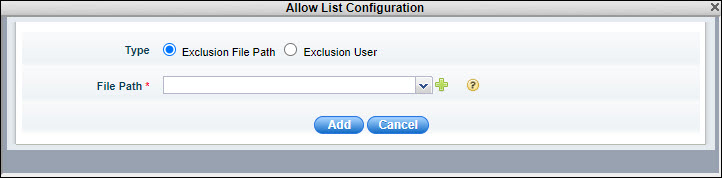
To create a new File Path, click on '+'. The following screen is displayed.
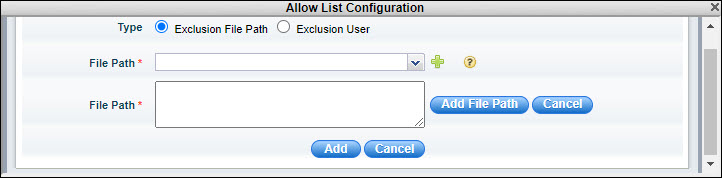
Enter the 'File Path' in the lower field and click on 'Add File Path'. You can repeat to add more file paths.
In the File Path selection field, select from the newly added file paths.
Click on 'Add' to save the selection.
You can also select 'Exclusion User' instead of a file path. Users who are listed will be allowed to execute any software from any path. This is used typically for allowing system administrators to install and execute software without restrictions.
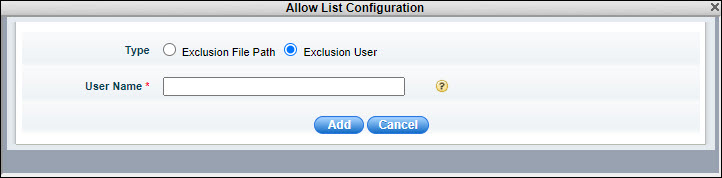
The 'User Name' is prompted. Enter the user name and click on 'Add'.
In the listing screen, the newly added path or username is included.
You can create a policy for blocking software.
Select the 'Software Control Policy' option in the menu.
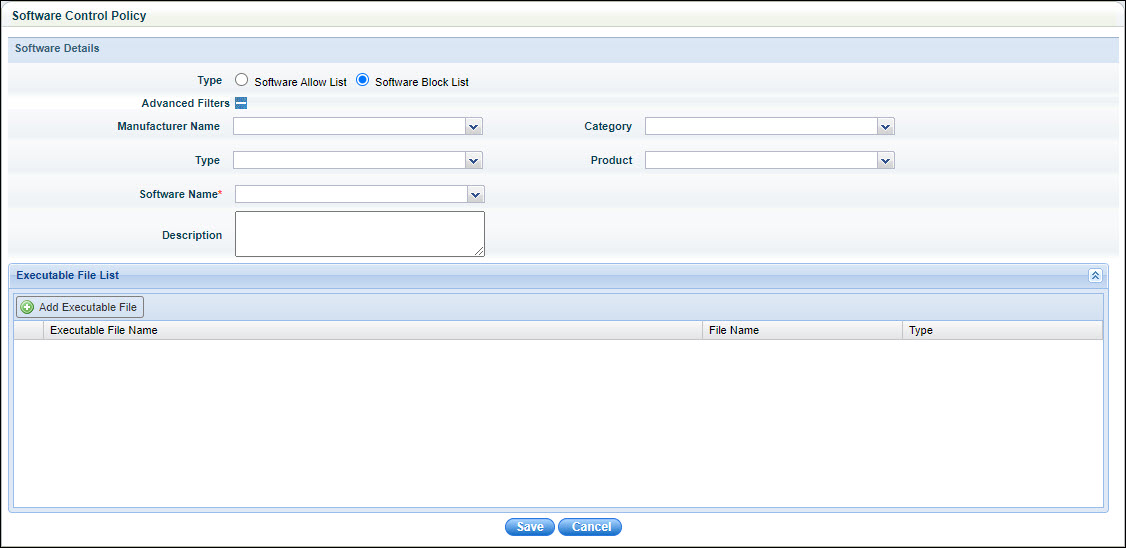
Select 'Software Block List' option in the 'Type' field. The following screen is displayed.
The fields are described in the table below
Serial No |
Field Name |
Description |
1 |
Type |
Select one of the following: EXE - Block an launch of an executable file whose name is provided MSI - Block the launch of the MSI installer whose name is provided Checksum - Block the launch of an EXE or MSI file based on a checksum value. This option is used when there are multiple versions of the software to be blacklisted having the same name. |
2 |
Advanced Filters |
Click on '+' to expand the Advanced Filter selection which allows for filtering based on the Manufacturer, Category, Type and Product attributes for easier selection of the software. |
3 |
Manufacturer, Category, Type, Product |
The software can be searched using these attributes.
|
4 |
Software Name |
Select the Software to be blacklisted. |
5 |
Description |
Enter a description. |
Click on the option  to add the details of the
file which is to be blocked. Depending on the type selected earlier,
the information to be entered varies.
to add the details of the
file which is to be blocked. Depending on the type selected earlier,
the information to be entered varies.
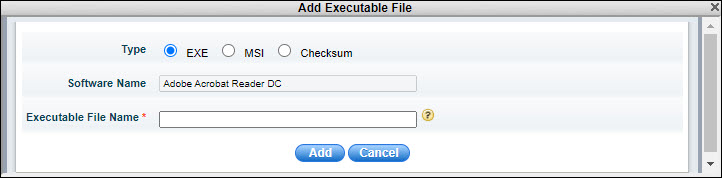
If 'EXE' is selected, then enter the 'Executable File Name' which is used to launch the software. Click on 'Add'.
If there are multiple executables in the software, then the process has to be repeated to add all the executable names. Alternatively you can use a wild card (*) in the file name to select multiple files.
If 'MSI' is selected, then the following screen is displayed
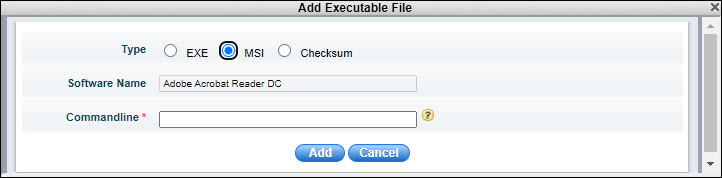
Enter the command line parameter list for the 'msiexec' command which is used to launch the MSI installer. Click on 'Add'.
If 'Checksum' is selected, then the following screen is displayed to allow the system to calculate the checksum of the file to be blocked. The checksum option is used when there are multiple versions of the software with the executable name being the same. Using the Checksum option will also prevent a situation where the executable name is changed.
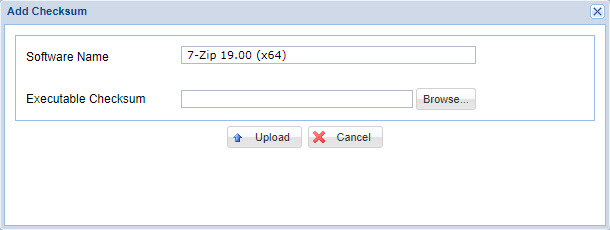
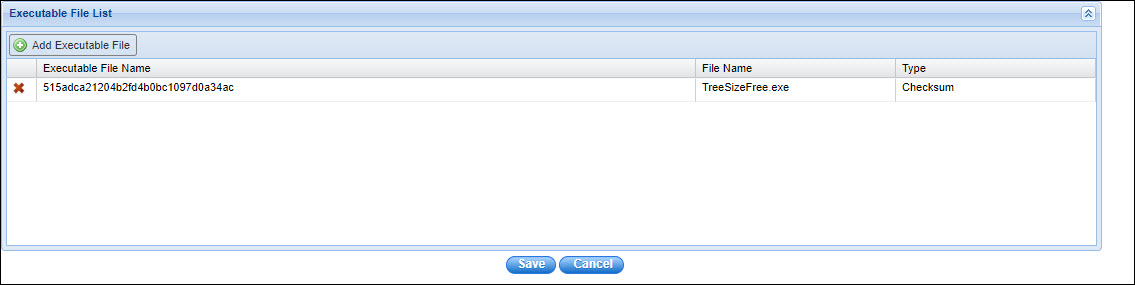
Click on 'Browse' and select the executable file whose checksum has to be calculated. Click on 'Upload'. The checksum appears in the file list along with the File Name. You can add multiple executable files.
Click on 'Save' to save the policy.
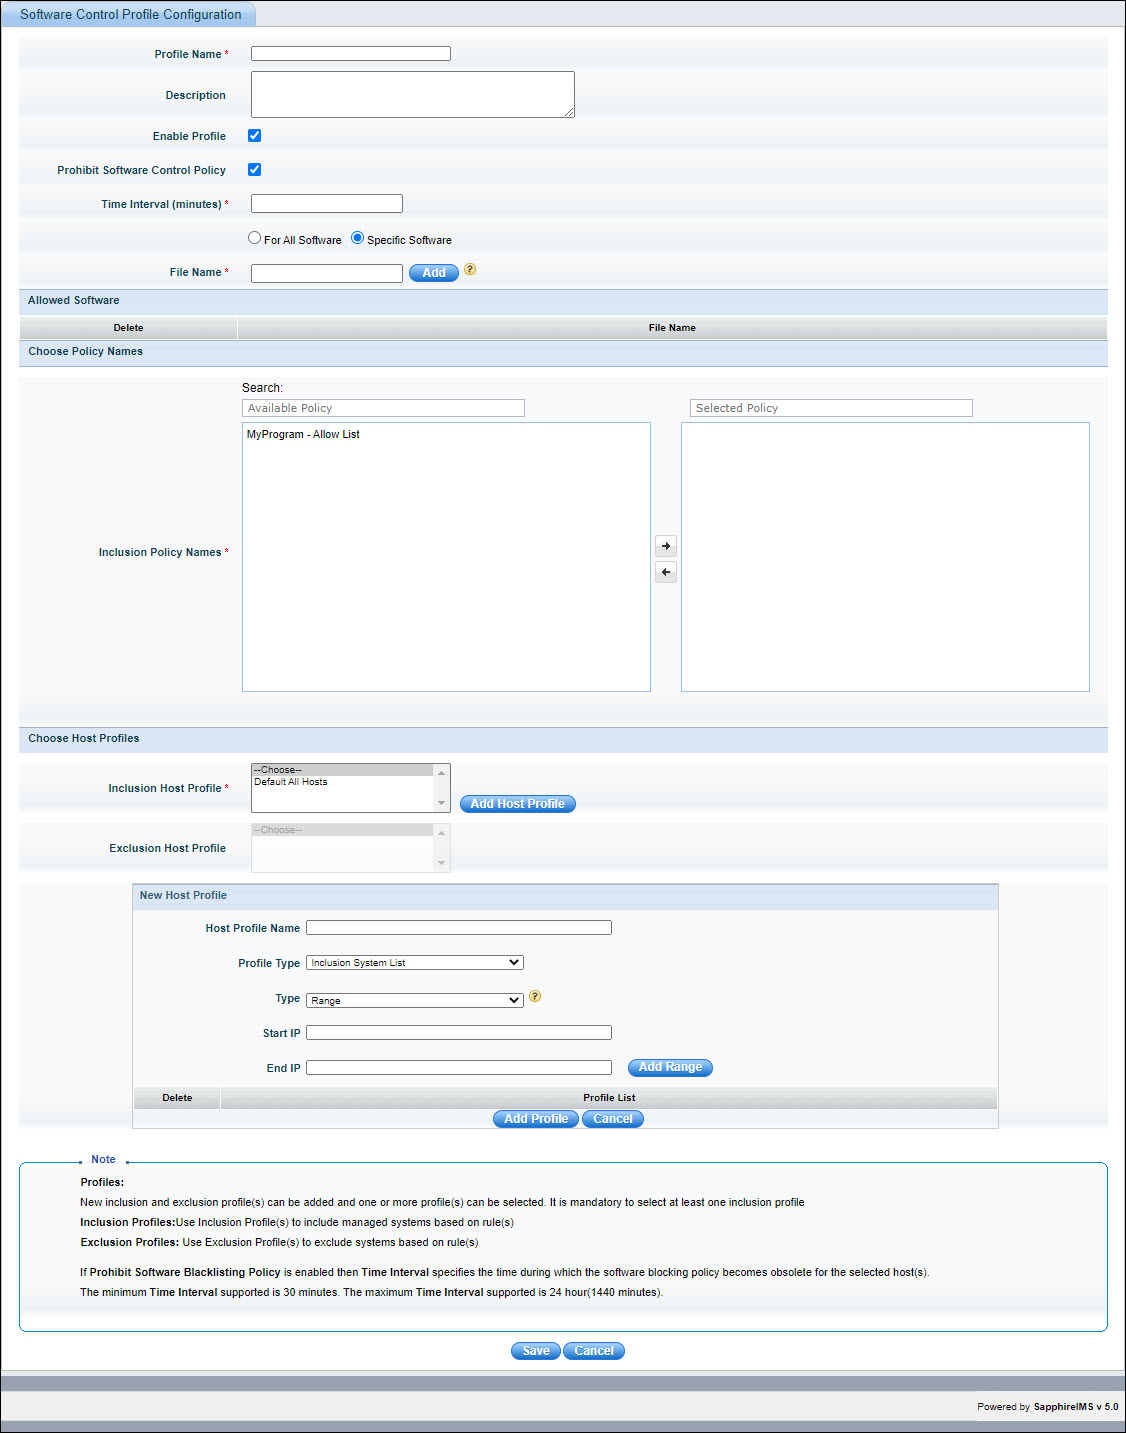
The next step is to create a profile to be used for the policy. The profile allows you to specify the hosts on which the software has to be blacklisted. Select 'Software Control Profile' option and click on 'Add'. The Software Control Profile configuration screen is displayed.
The fields are described below.
Serial No |
Field Name |
Description |
1 |
Profile Name |
Enter a profile name for the software blacklist profile configuration |
2 |
Description |
Enter the description of the profile |
3 |
Enable Profile |
Check the box if the profile has to be enabled |
4 |
Prohibit Software Policy |
Check this box to override Software Control Policy Enter the time interval in minutes during which software control policy has to be disabled. Select 'Specific Software' to allow specific software installation and enter the name of the software executable that is allowed to run during the selected time interval. You can add multiple executable names.
|
5 |
Inclusion Policy Names |
Search for and select the Policies which should be applied to this profile and click on the right arrow to move it to the included list. |
5 |
Inclusion Host Profile |
Click 'Add Host Profile' to add a new host profile with the systems which have to be included for enforcing this Control policy. Enter the 'Profile Name'. In the 'Profile Type' drop down box, select 'Inclusion System List' to define the inclusion host profile. Select the systems to be included using one of the options given in 'Type' and enter the corresponding parameters. For more information on profiles, go to Settings->Software Management->Profile Manager. You can select hosts by selecting IP Range, individual IP, node level (host names), domain or organization unit, operating systems or baseline compliant nodes |
6 |
Exclusion Host Profile |
Click 'Add Host Profile' to add a new host profile with the systems which have to be excluded for enforcing this Control policy. Enter the 'Profile Name'. In the 'Profile Type' drop down box, select 'Exclusion System List' to define the exclusion host profile. Select the systems to be included using one of the options given in 'Type' and enter the corresponding parameters. For more information on profiles, go to Settings->Software Management->Profile Manager. You can select hosts by selecting IP Range, individual IP, node level (host names), domain or organization unit, operating systems or baseline compliant nodes |
7 |
Add
|
Click 'Add Profile' to add the respective inclusion or exclusion software blacklist profile
|
|
||
The Software Control Profile is displayed in the listing page as shown below. To delete a profile, select it and click on 'Delete'.

Click the number to view the list of blacklisted software discovered in the network. The software listing is displayed filtered for the blacklisted software.

All software for which a Blocking Policy has already been defined
will be normalized with type set as 'Blacklisted' when the software
is discovered. If a software type is not appearing as 'Blacklisted',
you need to normalize and set the type as 'Blacklisted'.
After normalization the Action button  appears
against the software entry. If a software has been normalized
as Blacklisted, you can re-normalize at any point.
appears
against the software entry. If a software has been normalized
as Blacklisted, you can re-normalize at any point.
You can take action to uninstall the blacklisted software. Go to the topic Settings->IT Automation->Software Blacklisting->Uninstallation of Blacklisted Software for the steps.
Note: In case the software is not listed under the 'Software' tab, you need to perform a 'Get Inventory' action by going to the 'Discovery' listing page and clicking on the host. Refer to Inventory->Discovery->Actions for details.
You can enable or disable a Blacklist Profile. In the Profiles listing, select a Profile and Click on 'Manage Profiles'. A pop-up is displayed as shown below.
Select 'Enable' or 'Disable' and click on 'Update'.
If the settings are enabled, then an alert appears on the client system when attempt is made to install a Blacklisted Software.

Note:
If the Installation and Uninstallation executable file names are the same,
then uninstallation will not happen as the executable will be blocked
by the software blacklisting feature. In such a case, the software can
be uninstalled only after removing the blocking and allowing the executable
to run.
In addition to user alerts, an alarm is generated. To view the alarm job status, point to 'Fault' menu and click 'Alarms' > 'Alarm Job Status'
