![]()
![]()
This section describes the various operations that can be performed on a record.
Click on 'View Details' 'to view the record details. To open the record in a new tab, hold the 'Ctrl' key while clicking the record.
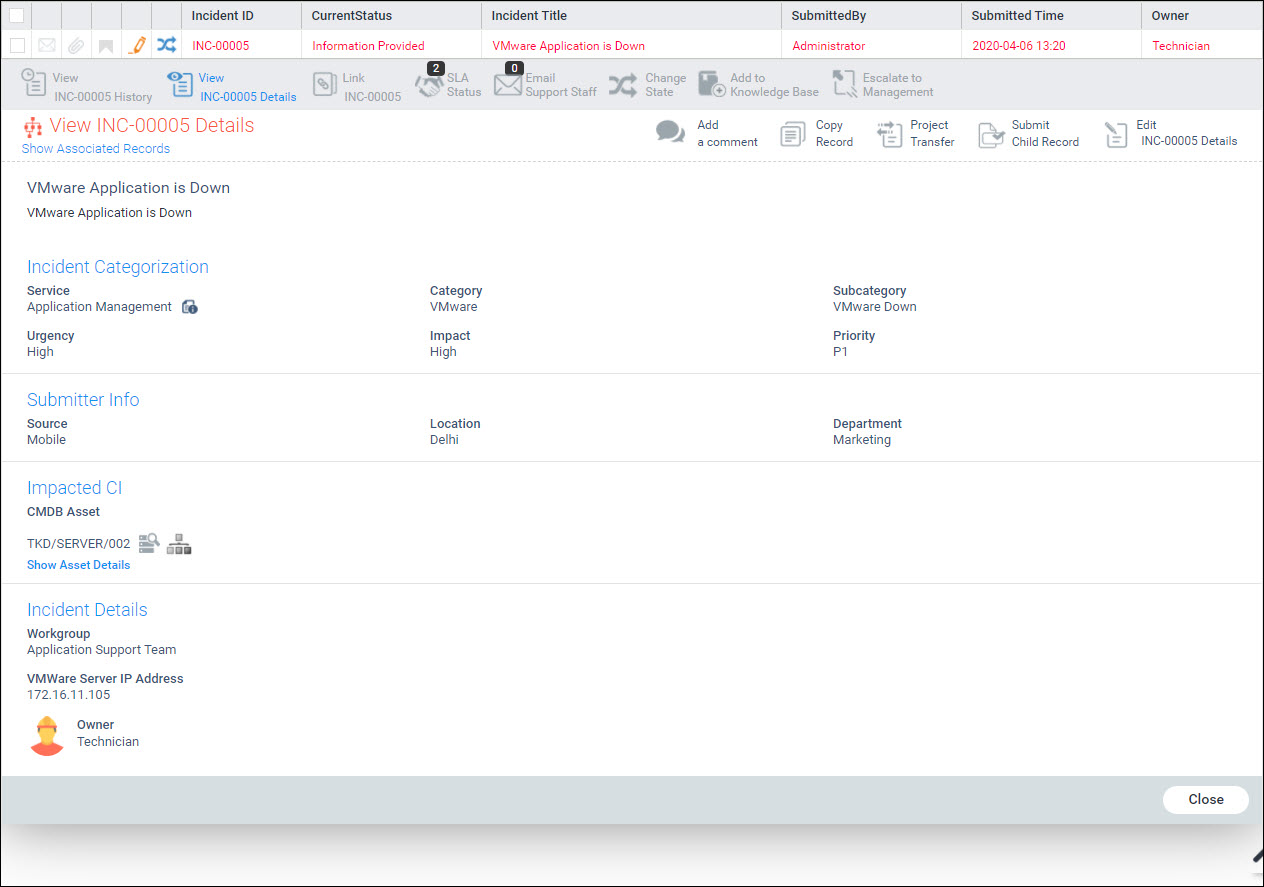
The content of the record depends on the fields configured for that project. However there are certain fields which are fixed and displayed for all types of records. These are described below. The fields are grouped into sections. Note that depending on the configuration of the project, the fields displayed may vary. However for a typical project the following fields are generally present.
|
Any other additional fields defined for the record will also
be displayed. If there is a help icon  associated
with the additional field, on click of the icon, the help page is
displayed in a pop-up window.
associated
with the additional field, on click of the icon, the help page is
displayed in a pop-up window.
Click on 'Close' to close the record.
Click on the edit record details icon  in order to edit and update an existing record.
The fields in the record can be edited. You can click on 'Update' to save the changes.
Click on 'Show Asset Details' option to show the details of the impacted asset.
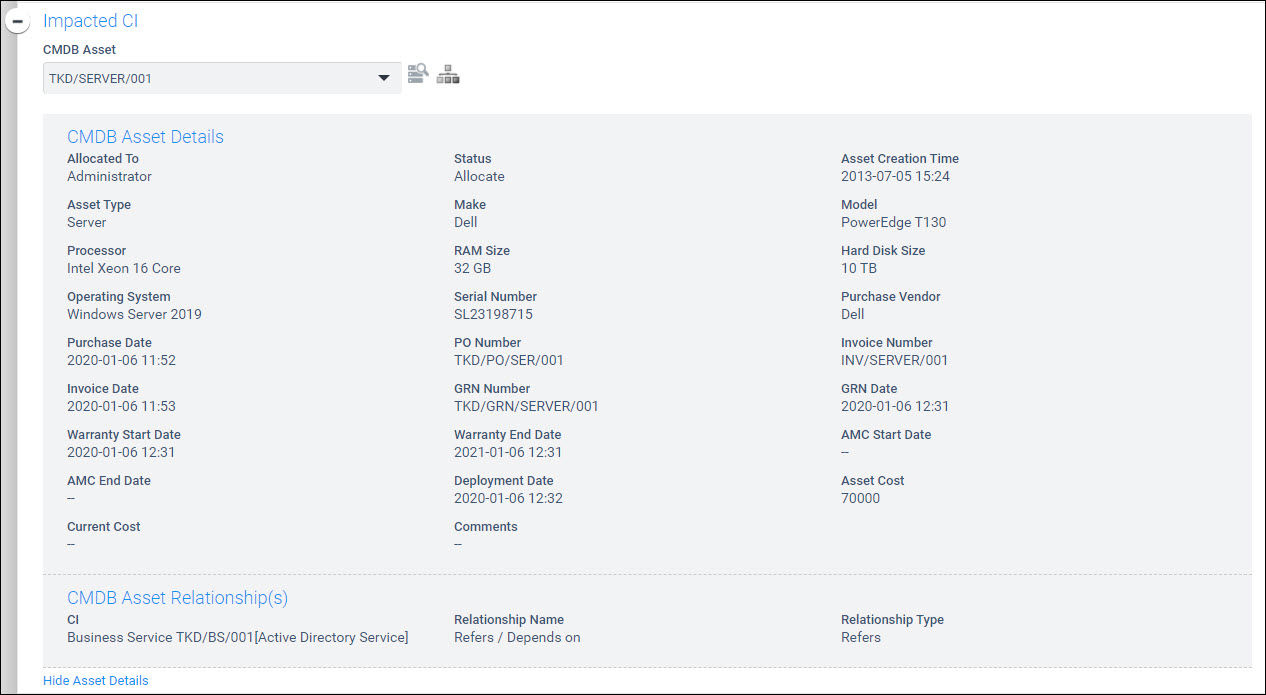
Click on 'Hide Asset Details' to close the asset details view.
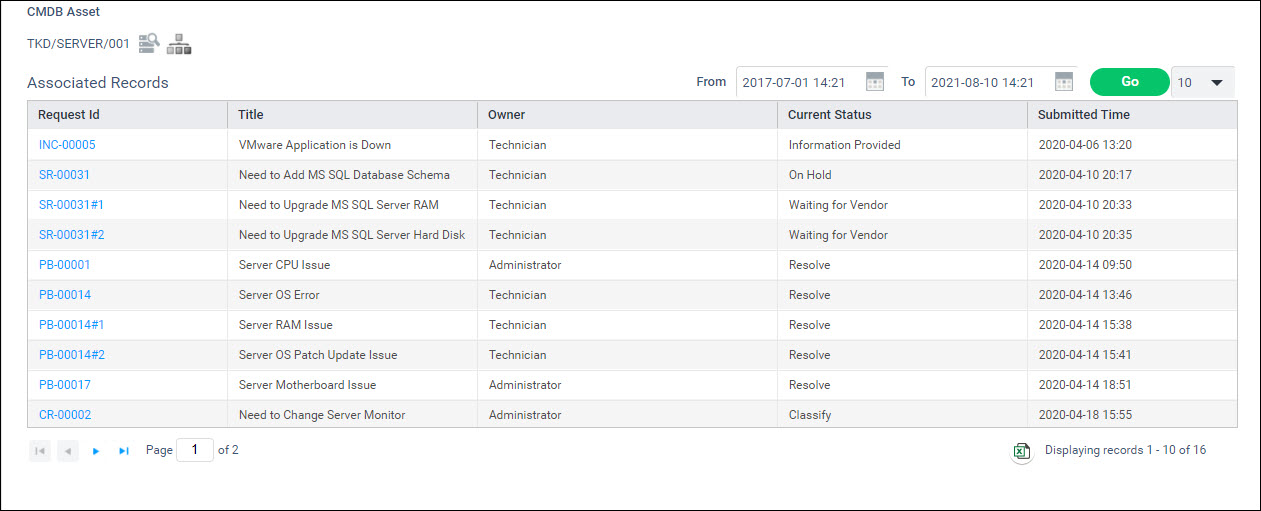
Click on  to view the other Service Desk records
associated with the asset. You can select the time period for which
the records need to be displayed and click on 'Go'.
All records pertaining to the asset irrespective of which project
they belong are displayed. This is useful to get the complete history
of the maintenance of the asset.
to view the other Service Desk records
associated with the asset. You can select the time period for which
the records need to be displayed and click on 'Go'.
All records pertaining to the asset irrespective of which project
they belong are displayed. This is useful to get the complete history
of the maintenance of the asset.
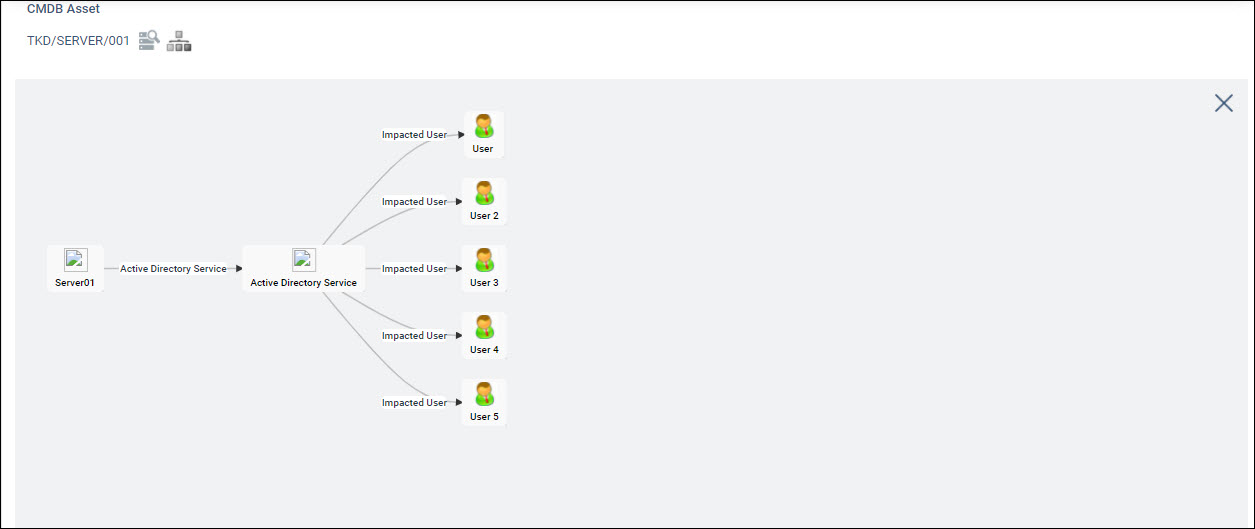
To view the asset relationship from the service desk record,
click on  . The relationship tree is displayed.
This is useful in knowing the dependencies of other assets on this
asset.
. The relationship tree is displayed.
This is useful in knowing the dependencies of other assets on this
asset.
In the case of additional fields which are grid fields, you
can click on  to add new rows, or select rows
and click on
to add new rows, or select rows
and click on  to delete rows. To edit any cell,
click on it and update. Click on
to delete rows. To edit any cell,
click on it and update. Click on  to expand the
grid field into full screen mode.
to expand the
grid field into full screen mode.
Refer to the topic Service Desk->Basic Operations->Comments and Attachments->Viewing Attachment for details.
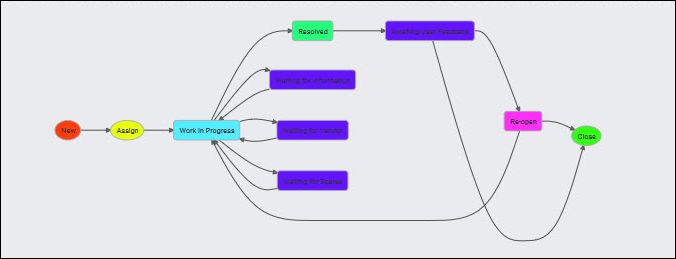
You can view the workflow for the record. Click on  button to view the workflow.
Click on the copy record icon  in order
to create a new record and copy the details from the current record.
An example of use of this feature is when a similar service request
has to be raised for multiple assets. The service request can be duplicated
and only the CI details need to be updated.
in order
to create a new record and copy the details from the current record.
An example of use of this feature is when a similar service request
has to be raised for multiple assets. The service request can be duplicated
and only the CI details need to be updated.
A new record submission page is displayed with all the details from the current record copied. You can edit any of the fields and click on 'Submit' to submit the record. Note that irrespective of the state of the current record the new record is created in an initial state.
 Note: This option is available
only if the user's role has the 'Copy Record' privilege enabled. To enable
the privilege, refer to Service Desk->Settings->User
Role Management->Roles.
Note: This option is available
only if the user's role has the 'Copy Record' privilege enabled. To enable
the privilege, refer to Service Desk->Settings->User
Role Management->Roles.
Click on the submit child record icon  in order to create child records. For more information on child records
refer to the section Service
Desk->Child Records.
in order to create child records. For more information on child records
refer to the section Service
Desk->Child Records.
This feature is useful for the IT engineer who may want to know all the incidents that have been submitted by a particular user and access the records quickly. This feature allows all records submitted by a user in a specific time period to be listed. The IT engineer can select any record and open it.
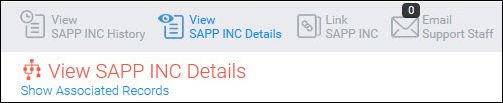
Click on 'View Associated Records'.
The listing screen is displayed with the list of records submitted by the same submitter in a given time period. By default, the time period is the previous one month.

Change the period in the date picker fields and click on 'Go' to select different time periods.
After the record is assigned to an owner, the owner can be changed by anyone who has the permission to change owners. This can be done when the record is in 'Assign' state.
In the edit screen for the record, click on the  button next to the owner
field. The screen to select the owner is displayed.
button next to the owner
field. The screen to select the owner is displayed.

Select the new owner and click on 'Update'.
If the project setting key 'Enable or Disable Owner Change Ticket View' is enabled then the previous owner can still view the record after the ownership is changed. In this case the following screen is displayed

Select the new owner and mark the checkbox 'Enable owner to track this request' if the previous owner needs visibility to the record.
Click on 'Update'.
In this case the records whose ownership has changed can be
viewed from the listing screen by clicking on  icon.
icon.
If a record has been submitted on behalf of another user, the Service Desk engineer can later change the submitter name.
Note: This is possible only
if the record is in the initial state.
Click on the option 'Change Submitter'. The screen to change the submitter is displayed.

Select the submitter and click on 'Update'.
There may be a need to change the service by IT once the record is submitted, generally to correct the service information if it is wrongly entered by the submitter. However this could result in some of the existing fields associated with the current service being lost. Also if the record has moved past the initial state, it will be reset to the initiate state in the new service. To change the service, open the record and click on 'View' button followed by 'Edit' button. In the Service field, select the new Service to which you want to change. A message appears as follows

Click on 'Yes'. A screen pops-up to enter the reason for the change.
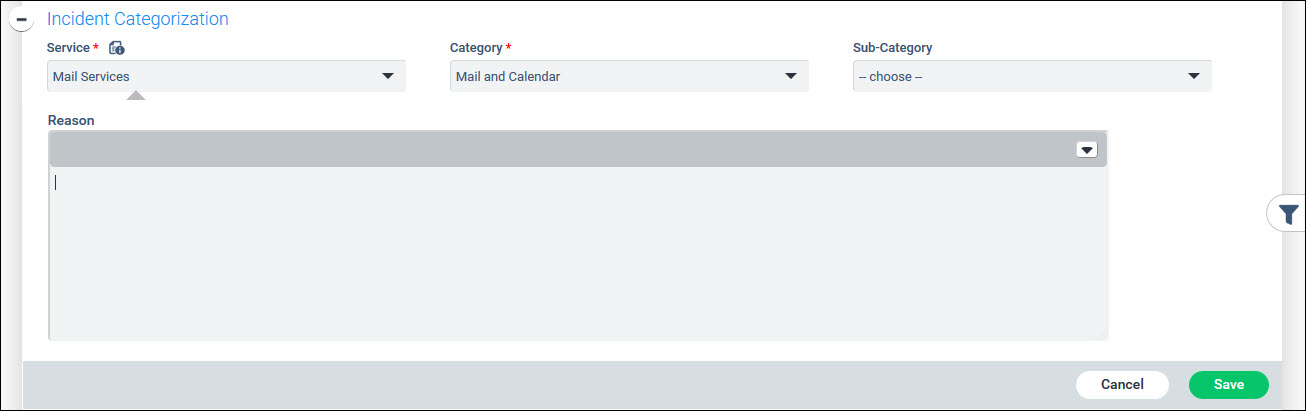
Enter the reason and click on 'Save'. Click on 'Update' to update the record.
If the service is changed when the record is beyond the initial state, then the following message is displayed. The rest of the operations remain the same as above. Note that you will need to reenter the mandatory fields which will get reset. Also the state of the record will be reverted to the initial state.
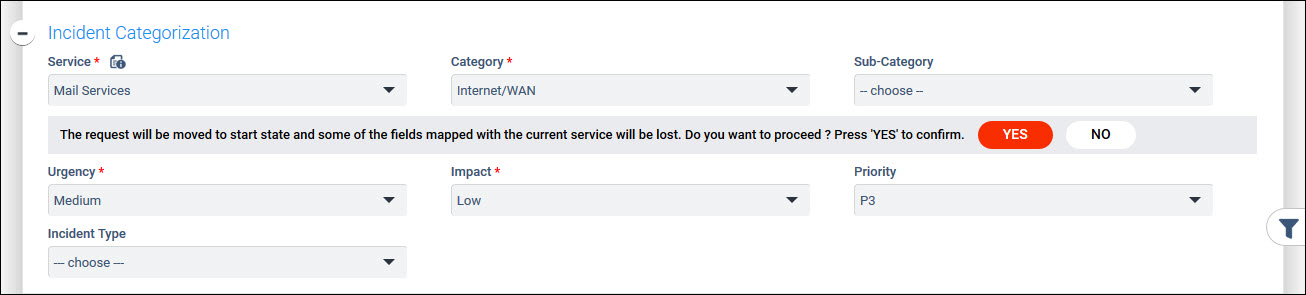
Note: When the service is
changed, the record submission time is not changed and remains as it was
when the record was originally created.
You can view the contact details of the Submitter or the IT engineer by clicking on the picture profile.

When you click on 'View Enclosures' option, the enclosures are displayed.
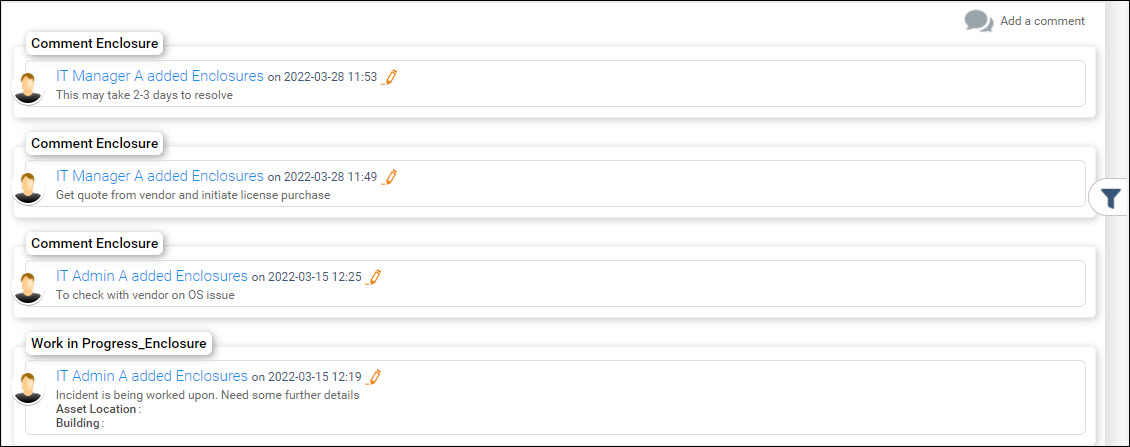
If the role has the setting 'Edit Enclosure Comment' enabled,
then the edit icon  is displayed against the comment.
Clicking on this allows you to edit the comment. Apart from the comment,
any additional fields defined for the current state can also be edited.
is displayed against the comment.
Clicking on this allows you to edit the comment. Apart from the comment,
any additional fields defined for the current state can also be edited.
 icon to get the description of the selected service along with
the duration and cost for the service.
icon to get the description of the selected service along with
the duration and cost for the service.