![]()
![]()
On landing on the assets screen, the list of assets is displayed. This topic describes the list view as well as the tabular grid view listing of assets.
On selecting CMDB from the left panel menu of Service Desk, or from the legacy interface the Asset Management listing is displayed. If there are more than one Asset Management modules configured, the first one is displayed.
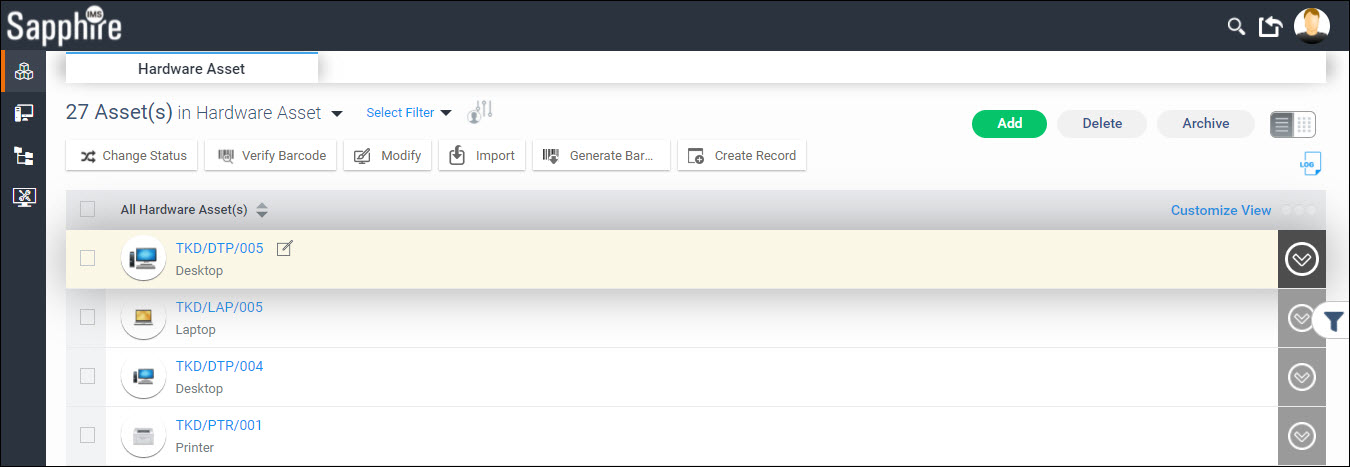
Click on the column name to sort the assets.
To expand and view any the details of any asset click on  against the asset. Refer to CMDB->Asset Management->Asset
Operations->Viewing an Asset for details.
against the asset. Refer to CMDB->Asset Management->Asset
Operations->Viewing an Asset for details.
Select between the listing of current assets or archived assets or asset reconciliation by selecting from the drop down as shown.

You
can filter the assets to display only those records which meet the
filter criteria. In order to open the Filters, click on  icon on the right hand
side. This expands the Filter menu shown below. Refer to the section
Creating
Filters for
more information.
icon on the right hand
side. This expands the Filter menu shown below. Refer to the section
Creating
Filters for
more information.
The 'Select Filter' drop down allows you to select a profile and apply it.
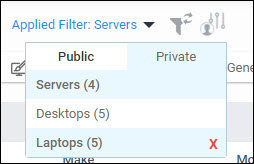
Click on the tabs 'Public' or 'Private' to select among the profiles. Public profiles are available for all users while Private profiles are available only for the user who created it.
Click on
 to clear the applied filter.
Click
on  to set the selected filter as default for this
project.
to set the selected filter as default for this
project.
The individual options of the listing page are described in detail under CMDB->Asset Management->Asset Operations->Asset Management Options.
Click on the Audit Log button  to view
the asset audit log. Refer the section CMDB->Asset
Management->Asset Operations->Asset Audit Log for
details.
to view
the asset audit log. Refer the section CMDB->Asset
Management->Asset Operations->Asset Audit Log for
details.
Click on  to switch between the List View
(default) and the Grid View. Refer to the section CMDB->Asset
Management->Asset Operations->Grid View for details.
to switch between the List View
(default) and the Grid View. Refer to the section CMDB->Asset
Management->Asset Operations->Grid View for details.
The CMDB dashboard widgets are displayed in the Service Desk
dashboard. To view the CMDB dashboard, click on  on the left hand menu in Service Desk. Refer to Service Desk->Dashboard and Reports->Dashboard
for configuring CMDB widgets in the dashboard.
on the left hand menu in Service Desk. Refer to Service Desk->Dashboard and Reports->Dashboard
for configuring CMDB widgets in the dashboard.
The menu on the top of the page contains a few buttons as seen in the screen above. Each of the buttons are described below.
|
If you hover the mouse on the left hand side, a panel appears and you can select among the options.
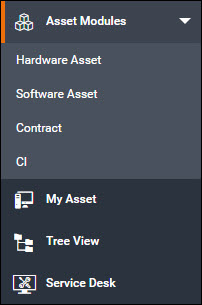
You can move up or down on the left hand menu and select any option. The options are described in the table below.
|
To customize the list view, click on  . The
customization screen pops-up.
. The
customization screen pops-up.
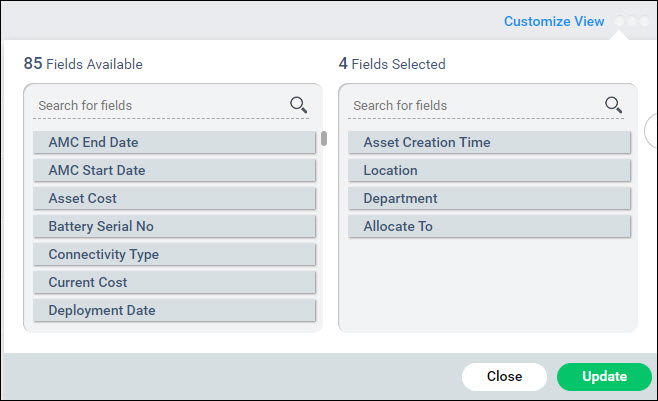
Drag and drop fields from the left hand to the right side to display in the view. Move the fields up or down to select the order of display.
Click on 'Update'.
If any user defined fields have been added using SQL scripts into the table ('assetreport_configparams'), these are also visible and can be configured to be displayed.
In the asset listing view, in each of the groupings, you can set search profiles which act like filters and allow you to view only those records which satisfy the filter criteria. Follow the steps below to set filters.
Click on on the right hand side to open the
filter options.
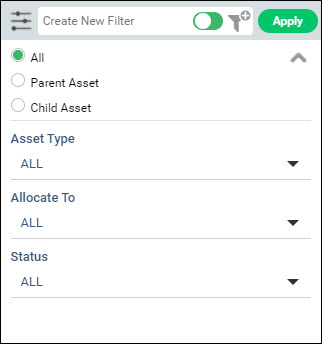
Select on 'Asset Parent' or 'Asset Child' or 'All' to list either only parent assets or child assets or all the assets.
Select the filters values for each of the parameters. The values in the drop-down appear alphabetically.
Click on
 to expand the custom filter options and allows
you to choose among the custom fields also.
to expand the custom filter options and allows
you to choose among the custom fields also.
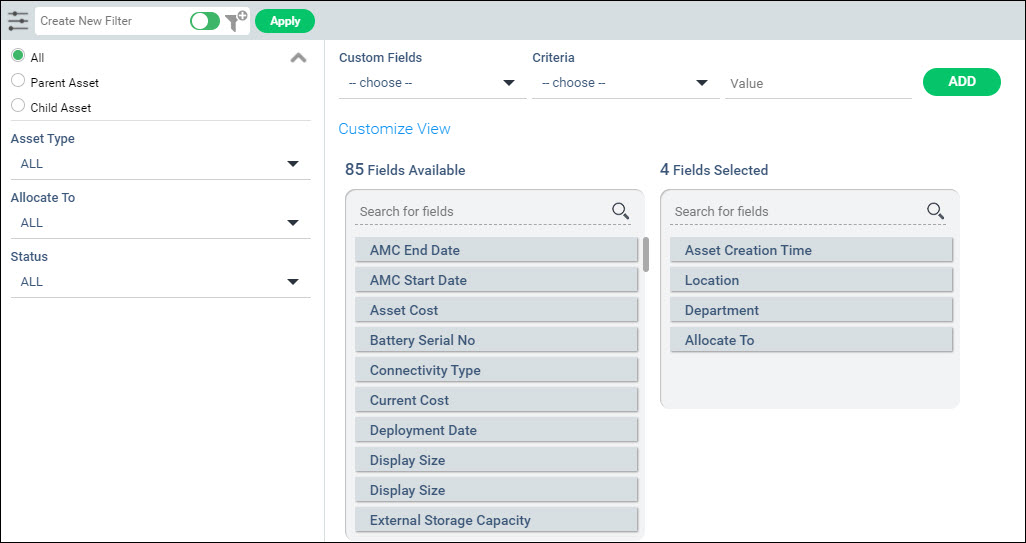
Select any custom field, the criteria and value. Click on 'ADD' to add the filter.
Once the filter values are selected, if you want to apply it temporarily click on 'Apply'.
To save and create the filter, enter a filter name
Use the slider to select between 'Public' and 'Private' filters while saving. Private filters can be created by you for your use only.
Click on
 .
.
A confirmation message is displayed. The filter appears in the 'Select Filter' drop down list in the listing view.
To modify
a filter, apply the filter by clicking on 'Select
Filter'. Next click on the filter button
to expand the filter screen. Update the filter settings and click
on  .
.
The left panel can be pinned or unpinned by clicking on  or
or  . This setting holds till the user logs out.
If the Global Setting 'Enable/Disable
Service Desk NewUI Left Panel Pin Option' is set as 0 (default)
then the left panel is unpinned when the user logs in. If set to 1,
then the panel is pinned when the user logs in to the system.
. This setting holds till the user logs out.
If the Global Setting 'Enable/Disable
Service Desk NewUI Left Panel Pin Option' is set as 0 (default)
then the left panel is unpinned when the user logs in. If set to 1,
then the panel is pinned when the user logs in to the system.


