![]()
![]()
Windows 10 version updates are released as feature packs and each version of Windows 10 released by Microsoft will be supported for 18 months. Windows 10 Feature Packs are also used to upgrade Windows 7 and 8 to Windows 10. This topic describes the steps for Windows 10 Feature Pack deployment.
Before starting the upgrade, refer https://www.microsoft.com/en-us/windows/windows-10-specifications?howto for the computer specifications and system requirements to support Windows 10 upgrade.
The following are some of the factors which will ensure that the upgrade is successful. Some of them need to be taken care before starting the Windows 10 Feature Pack upgrade.
Application versions running on the Windows systems should be compatible with the Windows 10 Feature Pack proposed to be deployed else the upgrade may fail.
'setup.exe' should not be blocked from running in target systems (including from SapphireIMS Software Blacklisting)
Target systems should be powered up and accessible on the network for the entire duration of the upgrade which may take hours.
After the deployment is complete, the target systems would need a re-start.
The Feature Packs which are in Zip file format are usually in Gb sizes and hence ensure that the network bandwidth is sufficient during the time the packs are getting downloaded.
It is a good practice to leverage the master slave agent architecture to avoid redundant downloads from the Microsoft site. However it should be noted that the master systems and slave systems upgrades are scheduled separately as the master systems should be up and running when the slave systems are getting upgraded.
If SapphireIMS is hosted on the cloud then the Remote Share option can be used for deployment.
Download the Windows 10 Feature Pack upgrade in ISO format from the Volume Licensing Service Center or Download Windows 10.
 Note: Ensure that the edition,
architecture and language of the ISO file is compatible with the target
systems.
Note: Ensure that the edition,
architecture and language of the ISO file is compatible with the target
systems.
The ISO file can be opened with any unzip utility and the contents can be viewed as shown below.
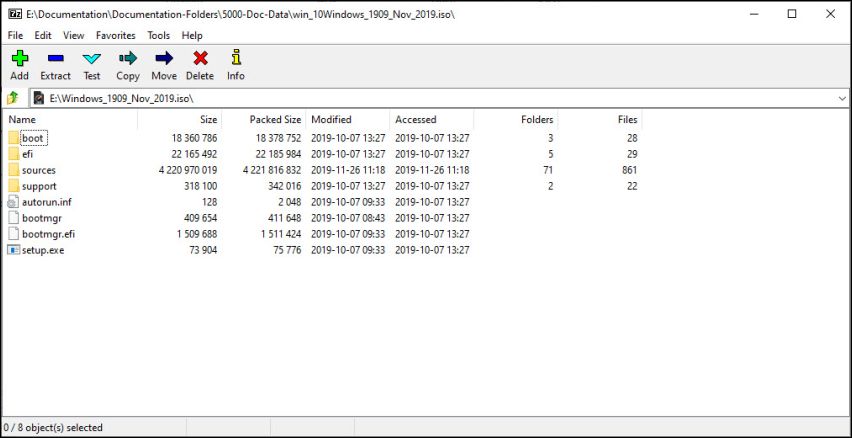
Rename the file to begin with 'win_10' and change the extension to 'zip'.
The Feature Pack can be placed locally on the system where SapphireIMS server is present and downloaded from there to the target systems or it can be placed on a remote share folder.
Click on 'Settings' and under 'Software Management' click on 'Windows 10 Feature Pack Deployment' option. The Feature Pack listing screen is displayed.

Click on 'Add' to add an entry for a new Feature Pack. Note that you can have multiple entries each for a different version of the Feature Pack.
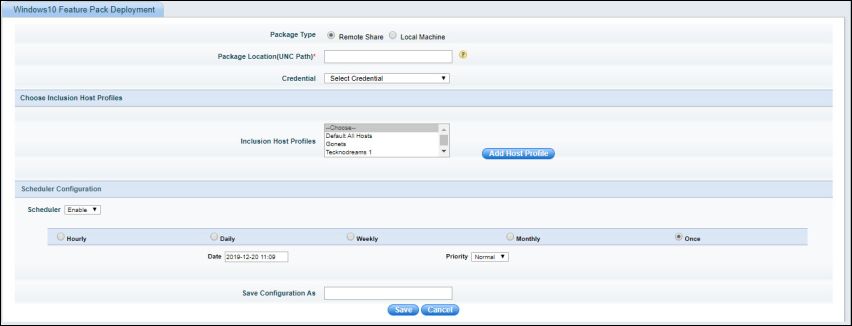
The fields are described in the table below.
|
Click on 'Save' to save the configuration.
Once the job is posted, you can get the status of the deployment in the Patch Deployment status listing (refer IT Automation->Windows Patch Management->Patch Deployment for details)
Note: In case of Enterprise
Plus Edition (MSP), you can create a dummy file on the server. However,
the actual file needs to be placed in all the probes and add-on probes
in the path specified above. In case of Enterprise Edition, all data collectors
should have the feature pack files placed at this location.