![]()
![]()
SapphireIMS facilitates the creation and management of users who would be able to use the system through the user interface which allows addition/editing/removal of users. For each users the personal information including user ID, the full name, e-mail address, Phone Number, Each user is associated with a particular user role to facilitate secured access to the system.
SapphireIMS provides interfaces to import user details from existing database systems such as an Human Resource Management System, AD/LDAP server or Excel files thus simplifying the creation of users.
A number of reports are available under Reports > IT Automation > User Management which include application usage, Top 10 users etc.
Click the 'Settings' tab. In the 'User Management' section, click 'Users'. The user list is displayed.
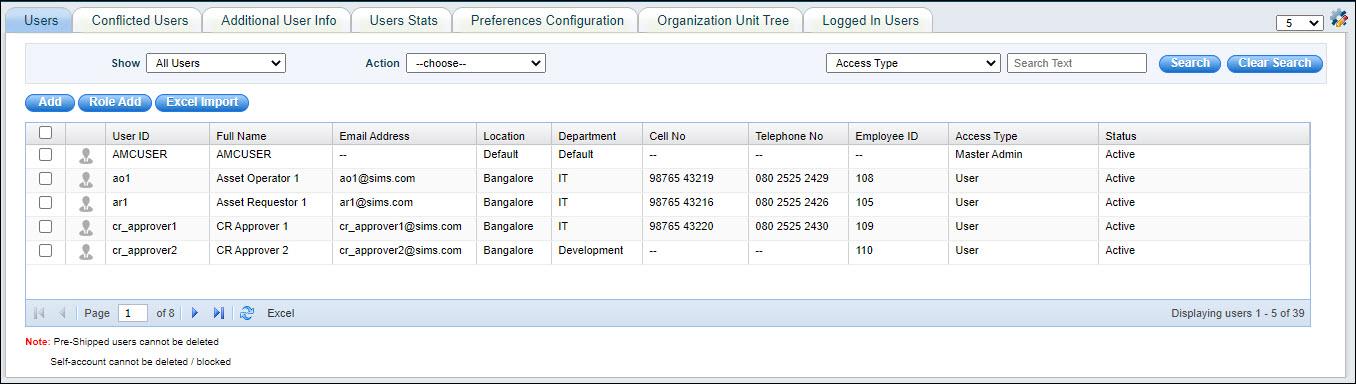
The 'Users'
tab lists all the users who are part of SapphireIMS system. Click
on ‘![]() ’ icon to
customize the user list screen. You can search for a specific user
by selecting any user field in the drop-down select box, entering
the value in the text box and then clicking on 'Go'.
’ icon to
customize the user list screen. You can search for a specific user
by selecting any user field in the drop-down select box, entering
the value in the text box and then clicking on 'Go'.
Select a filter in 'Show' which can be 'All Users', 'Active Users', 'Inactive Users' and 'Deleted Users'. The Status column is displayed when 'All Users' is selected.
The icon against the user shows green if the user is logged in to SapphireIMS.
Click on 'Add' to add a new user. Refer to the topic Settings->User Management->Adding User Accounts for more information.
Select one or more users by putting a check on the box against the users and then select 'Delete' in the 'Action' drop down field to delete the users.
To edit a user account, click on the same in the 'User ID' column. The user detail screen is displayed. Modify the details and click 'Update'.
Click 'Role Add' to define/manage roles. This is discussed in detail in the next topic (refer Settings->User Management->Roles->Managing Roles.
Select one or more users and select 'Block Login' in the 'Action' drop down field to block the users from logging into SapphireIMS.
Select one or more users and select 'Unblock Login' in the 'Action' drop down field to allow the blocked users to login to SapphireIMS.
Select one or more users and select 'Change Access' in the 'Action' drop down field to change the role for the selected users.
Click 'Excel Import' to import user information from Excel. Refer Settings->User Management->Excel User Import for more information.
 Note:
Deleting an user account is a non-reversible action. The account will
be permanently deleted from the system. However accounts imported from
an LDAP/AD server cannot be deleted locally. The account has to be deleted
on the LDAP/AD server.
Note:
Deleting an user account is a non-reversible action. The account will
be permanently deleted from the system. However accounts imported from
an LDAP/AD server cannot be deleted locally. The account has to be deleted
on the LDAP/AD server.
Note:1.
‘Reset Password’ tab will be visible only if the setting key ‘Enable/Disable
Password Reset Feature’ in ‘Settings > Advanced System Settings >
Global Settings’ is enabled by setting as 1.
2. The setting key 'Enable/Disable AD Account Operation Access' in 'Settings > Advanced System Settings > Global Settings' should be set to 1 to enable AD Password Reset.
The lists of users imported from LDAP/AD server into SapphireIMS has a password associated and maintained in the LDAP/AD server. This password can be reset either by the user (Refer Getting Started->Preferences) or by the SapphireIMS administrator. In the case where the SapphireIMS administrator wants to reset the password, the same can be done without having to know the secret question setting. The new password will get updated in the LDAP/AD server.
Click on 'Settings > User Management.
Select one or more users and select 'AD Account Reset' in the 'Action' drop down field. The Reset Password screen is displayed.
Type the new password, confirm it and click ‘Reset Password’. The updated password for the selected users will reflect in the LDAP/AD server.
User accounts can get locked if invalid password is entered in succession till the limit for invalid tries is reached. The account can be unlocked through self service or by the SapphireIMS administrator.
Click on 'Settings > User Management.
Select one or more users and select 'Unlock Account' in the 'Action' drop down field. The account is unlocked and a confirmation message is displayed.
When importing users from LDAP/AD servers if there is a conflict or the users were not successfully imported, they are listed under 'Conflicted Users'. You can view the user information and decide to either delete the entries or Include the entry in the users list.
Click 'Conflicted Users' to view the list of conflicted users or users who were not successfully imported through the LDAP configuration rule.

Select the conflicted users and click 'MERGE' to add the users to the LDAP/AD users list
Note:
You cannot login to SapphireIMS with AD conflicted user name and password.
SapphireIMS allows the users to modify certain attributes of their profile under User Details section in 'Preferences' (Refer Getting Started->Preferences). These are the Full name, Telephone Number, Mobile Number and e-mail address. Additionally in case the users are imported from an LDAP/AD server, the attributes are updated on the LDAP/AD server also. In order to allow users to change these attributes the administrator has to configure the preferences.
Note: To enable the update
of LDAP/AD attributes to the LDAP/AD server, the Global Settings 'Enable/Disable
updation of AD attributes' should be set to 1. Also the LDAP/AD server
configuration should be using SSL for any update of the LDAP/AD server.
Click 'Preferences Configuration' to set the display attributes of LDAP field names.

Click on 'Readonly' checkbox if the user needs to be prevented from editing the field. Click on 'IsMandatory' if the field should be made mandatory while the user is editing the preferences. In the 'Display Name' column, enter the display label. Under the 'LDAP Attribute' column select the LDAP/AD attribute which needs to be updated if the field is updated locally. The 'Display Order' specifies the order in which the fields should be displayed in the Preferences screen.
There is an option to set the permissions for the user to update permissions for individual fields to allow the field to be editable based on the role or user. To set the permission, click on 'Set' against the field. The following screen is displayed.
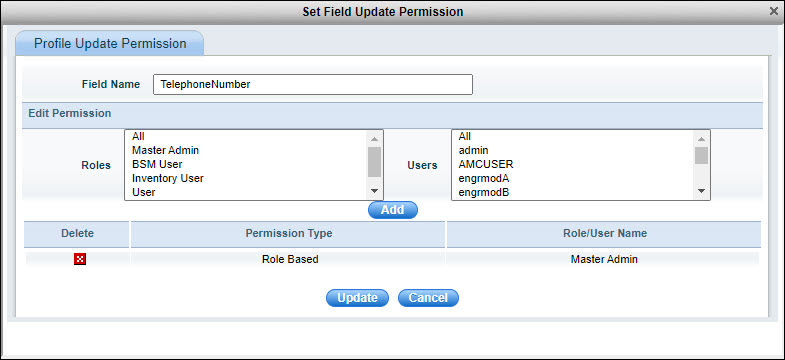
Select a 'Role' or a 'User' and click on 'Add'. The entry is added below. You can delete any entry by clicking on the delete button.
Click 'Update' to save the changes to return to the main page.
Click 'Update' to save the changes.
Note: While only a few fields
are set-up for enabling preferences, other fields can be added if needed.
However this requires changes to the database and you can contact SapphireIMS
Support team for the same.
This feature allows you to add additional fields while importing users from LDAP.

Check the 'Visibility' box and enter the 'Additional Field Display Name'.
Select the required LDAP/AD attribute under the column 'AD LDAP Attribute' and click on 'Map'. If the LDAP/AD attribute is not present in the AD LDAP Attribute drop down list, select 'User Defined' attribute and enter the AD attribute under 'User Defined Attribute'.
The check box 'Preference Status' is used to display the additional field in the Preferences screen. However this is applicable only for AD users.
If there is a need to add more than 15 fields, after you enter the 15th row, a button 'Add Additional Field' is displayed. Click on this button. A new row to add another field appears. You can repeat this to continue to add more rows.
Click 'Update'.
Notes:
1. If the AD attribute is present in LDAP, it is imported else the attribute
is displayed as '--' in the user listing.
2. If the 'Visibility' column is checked, the user additional field will appear in the list of fields for selection in asset reports ('Allocate To User fields' list in the 'Select Fields' drop down list box of asset reports)
SapphireIMS allows you to group users under organization units. OU helps in managing the access control in SapphireIMS. By segregating users and assets based on OU, access to Service Desk tickets or assets in CMDB can be restricted to IT personnel belonging to that OU.
Follow the steps below to do so.
1. Click on 'Organization Unit Tree' and select the OU to which you want to map the users.
2. Click on 'Map Users' option.
3. Select the user from the list of users
under 'Available Users' and click
![]() to
move the user to the 'Selected Users'
box
to
move the user to the 'Selected Users'
box
4. Click 'Add'.
You can view the details of users who are logged-in and force a logout centrally. Click on the tab 'Logged in Users'. The listing of users is displayed.

The Last Request Time is the time at which the user has last interacted indicates how long the user has been idle.
To logout one or more users, select the users and click on 'Logout'.
The fields in the user listing page can be renamed. To change the display name of a field, click on the tab 'Rename User Fields'.
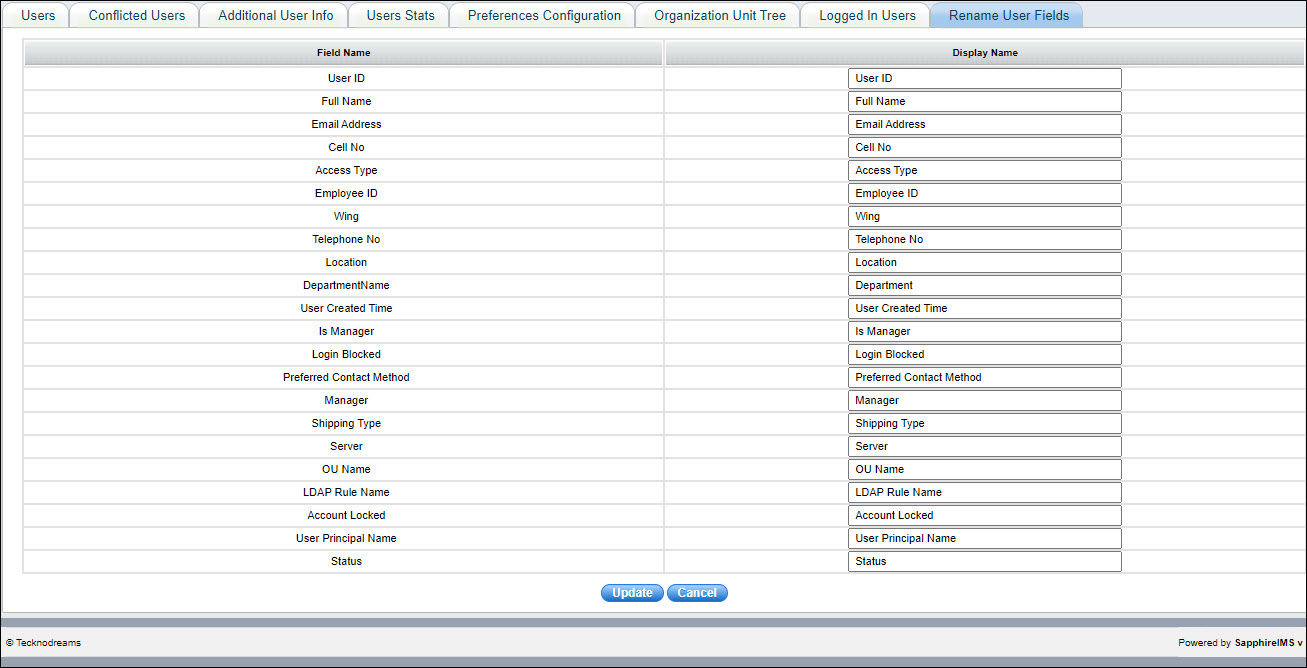
Change the 'Display Name' of one or more fields.
Click on 'Update' to save the changes.