![]()
![]()
The service desk notification templates are used to customize the notification formats for different projects. E-mail notifications are used for the following
Inform recipients of any change in the record (Generic Notifications) including state changes, changes to fields in the records etc. Go to the section Generic Notification.
Inform recipients about Knowledge Base Article Review, Update, Publish, Reject, Comment and Vote. Go to the section KB Notification.
Inform recipients about KEDB Article Review, Update, Publish, Reject, Comment and Vote. Go to the section KEDB Notification.
Templates can make use of macros which represent database fields and the macro is substituted with the actual value at the time of e-mail generation.
There are a number of in-built templates in the product. Apart from editing the existing templates, new templates can also be created.
In the 'Settings' panel, click on the '+' sign to expand 'Email & SMS Notifications'. Click on 'Email Notification Templates' to display the Email Notification Templates listing page.
Click ‘ADD’ to create a template.
|
Click on 'Save' to save the template.
If you want to add the organization Logo in the e-mail, refer to the next section 'Customizing the Logo'.
You can customize the Logo in the notification e-mail. On the Email Notification screen click on 'LOGO'. The Logo screen appears
![]()
Click on 'Enable Logo' or 'Disable Logo' to enable or disable the Logo in the notifications.
You can select the position of the Logo in the mail by selecting 'Logo on Up' or 'Logo on Down'.
Click on 'Update'.
The notification template created can be modified. Apart from editing any of the information, you can also edit the summary table information.
Click on the specific notification template. The template screen is displayed.
Make any changes to any of the fields in the notification template.
To make changes to the summary table,
click the icon ![]() in the message body section,
to display the screen below.
in the message body section,
to display the screen below.
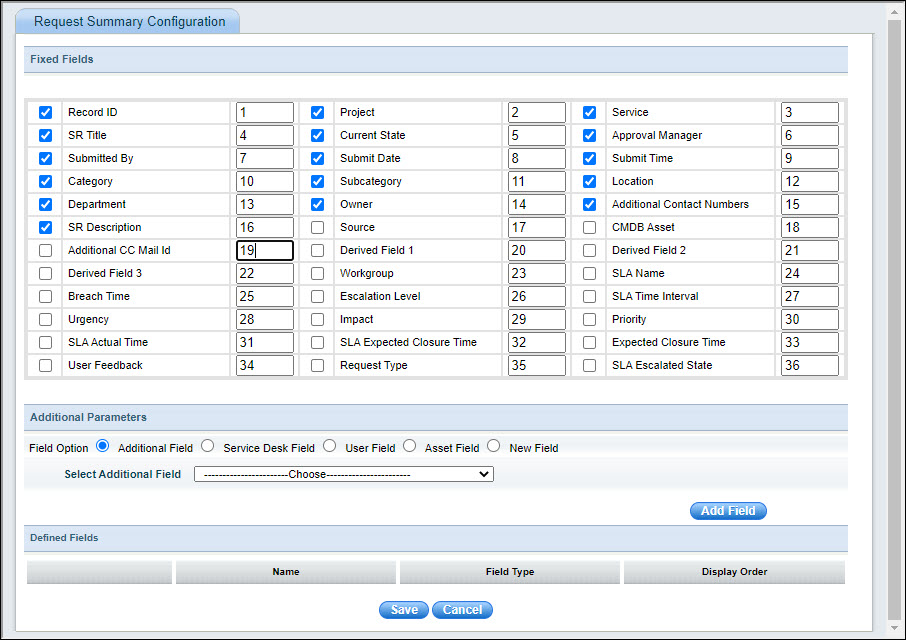
Select the fields, which needs to be included in the mail. Some of the fields are selected by default. These fields can be deselected.
In the ‘Additional Parameters’ section select the type of field. Then select the appropriate field from the drop down.
Click ‘Add Field’ then click ‘Save’. The selected fields will be included in the ‘Message Summary’ section of the e-mail. You can also view the fields which will be shown in the summary table at the end of the edit screen as shown below.
Click ‘Update’ to successfully save the modified template.
After creation of templates, the notification rule has to be defined which will cause the notifications to be triggered. Refer to the next topic for creation of notification rules.
Below is an image of a sample e-mail sent from SapphireIMS for the 'Acknowledgement Info Template'

When creating the notification template you can select the Knowledge Base option and the following fields appear on the screen
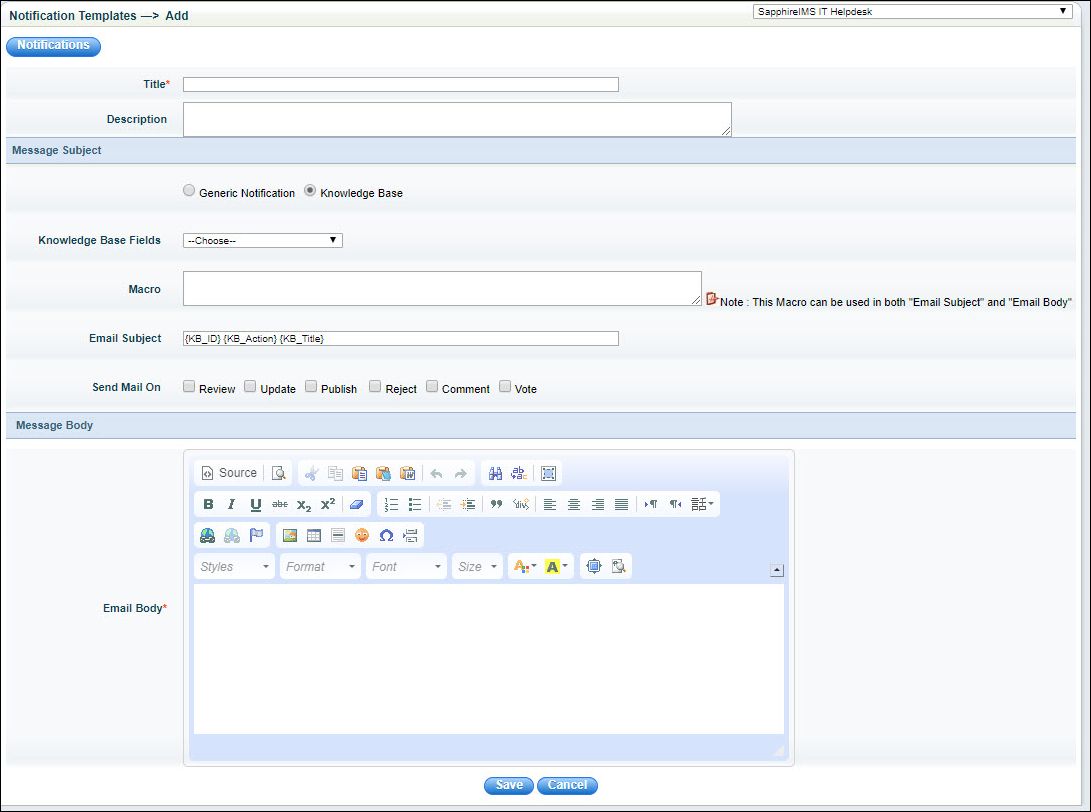
Select the macro among ID, Action and Title.
Select the one or more events on which the notification has to be sent which are Review, Update, Publish, Reject, Comment and Vote. Refer to Service Desk->Service Desk Common Features->Knowledge Base for more details on Knowledge Base.
After updating the subject and body fields, click on 'Save'.
 Note: This section applies
to Problem Management type of projects only since KEDB is not relevant
to other project types.
Note: This section applies
to Problem Management type of projects only since KEDB is not relevant
to other project types.
When creating the notification template you can select the KEDB option and the following fields appear on the screen.
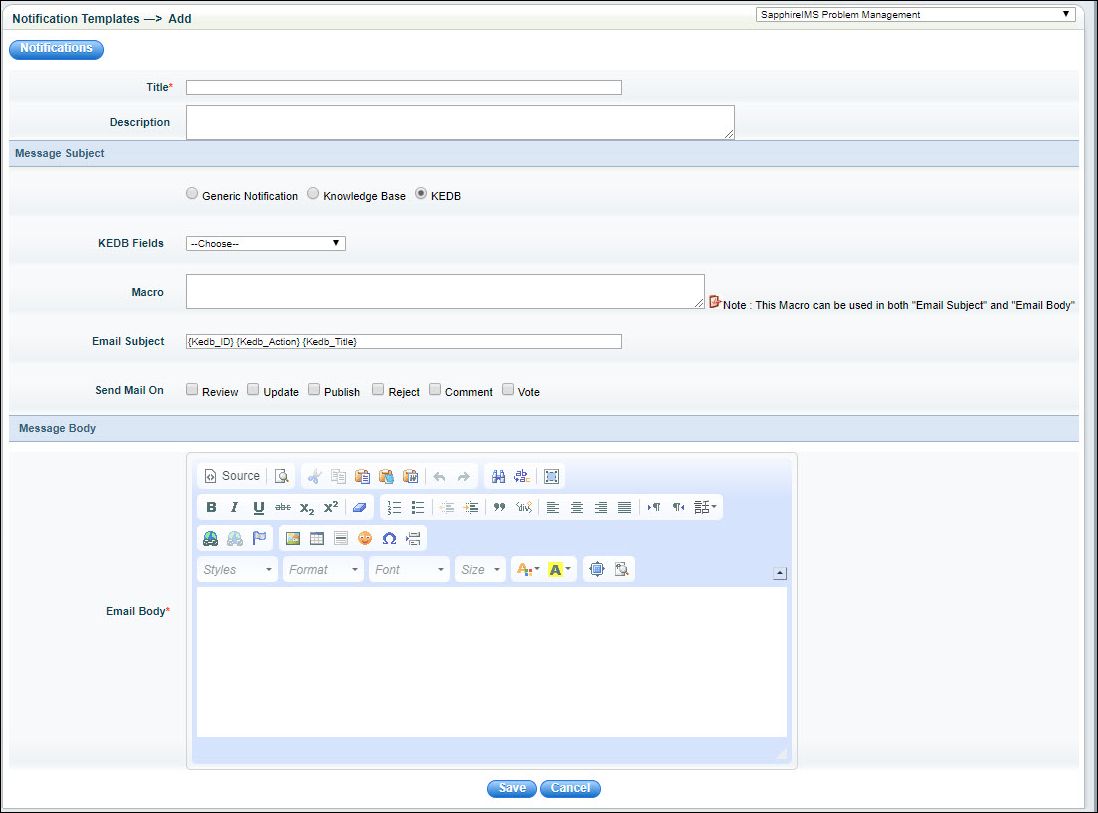
Select the macro among ID, Action and Title.
Select the one or more events on which the notification has to be sent which are Review, Update, Publish, Reject, Comment and Vote. Refer to Service Desk->Problem Management->Known Error Management for more details on Known Error Database.
After updating the subject and body fields, click on 'Save'.