![]()
![]()
SapphireIMS provides support to import all your user account information from an LDAP or AD server, Azure AD, OneLogin Cloud Directory and Google Workspace (formerly G Suite) . This import can also be scheduled so that the user information is periodically synchronized with the source. However the authentication of the users will happen from the corresponding source as the password is not downloaded into SapphireIMS. Also in this mode, single sign-on is enabled.
For LDAP, you first need to create a credential profile. You can go to 'Settings > Profile Manager' to add a new credential profile. Refer to Settings->Asset and Inventory Management->Profile Manager for more information.
 Note: For setting credentials
for Microsoft AD servers you need to select credential type as WMI and
for other LDAP servers the credential type should be selected as LDAP.
Note: For setting credentials
for Microsoft AD servers you need to select credential type as WMI and
for other LDAP servers the credential type should be selected as LDAP.
Next, you need to configure an LDAP rule. Refer to Configure LDAP Rule in SapphireIMS for details.
Once the LDAP rule is configured, you can configure the import and synchronization with the Directory. Refer to the topic Settings->User Management->AD and LDAP Integration->LDAP/AD Server Synchronization Configuration for more information.
Lastly, you need to enable single sign-on. Refer Configuring Single Sign-On (SSO) for details.
For configuring Google Workspace, refer to the section Setting up Credentials and enabling Service Accounts in Google Workspace. This needs to be completed before configuring the LDAP rule.
1. Click the 'Settings' tab. Under the 'User Management' section, click 'AD and LDAP Integration'
2. Click on 'Add' to add a new LDAP rule.
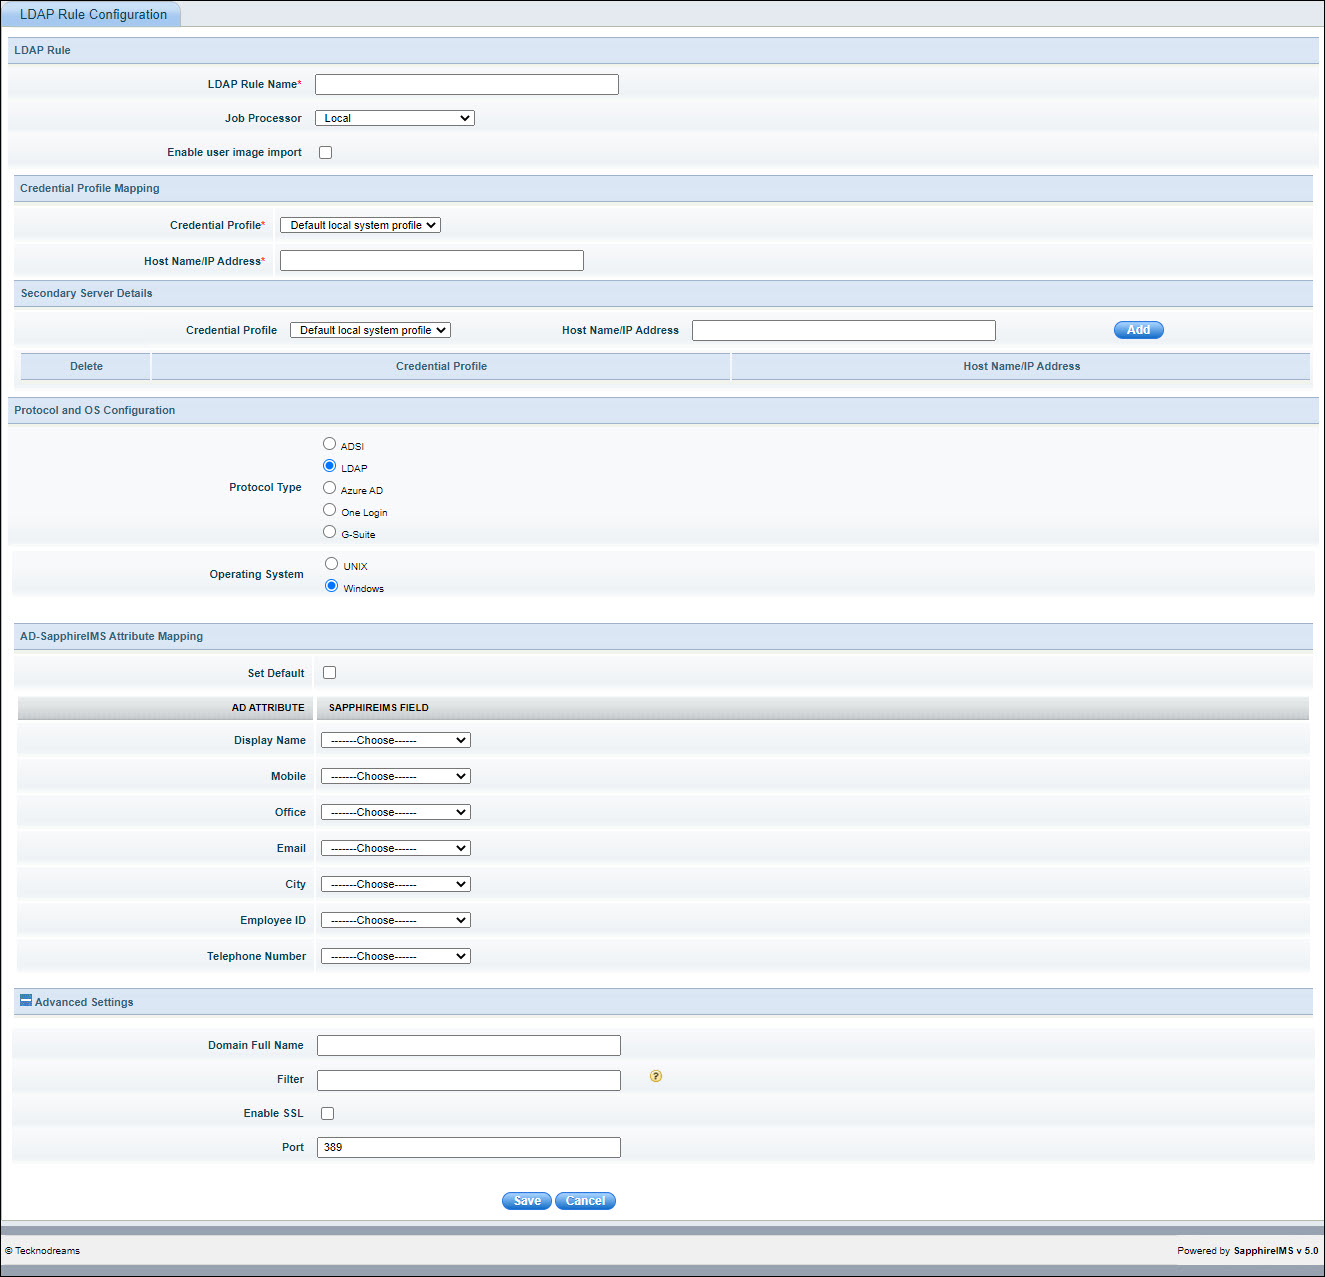
The fields are described below.
|
Click 'Save' to save the LDAP Rule
After configuring the LDAP rule, the rule needs to be scheduled to get executed so that the user import happens. You can go to the topic Settings->User Management->AD and LDAP Integration->LDAP/AD Server Synchronization Configuration for information on scheduling the rule.
By default, certain set of attributes are imported from LDAP/AD server. You can add additional attributes.
Note: Passwords are not imported
from the LDAP/AD server and all authentication happens from the LDAP/AD
server. On logging in the first time, the user is taken to the 'Preferences'
page where the user can enter the PIN and security question/answer. This
is required to reset the password in future.
Note: Support
for importing User Data from Multiple Domains along with SapphireIMS Web
Portal and Mobile App based User Authentication across Multiple Domains
in Microsoft and OpenLDAP Active Directory Integration is provided. Both
“domainname\username” and “username@domainname” formats for Username are
supported for the Active Directory Users to login to the SapphireIMS Web
Portal and Mobile App.
Note: The Global Settings
Key 'Multi domain user error message' is used to change the error message
when a multi domain user enters incorrect credentials while logging in.
Refer to Settings->Advanced
Settings->Global Settings to set the error message.
Note: There is a Global Setting
Key to restrict the import of Location and Department information for
disabled users. Set the Global Settings Key "Restrict location and
department info update for disabled users during AD sync" as 1 to
restrict the import. Refer to Settings->Advanced
Settings->Global Settings to set the error message.
This section provides the details for setting up the credentials and enabling service accounts in Google Workspace in order to allow user import from Google Workspace. You need a Google account to get started.
Login to Google using your account.
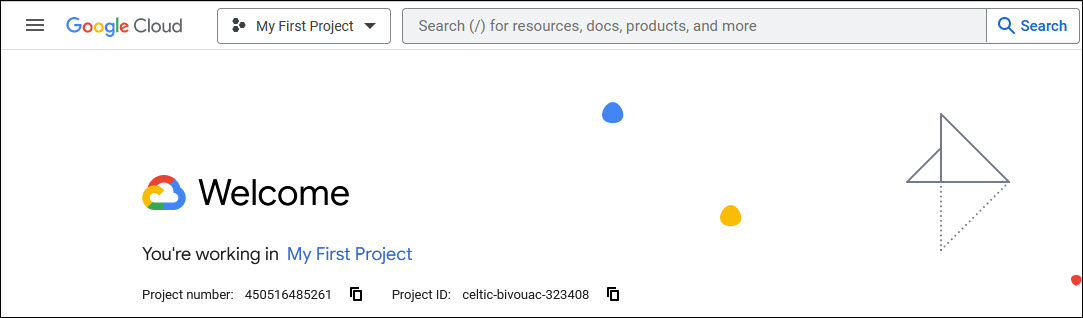
Go to the following URL: https://console.cloud.google.com. The home page is displayed. The first step is to create a new project.
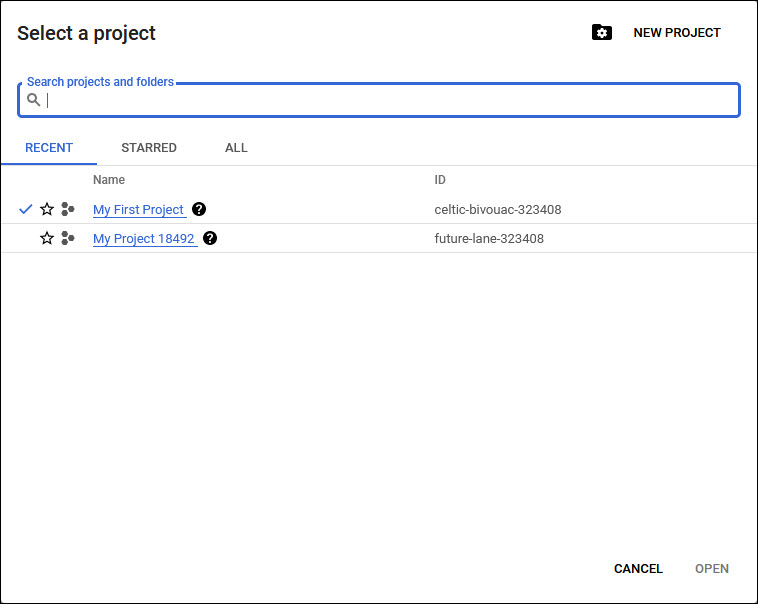
Click on the drop down at the top to go to the project selection screen.
A new project has to be created. Click on 'New Project' to create a new project. The project creation screen is displayed.
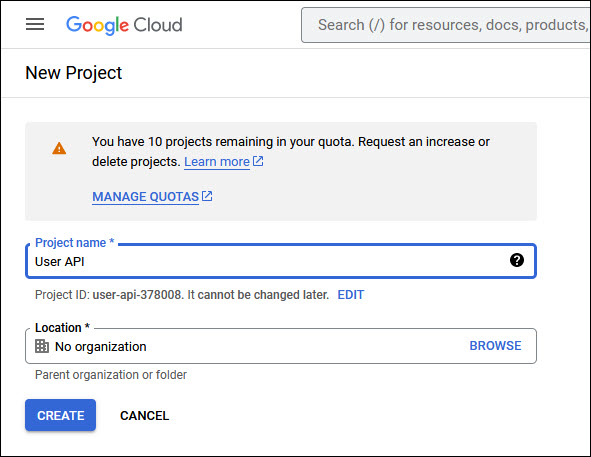
Enter a 'Project Name' and click on 'CREATE'.
After the project is created, the Admin SDK API has to be enabled.
From the home page select the project. On the menu click on 'APIs & Services' to open that page.
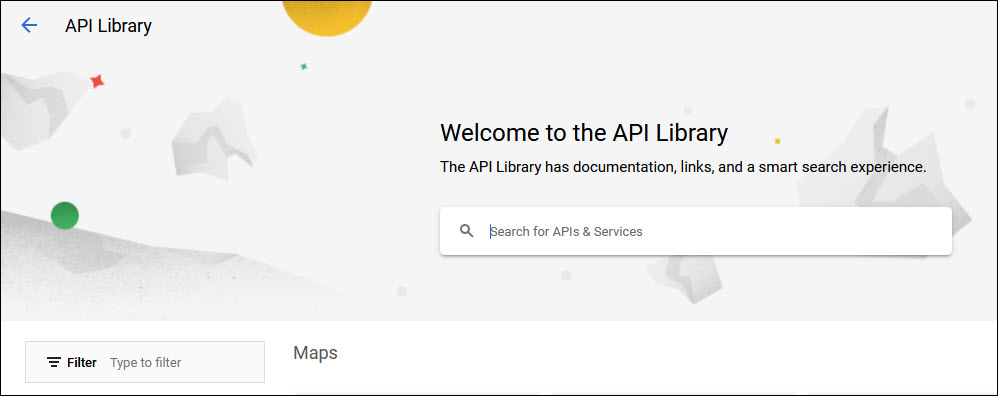
Click on '+ Enable APIS and SERVICES'. The welcome page is displayed.
In the search box, type 'Admin SDK API'. The matching APIs are listed. Click on 'Admin SDK API' to select.
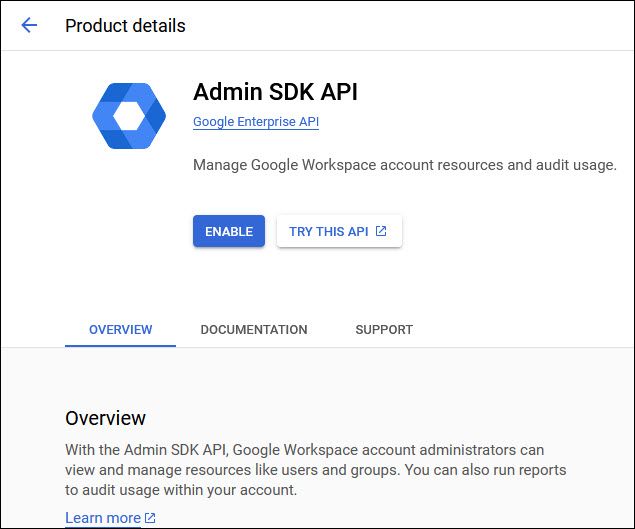
Click on 'ENABLE' to enable the API.
The next step is to enable OAuth.
On the left hand menu click on 'APIs & Services'. Further in this menu click on 'OAuth consent screen'.
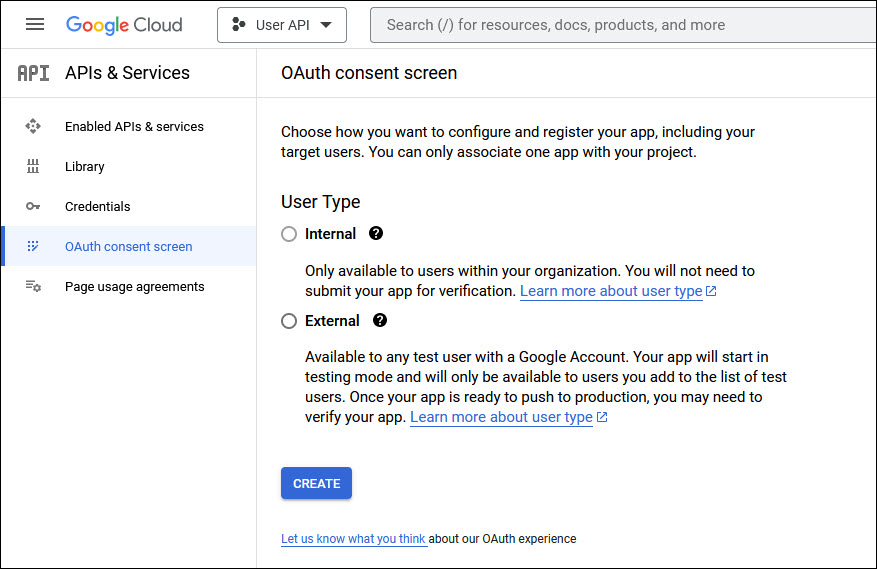
Select 'User Type' as 'Internal' and click on 'CREATE'. The App Registration screen is displayed.
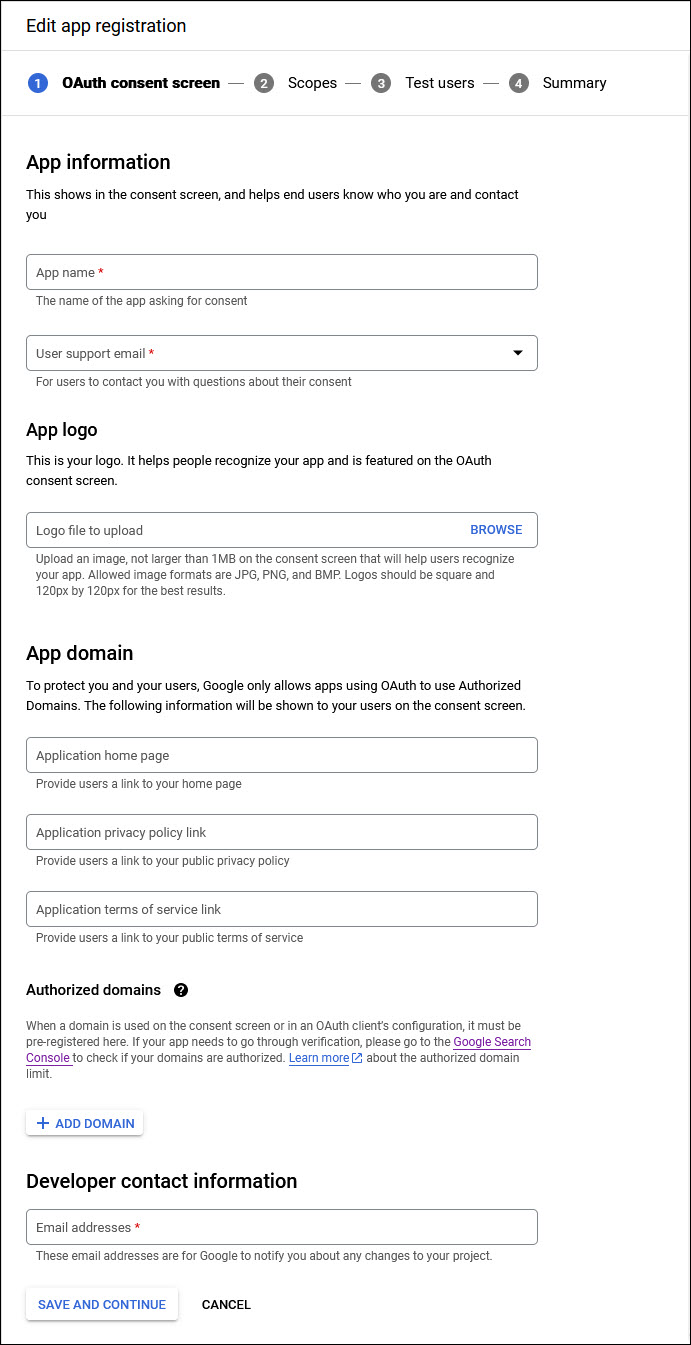
Enter the 'App name' and the email for 'User Support'.
Upload a logo image for the app. Click on 'Browse' and select a file to upload.
You do not need to enter the links in App Domain.
In the Authorized Domains section, click on 'ADD DOMAIN' and add the domain.
Add the 'Email address' in the Developer Contact Information.
Click on 'SAVE AND CONTINUE'. The next step is to add the scope for the app.
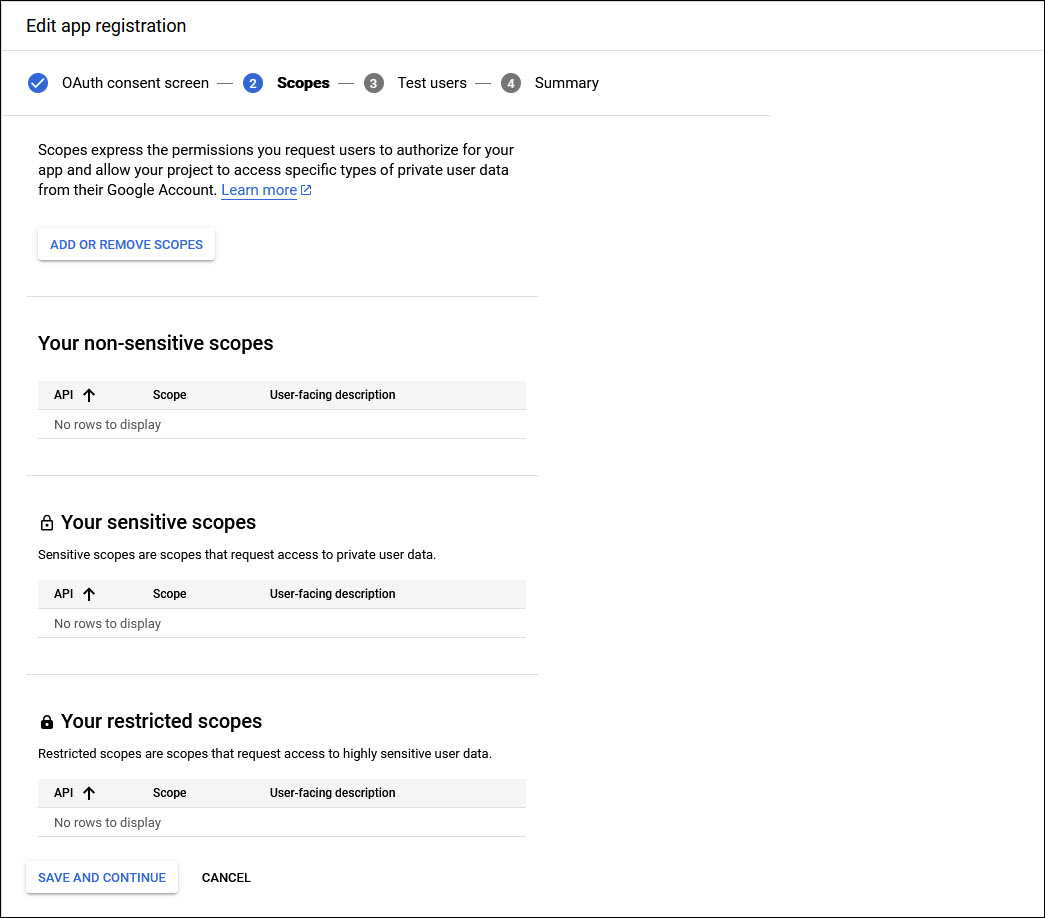
Click on 'ADD OR REMOVE SCOPES'. The screen to add is displayed.
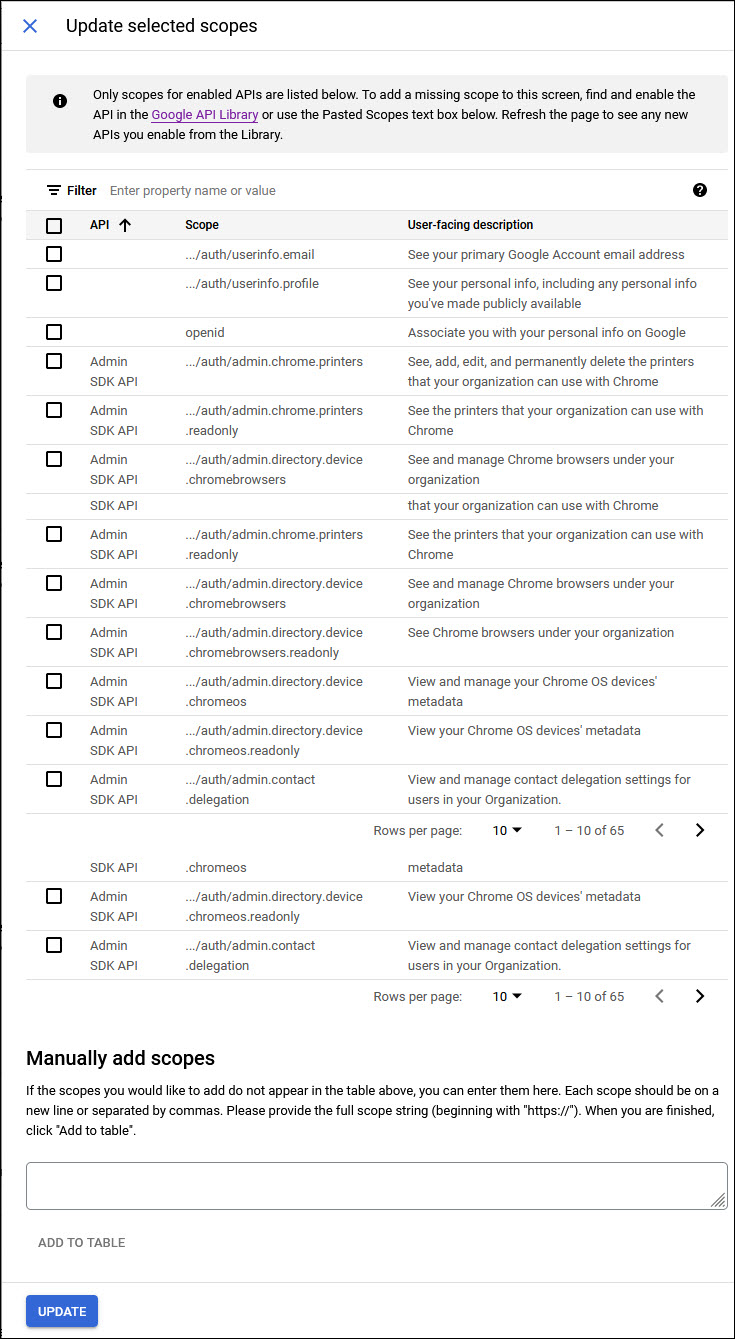
At the bottom of the page you can see a section 'Manually add scopes'. Enter the following scopes each in a new line or separated by commas
https://www.googleapis.com/auth/admin.directory.group.member
https://www.googleapis.com/auth/admin.directory.group
https://www.googleapis.com/auth/admin.directory.user
https://www.googleapis.com/auth/admin.directory.user.alias
https://www.googleapis.com/auth/admin.directory.user.security
Click on 'ADD TO TABLE'.
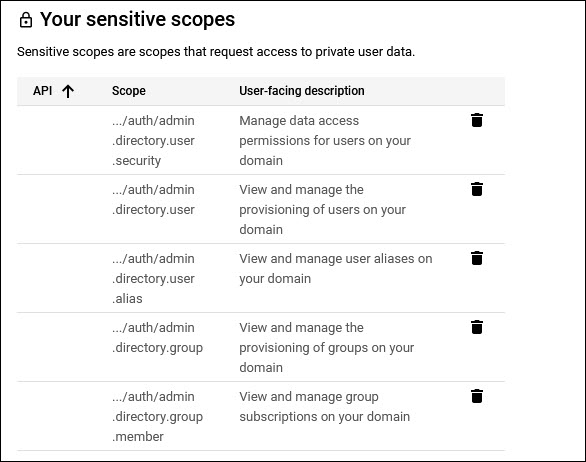
Click on 'UPDATE'. The added scopes are displayed under 'Your sensitive scopes'.
Click on 'SAVE AND CONTINUE'.
Proceed to the 'Summary' page by continuing past the 'Test Users' page.
Click on 'BACK TO DASHBOARD'.
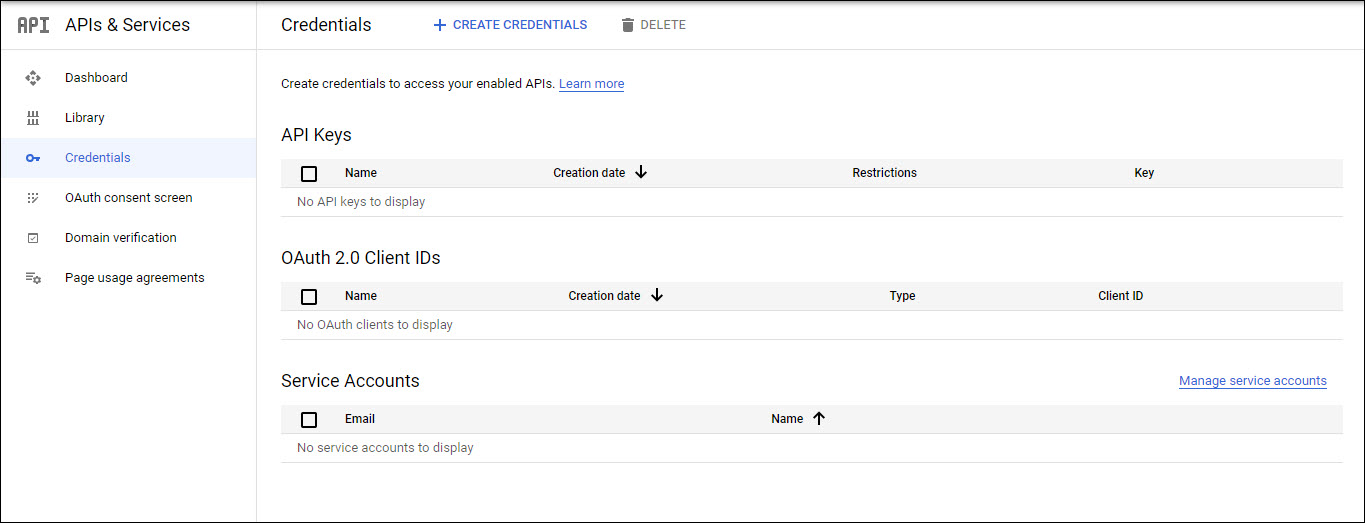
The next step is to create the OAuth 2.0 credentials. Click on the 'Credentials' menu option on the left hand menu.
Click on 'CREATE CREDENTIALS'. A drop-down menu is displayed as shown below.
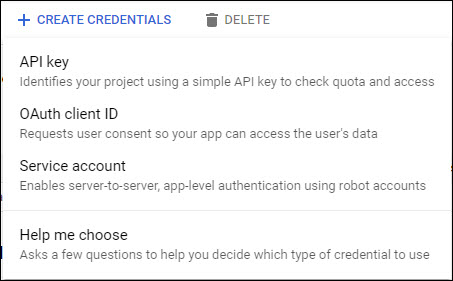
Click on 'OAuth Client ID'.
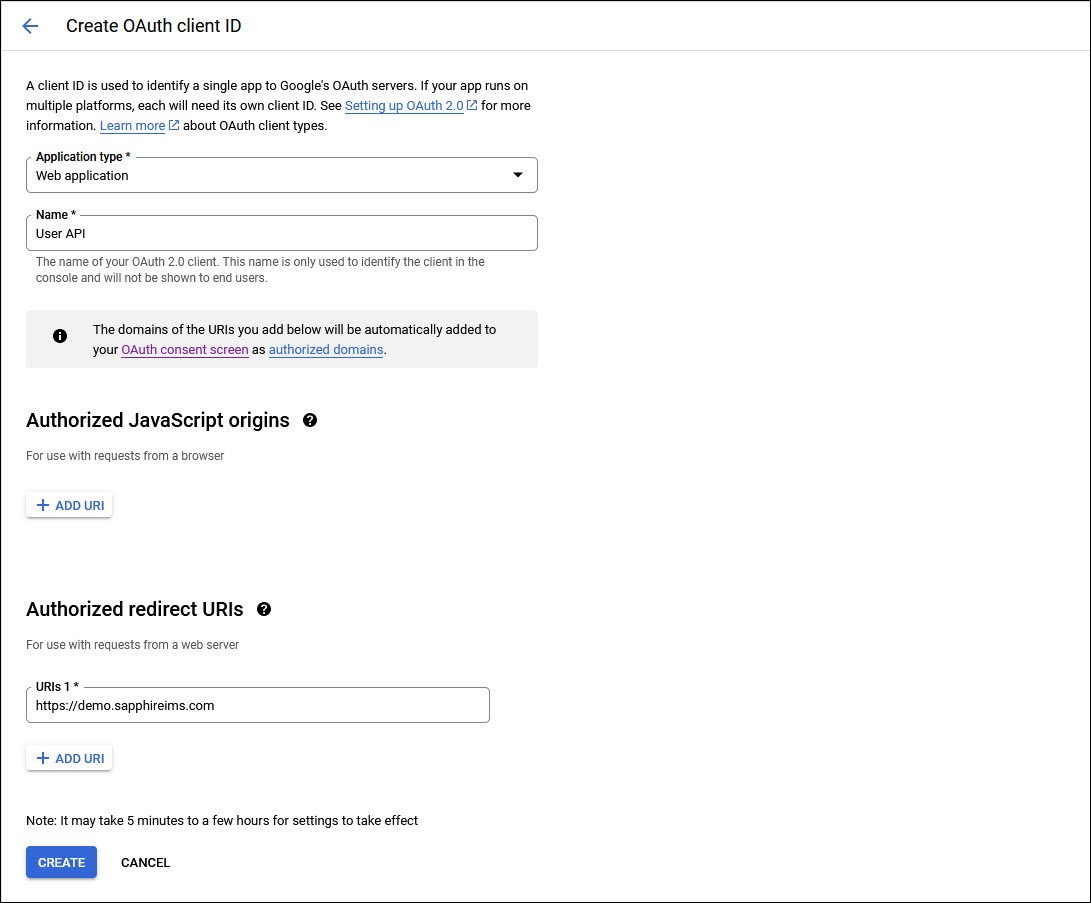
Next select the 'Application Type' as 'Web Application'.
Enter the 'Name' as 'User API'.
In 'Authorized JavaScript origins', click on 'ADD URI'.
Enter the URI for the server where SapphireIMS is deployed.
Click on 'CREATE'.
A pop-up window is displayed with the Client ID and Client Secret. Copy these into a text file and save it as it is needed later.
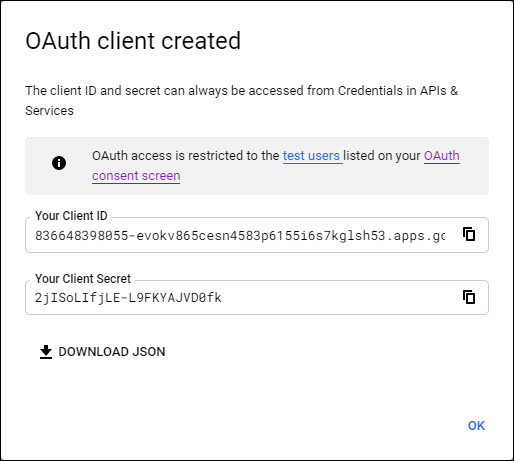
Click on 'OK'.
The next step is to create the service account credentials.
Click on 'CREATE CREDENTIALS' option. In the drop down, select 'Service Account'. The following screen is displayed.
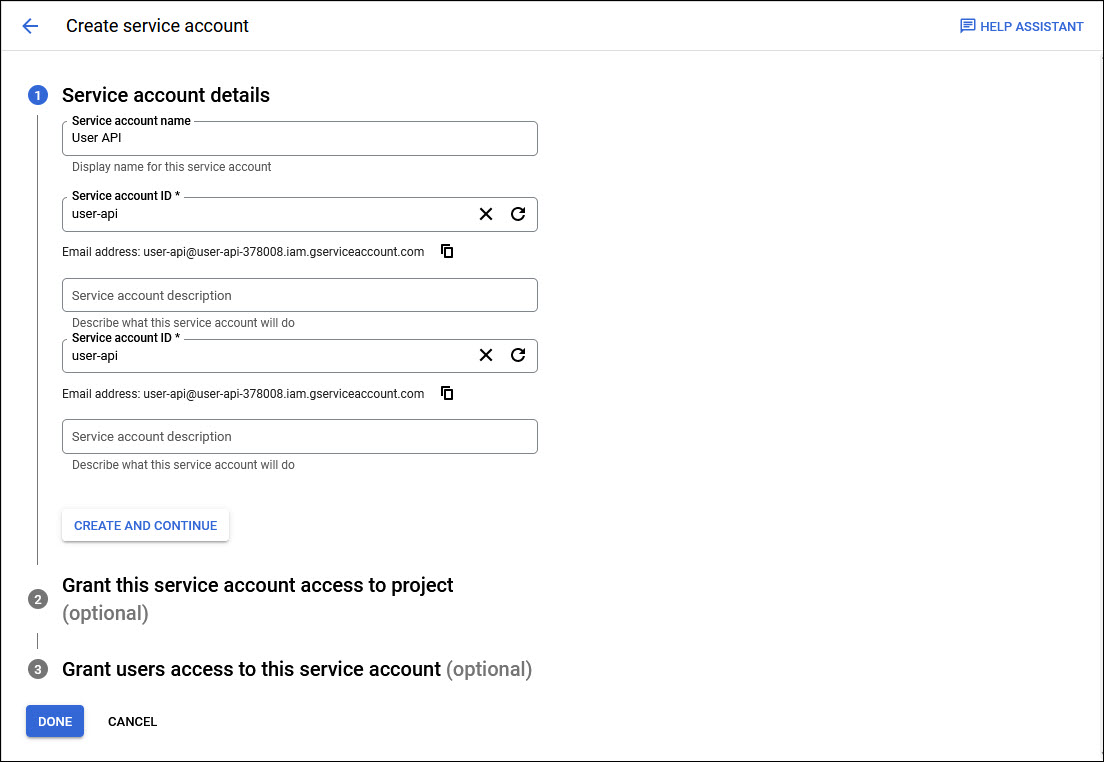
Enter a 'Service account name'. The 'Service account ID' is automatically generated and can be modified if needed.
Make a note of the Service Account Email address which has to be later configured into SapphireIMS.
Click on 'CREATE AND CONTINUE'.
'Grant this service account access to project' is optional and click on 'CONTINUE'.
Click on 'DONE'.
Next click on 'Service Accounts' in the left hand menu. The newly created Service Account will be displayed.
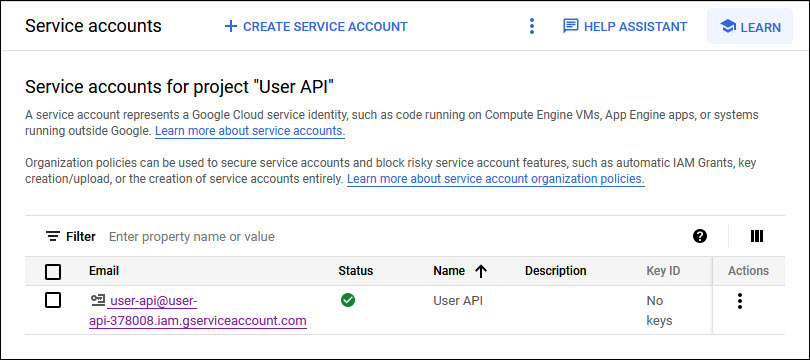
Click on the newly created account to open it.

Click on the 'KEYS' tab.
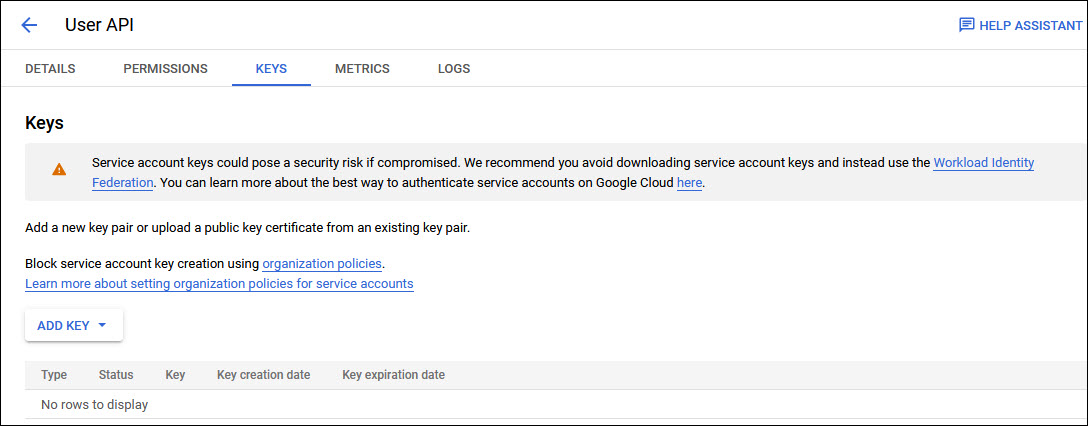
Click on 'ADD KEY' to expand the drop down and select 'Create New Key'.
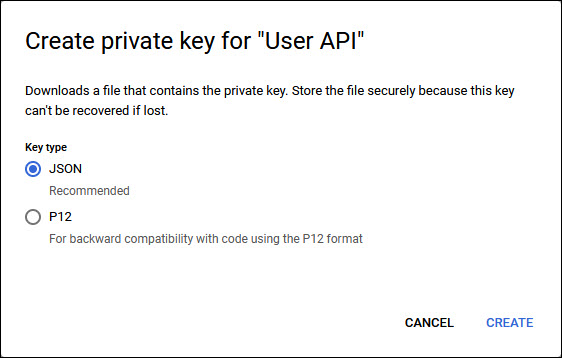
Select the 'Key Type' as 'JSON' and click on 'CREATE'.
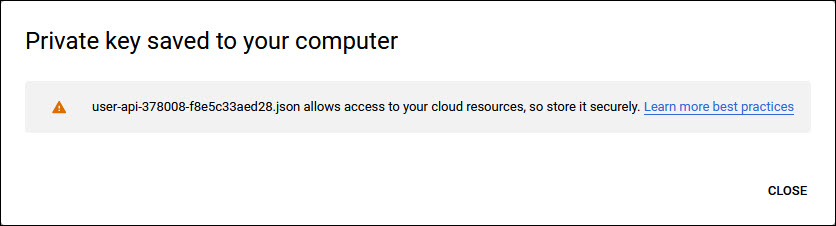
The Private Key ID and Private Key ID are saved to a JSON file in the 'Downloads' folder. Click on 'CLOSE'.
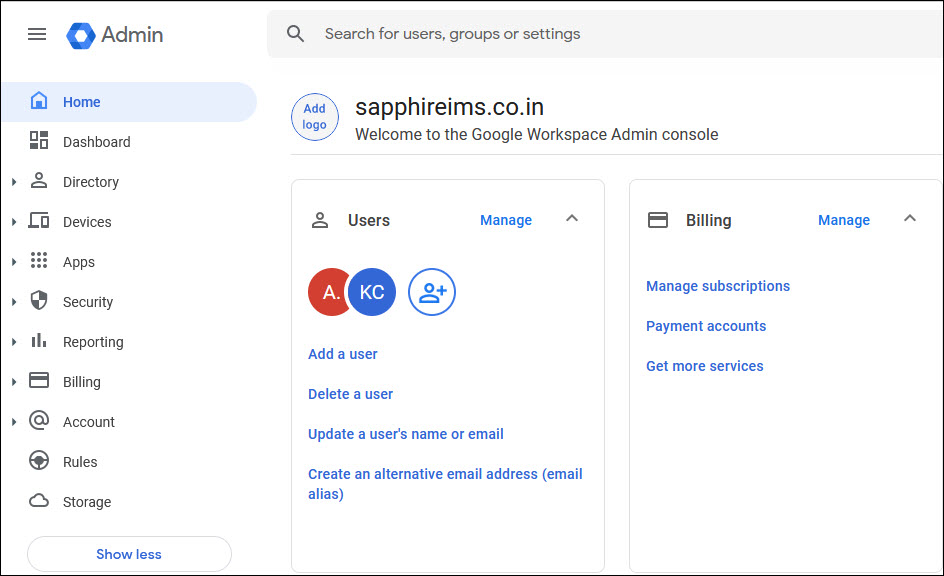
The next step is to delegate domain wide authority to the Service Account. Open the Google Workspace Admin console.
On the left hand menu, click on 'Security'. Click on 'API Controls' under 'Access and data control'. The following screen is displayed.
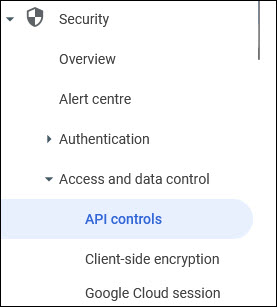
Click on 'API Controls'. The following screen is displayed.
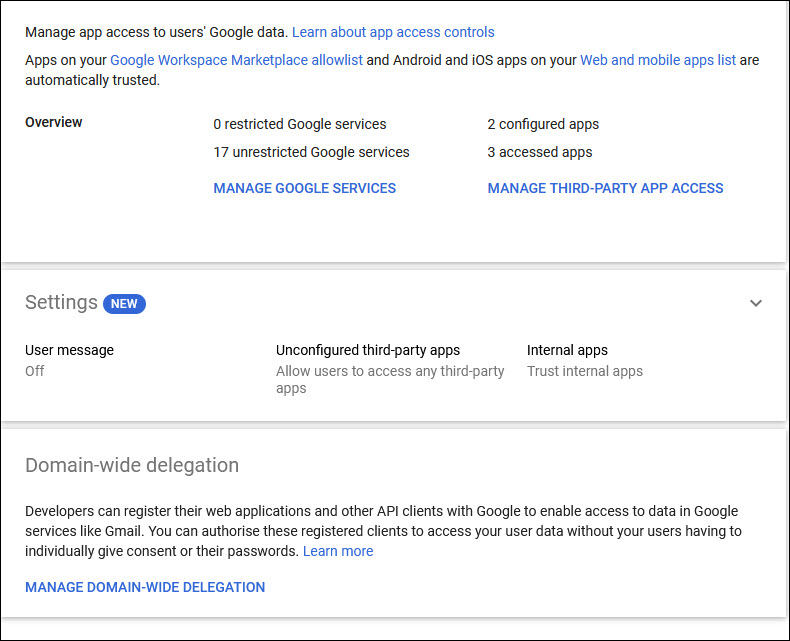
Click on 'MANAGE DOMAIN-WIDE DELEGATION'. A list of API clients is displayed.
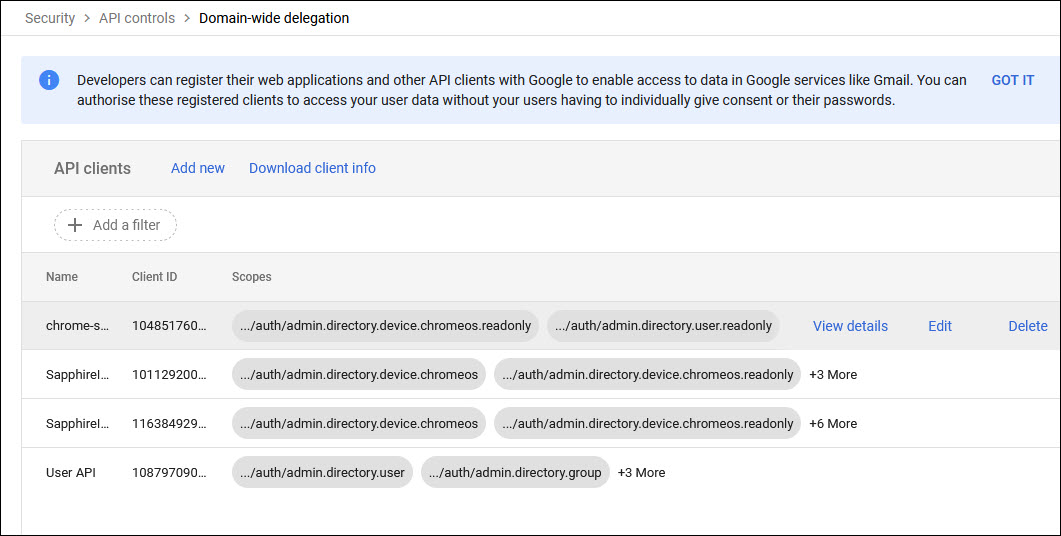
Click on 'Add new' to add a new client. The client addition screen is displayed.
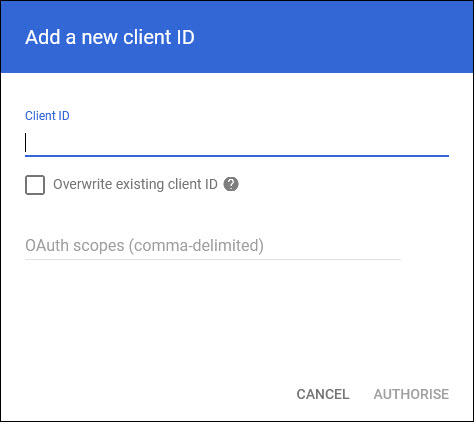
Enter the Service Account ID which had been generated earlier in the 'Client ID' field.
In the OAuth scopes, enter the following separated by commas.
https://www.googleapis.com/auth/admin.directory.group.member
https://www.googleapis.com/auth/admin.directory.group
https://www.googleapis.com/auth/admin.directory.user
https://www.googleapis.com/auth/admin.directory.user.alias
https://www.googleapis.com/auth/admin.directory.user.security
Click on 'AUTHORISE'.
The configuration is complete.